Code Generation
After you have trained and evaluated the performance of the h5 model Keras or Tensorflow model, you can convert the best model into optimized C-code that can be deployed on an Edge device such as small printed circuit board with microcontroller and accelerometer sensor that can run C99 code. For supported layers for C code conversion refer to Supported layers and functions (opens in a new tab).
To generate the code, follow the steps:
-
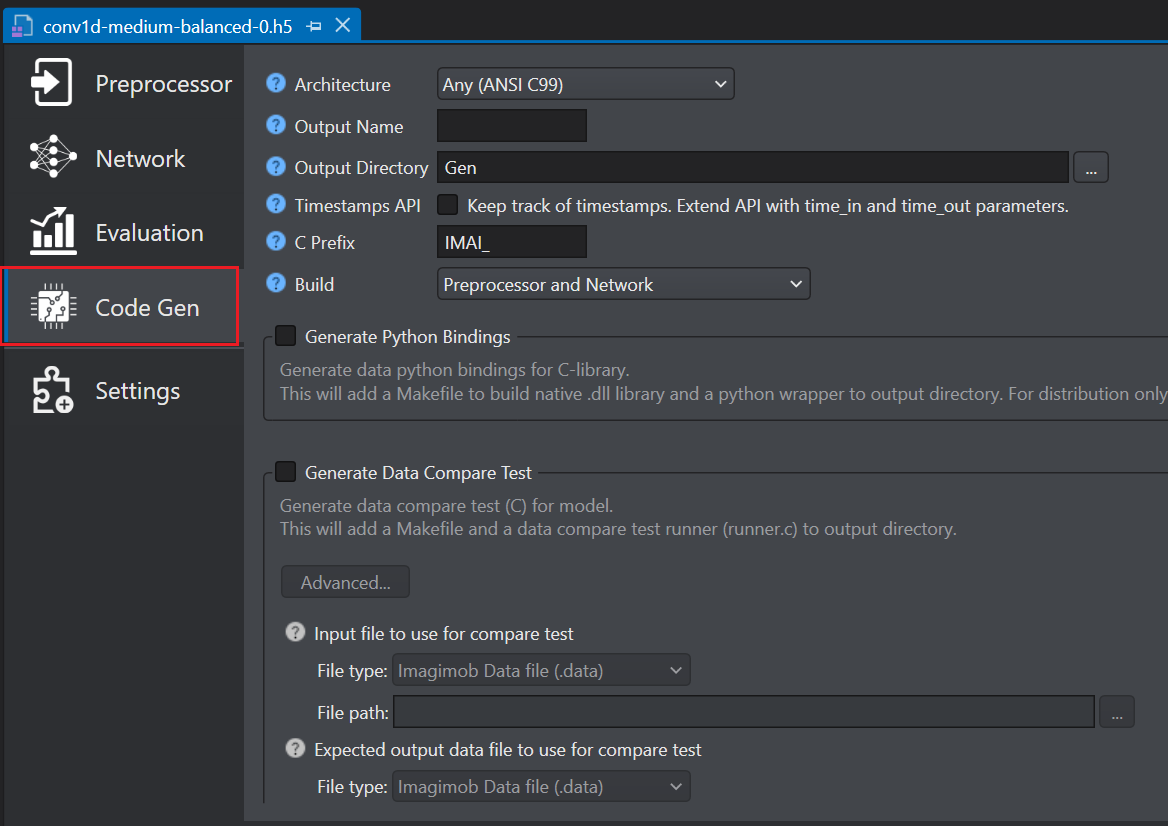
Double click the HDF5 (*.h5) model and click the Code Gen tab on the left pane.
-
Configure the following parameters-
-
In Architecture select the target architecture for optimization. Select Any(ANSI C99) to compile for any platform and Infineon Aurix to compile for Aurix board.
-
In Output name enter the name for the generated .c/.h files.
-
In Output directory browse the directory where you want to save the optimized output. By, default Gen is selected as the default folder.
-
In Timestamps API enable the checkbox to track corresponding input time for each output prediction. To know about the edge API, refer to Edge API.
-
In C Prefix enter the prefix for the function names in the optimized C API.
-
In Build select the build type as Preprocessor and Network, Preprocessor, or Network.
-
In Generate Python Bindings enable the checkbox to generate data python bindings for the C library.This will add a Makefile to build native (.dll) library and python wrapper to output directory. Distribution requires only (.dll) and (.py) files.
-
In Generate Data Compare Test enable the checkbox to generate tests together with the Edge model. This test verifies that the output from the Edge model matches the output from the HDF5 (.h5) model for the same input. You need to provide the input and output data to test the optimized output.
You can perform the compare test in two ways, by using:
-
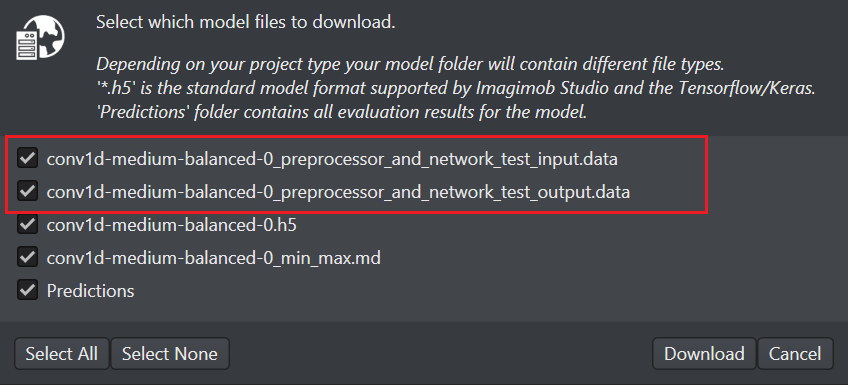
the input and output data files (.data) generated after training the model
You can download these files from Imagimob Cloud. To know more, refer to Downloading model files.
-
any dataset from the Data folder as input and the corresponding data predictions in the Predictions folder as output
-
In Input file to use for compare test
- In File type, select the file type of the input file that you want to compare.
- In File path, browse to the location to select the input file.
-
In Expected output data file to use for compare test
- In File type, select the file type of the output file that you want to compare.
- In File path, browse to the location to select the output file.
-
Make sure you select the input and output files from the same session with the correct file type otherwise the test will fail because of data mismatch.
-
Click Generate Code. The code is generated and the Code generation Report window appears.
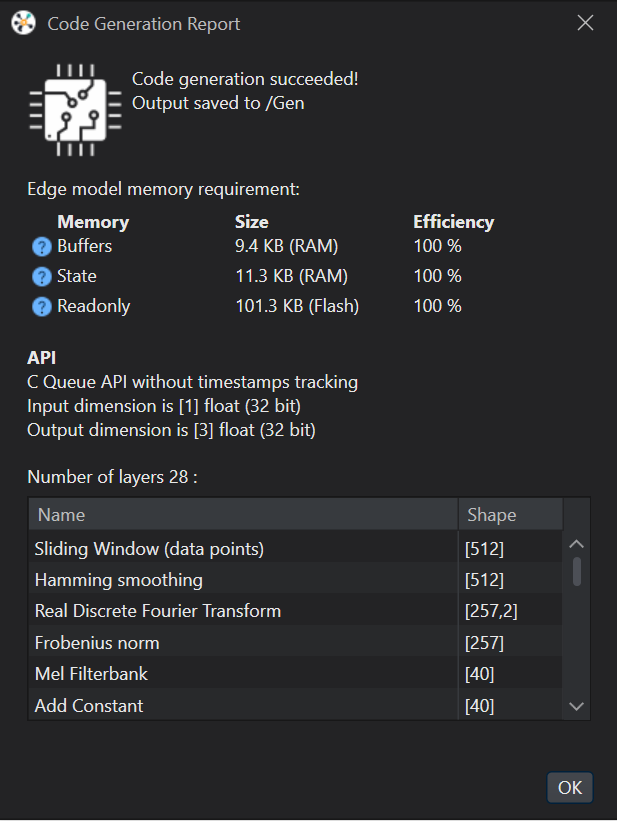
The optimized C-code along with 'Makefile' and 'runner.c' is automatically saved in the Gen folder. This is the folder that you select in the Output Directory parameter.
-
Click Ok to close the report. A pop up window appears.
-
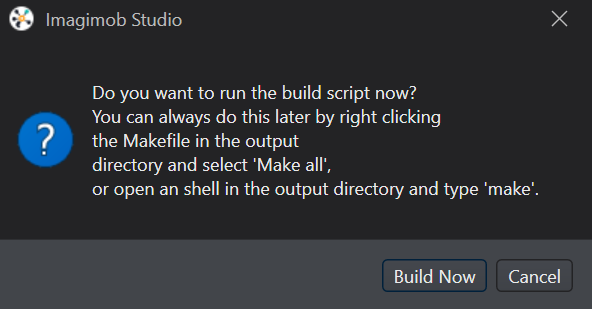
You can run the compare test right away or later, as needed.
-
To run the test later,
-
Navigate to the Gen directory created when generating the code.
-
Right-click the Makefile and select Make All. The Cygwin window appears and test run the model using the provided input and output files.
-
-
To run the test right away, click Build Now.
-
-
A console window appears.
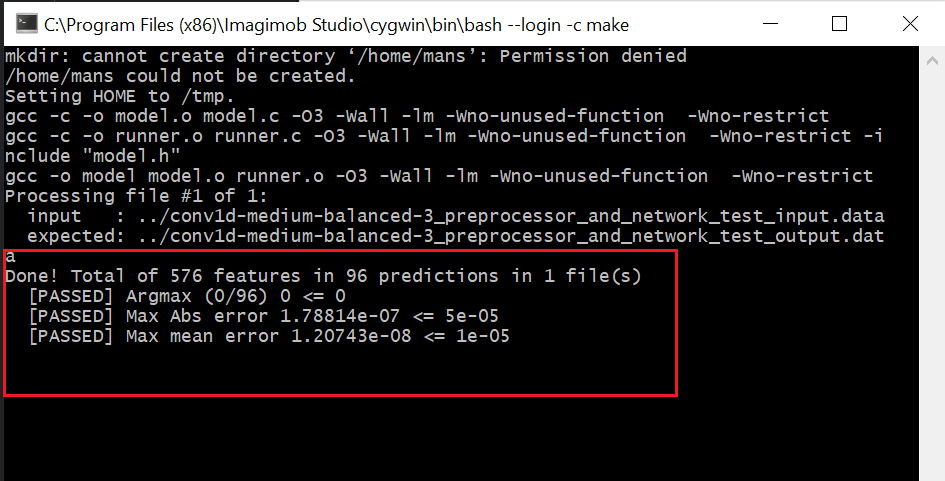
From the output above, we can now confirm that the generated code is equal to the HDF5 (.h5) model to within the sixth decimal. You can safely deploy this code and be confident that the edge model will perform as good as the .h5 model. The only difference between the two models is that the Edge model consumes a fraction of the memory and processing power during runtime and can run on any embedded platform.