Adding data to classification and regression projects
You can import your existing data to an empty project to start building the model from scratch. You can also import additional dataset to a starter project and fine tune the model as per your business scenarios.
To add the data to a project, follow the steps:
-
Navigate to Workspace and expand the project directory in which you want to add the data.
-
Copy and paste the data that you want to add into the Data folder. If the Data folder does not exist in the project directory, create one.
-
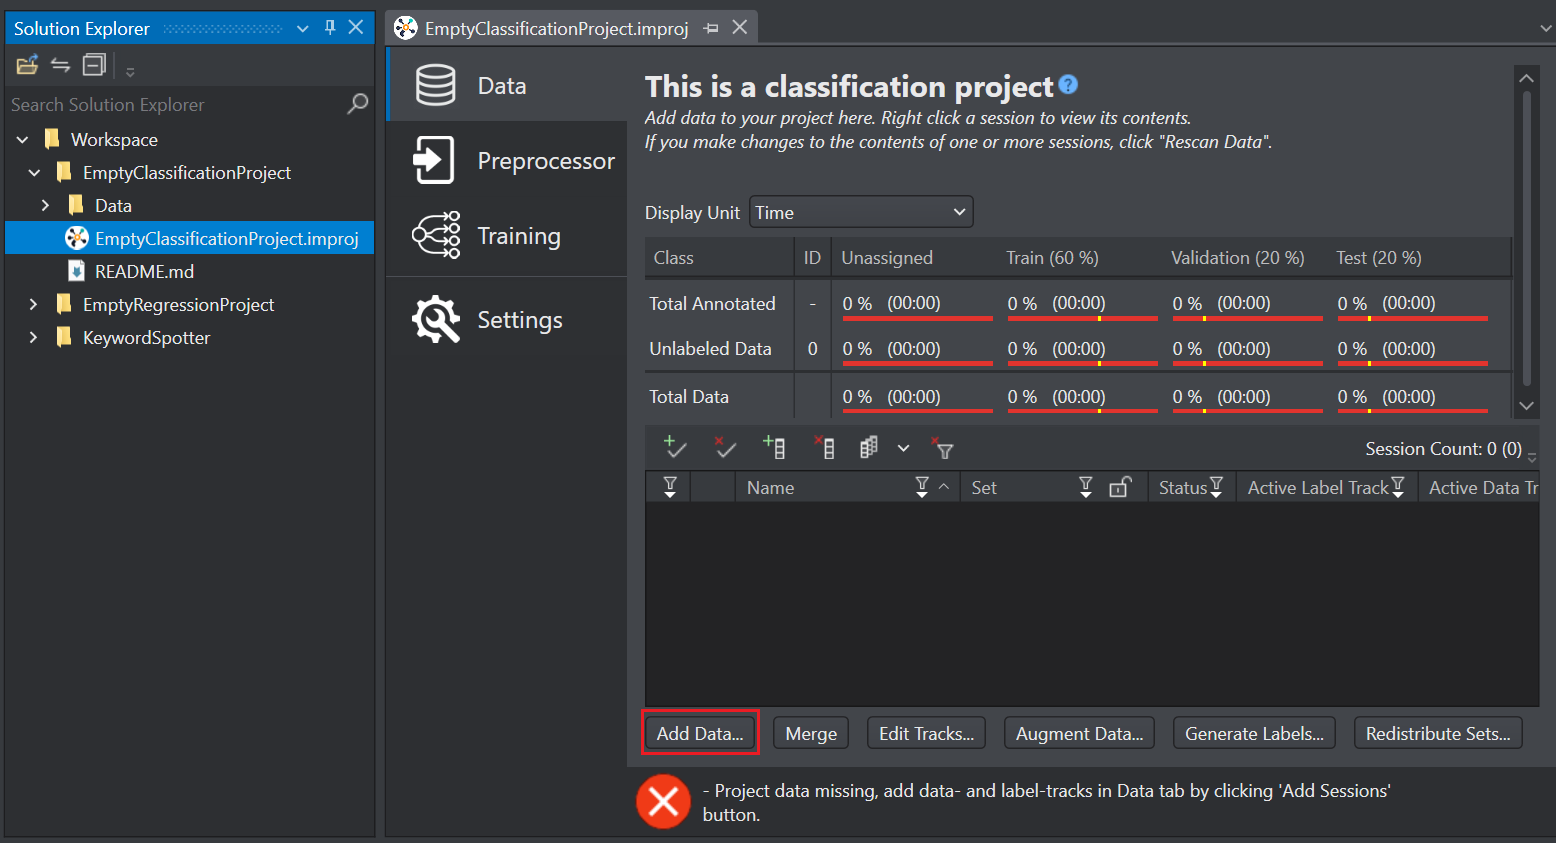
Open the the project file (*.improj) present in the project directory.
-
In Data tab, click the Add Data button at the bottom of the project file. The Add Data window appears.
-
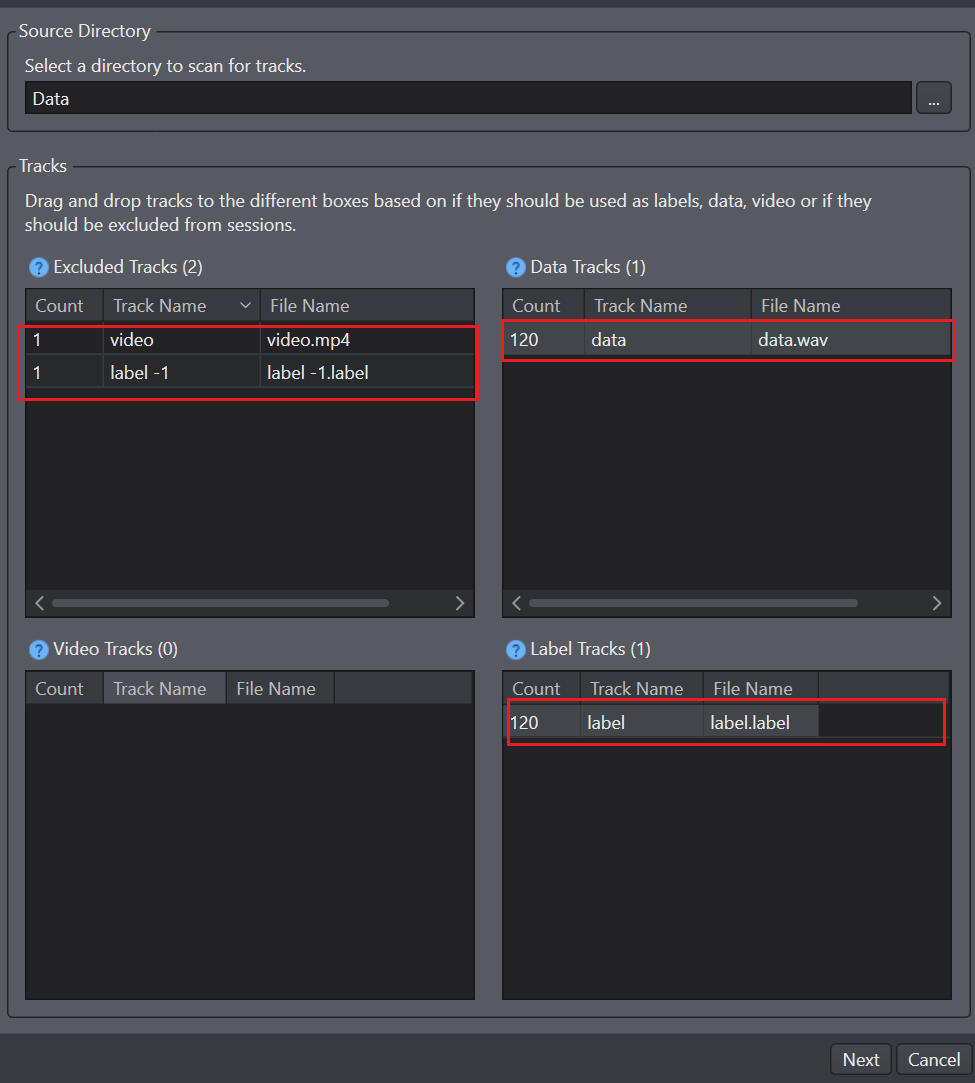
In Source Directory, click the three dot and select the folder you want to upload. The files are automatically sorted into the appropriate boxes based on their type:
- Files with extensions .data, .csv and .wav are placed in the Data Tracks box
- Files with extensions .mp4 are placed in the Video Tracks box
- Files with extensions .label and .data are placed in the Label Tracks box
- Drag and drop the file that you do not want to import in the Excluded Tracks box
By default, the .data and .label files are placed in the data track and label track boxes respectively.
- For classification problem, keep the .data files in the data track box and the .label files in the label track box.
- For regression problem, keep the .data files you want to use as data in the data track box and drag and drop the .data files you want to use as a label in the label track box.
-
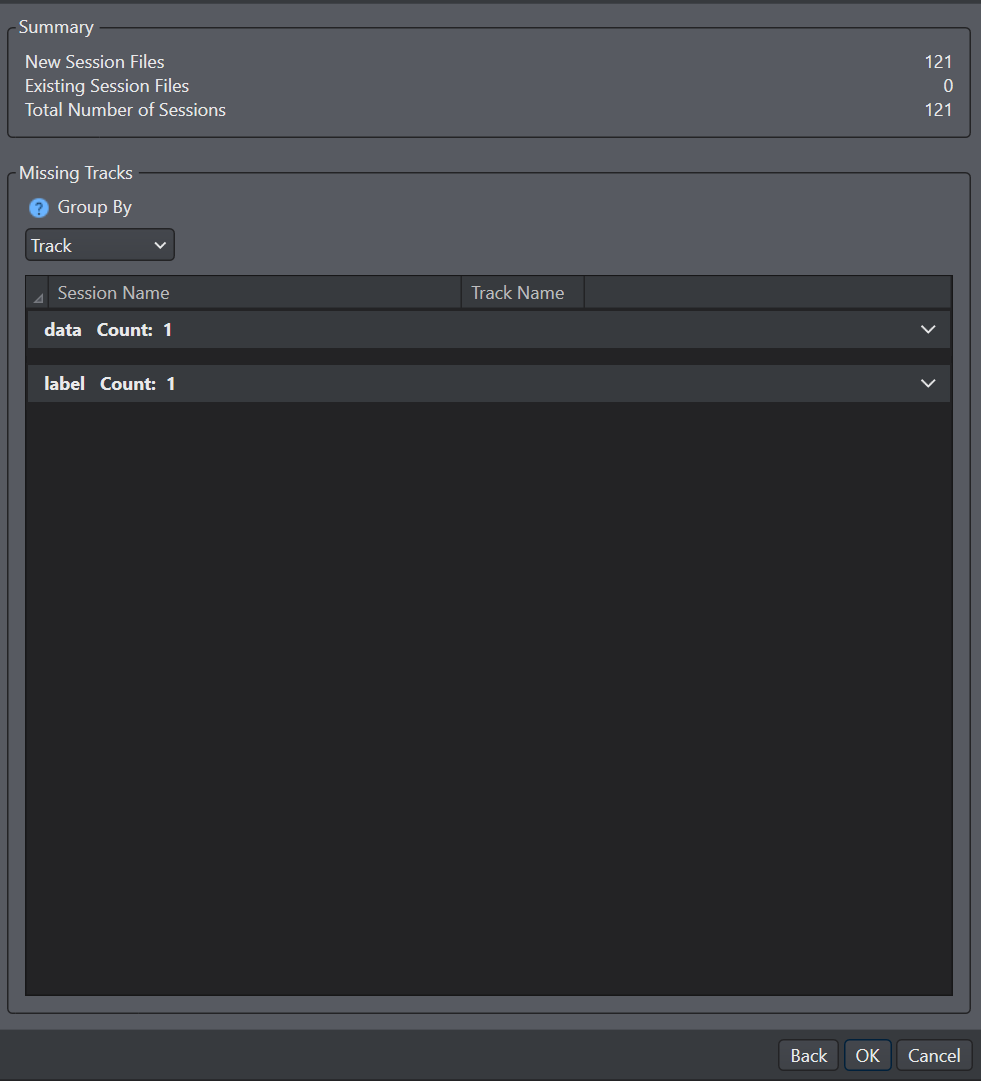
Drag and drop the tracks into the appropriate boxes based on whether they should be used as data or label and click Next. The summary window displays the details related to the new or existing and total sessions that will be generated after the import. It also displays the missing tracks, if any.
-
Click Ok to import the data into the project.
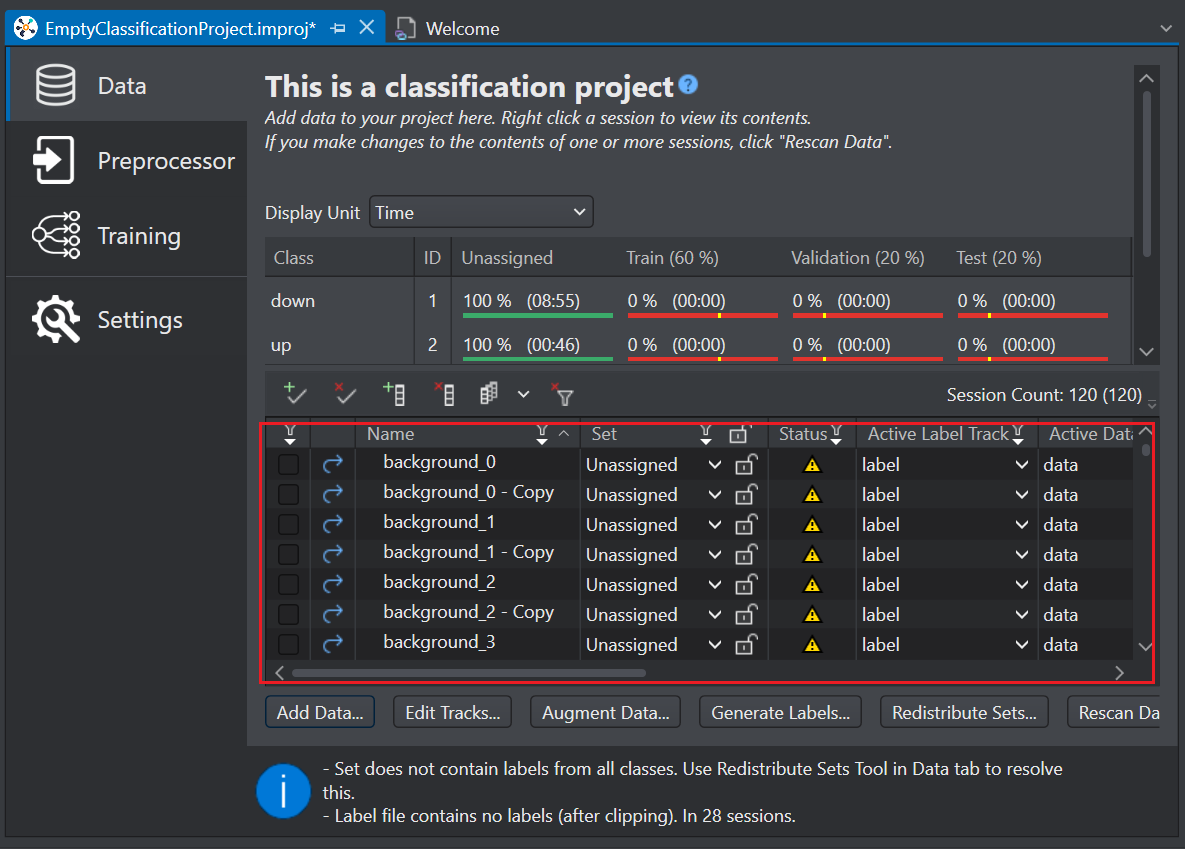
After you have imported the data into the Studio, you should distribute the data into different datasets. To know how to distribute the data, refer to Data Distribution.