Preprocessing
The second main step in building a machine learning model is defining the preprocessor. The collected data needs to be processed before the data is used to train a model. This gives the model better accuracy without changing the architecture of the model. Studio offers a wide variety of preprocessing layers that can easily be added and configured into your pipeline.
Preprocessing layers for Siren Detection
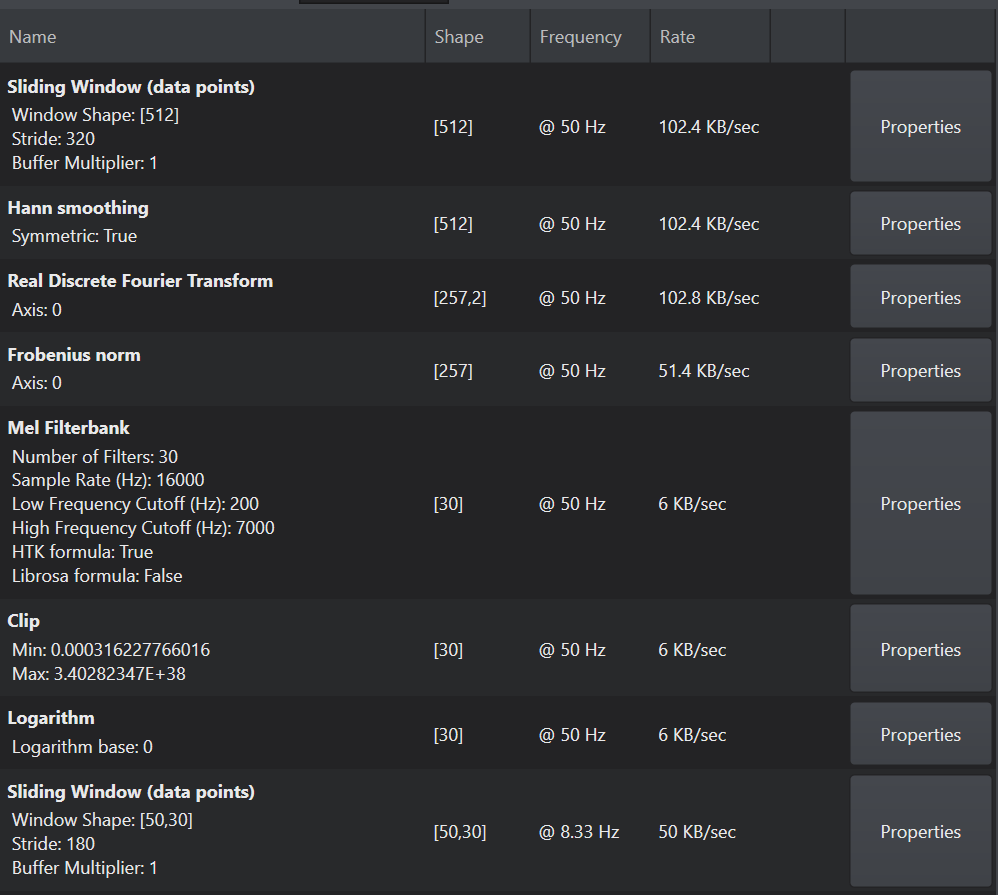
By default, the siren detection starter project has pre-configured preprocessing layers. The siren detection preprocessor is fed one PDM sample at a time at a frequency of 16000 Hz. The preprocessor used in generates a Mel spectrogram of the input audio data. Such a spectrogram is obtained by calculating the Real Discrete Fourier Transform (FFT) of a window of raw audio data and by applying a Mel filter bank to it. This is a commonly used technique in audio preprocessing, and it helps the model in focusing on the relevant features of the audio signal thereby reducing the amount of data that the model needs to process. A sliding window is used to input the spectrogram data to the actual neural network. The output is a [50,30] buffer that can be produced at 8 Hz. The complete preprocessing configuration can be seen in the image below.
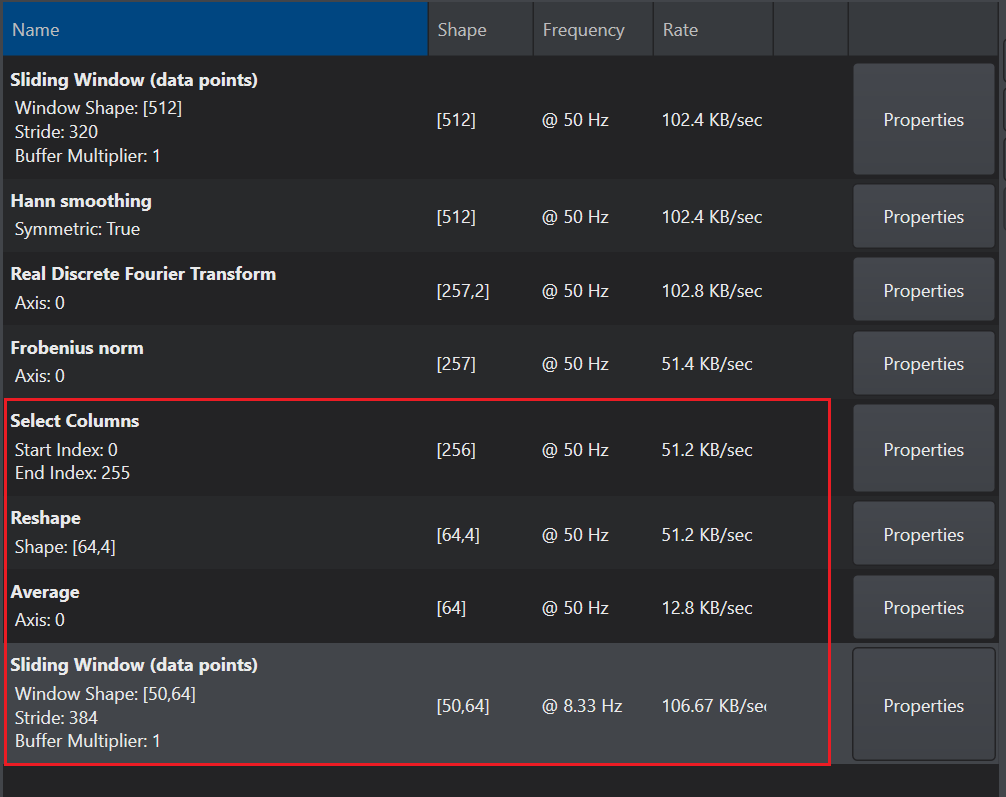
The preprocessor defined above consists of Mel spectrogram, which does not focus on all the frequencies and emphasizes more on lower frequencies, but we want a linear distribution of frequencies. So, let’s define a new preprocessor with a spectrogram that will equally emphasize on all the frequencies. We will achieve this by averaging every four frequencies to reduce the dimensionality of the network, thus helping you to focus on the main features.
To create a new preprocessor pipeline:
-
Remove the Mel Filterbank, Clip and Logarithm from the list of Preprocessing layers.
-
Download and unzip the Select columns custom units into the Siren Detection> Units folder.
-
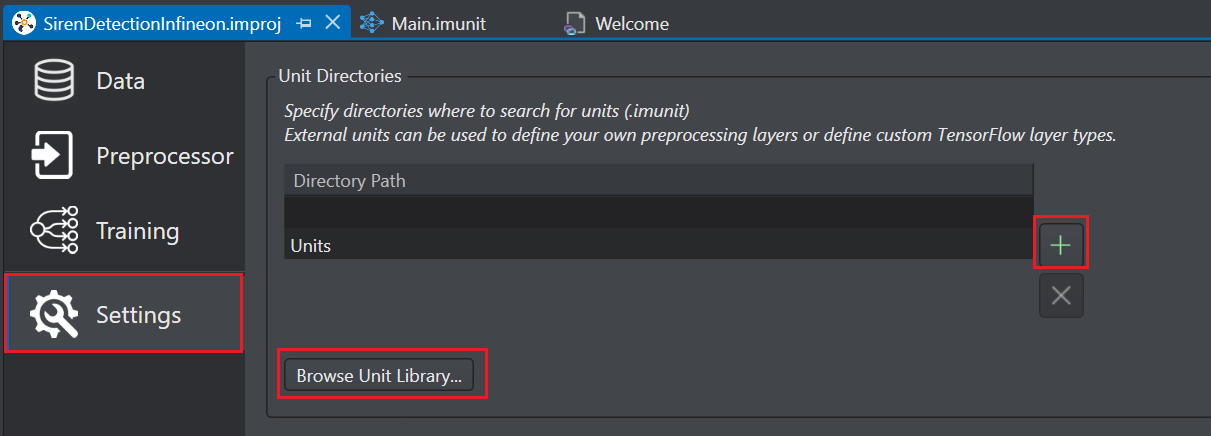
Navigate to the Settings tab, and click the Add icon and select the Units folder.
-
Click on Browse Unit Library button to open the Built-in Custom Units Library. The Unit Browser window appears.
-
Click the Reload Library button to refresh the library and close the window.
-
Navigate to the Preprocessor tab, click the Add icon to add the select column custom unit. A list of supported preprocessing layers shows up that can be configured and added to the pipeline.
-
Select IMUnits> Select Columns and click ok to add as the preprocessing layer.
Now, we will change the shape of Frobenius norm preprocessing layer from a odd number (257) to an even number (256) so that the window becomes visible.
-
Click the Properties button of the Select columns preprocessing layer. The Select Columns Properties window appears.
-
In Start Index and End Index, enter the value 0 and 255 respectively. This will set the shape of the select columns as 256. Now, we will average every four columns, for that, we will use the Reshape layer to reshape the signal.
-
Click the Add icon to add the Math > Reshape layer. In Shape, enter the value 64,4.
-
Click the plus icon to add the Math > Average layer across the fourth dimension.
-
Click the Properties button of the Sliding Window, and set the Window Shape and Stride to 64 and 384 respectively.
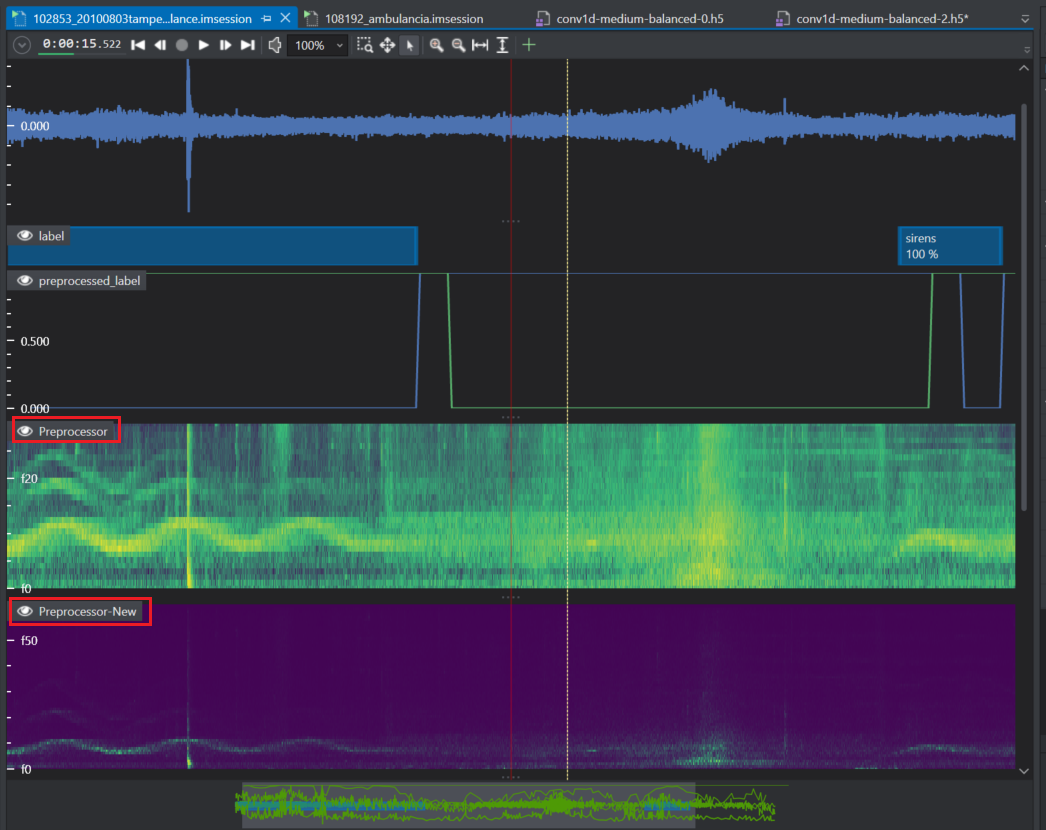
After you have defined the preprocessor, you can generate and import the new preprocessing tracks into the project. This will be useful in evaluating the new preprocessor with the original preprocessor. Refer Generating the preprocessing tracks and Importing the preprocessing tracks to know the detailed steps.
The image below shows the original and the new preprocessor tracks.
The next step is to train the model, refer Model Training to know more.