Labeling Images
This section provides information on how to label the image data after you import the data into Studio.
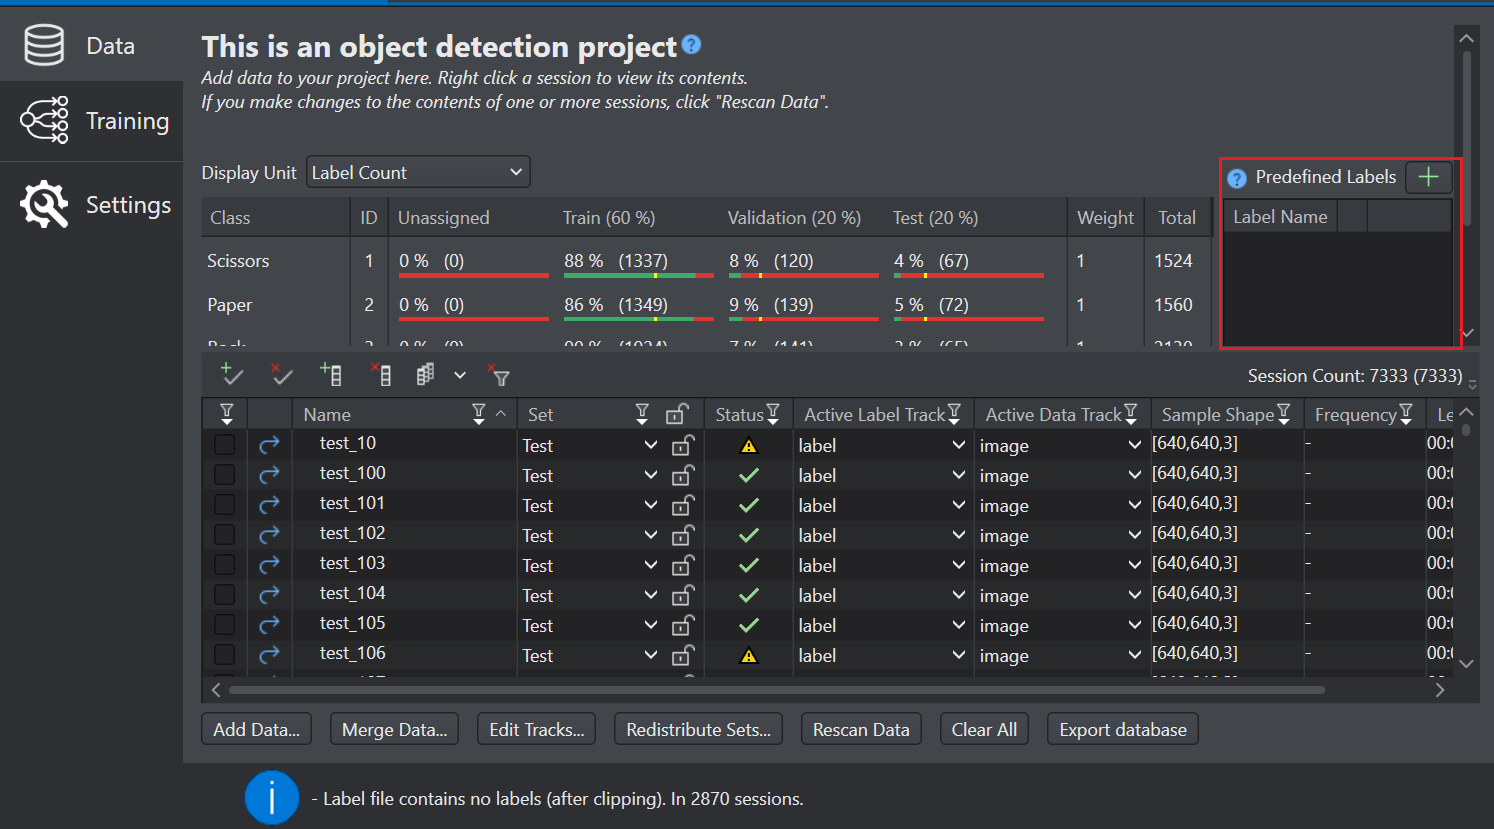
Labeling using the Predefined labels
- Identify the classes you want the model to identify in the Images
- Define the classes in the Predefined Labels Pane in the Data Tab
- Open the session files and use the predefined classes to draw bounding boxes on the images
How to Predefine Labels for the project?
-
Navigate to the project directory and open the project file. By default, the Data tab is selected.

-
In the Predefined Labels Pane, click the
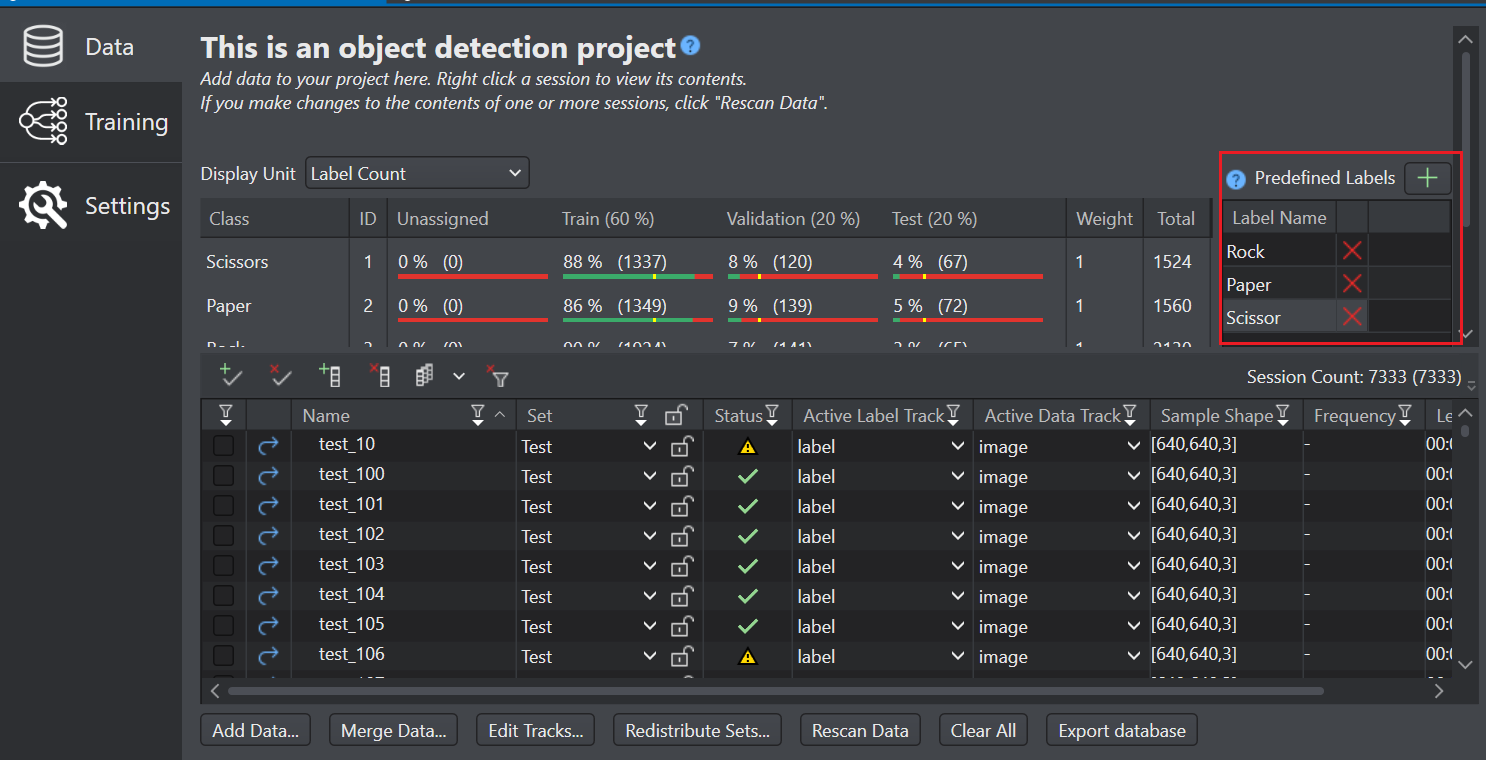
Add New label icon to add a label. A label is created under the Label Name column.

-
Double-click the label to modify the label name and click outside the label box to save the change.
Similarly, define all the classes for the project in the Predefined Labels Pane. If you want to remove a class from the Predefined Labels Pane, click theRemove icon next to the label you want to remove.
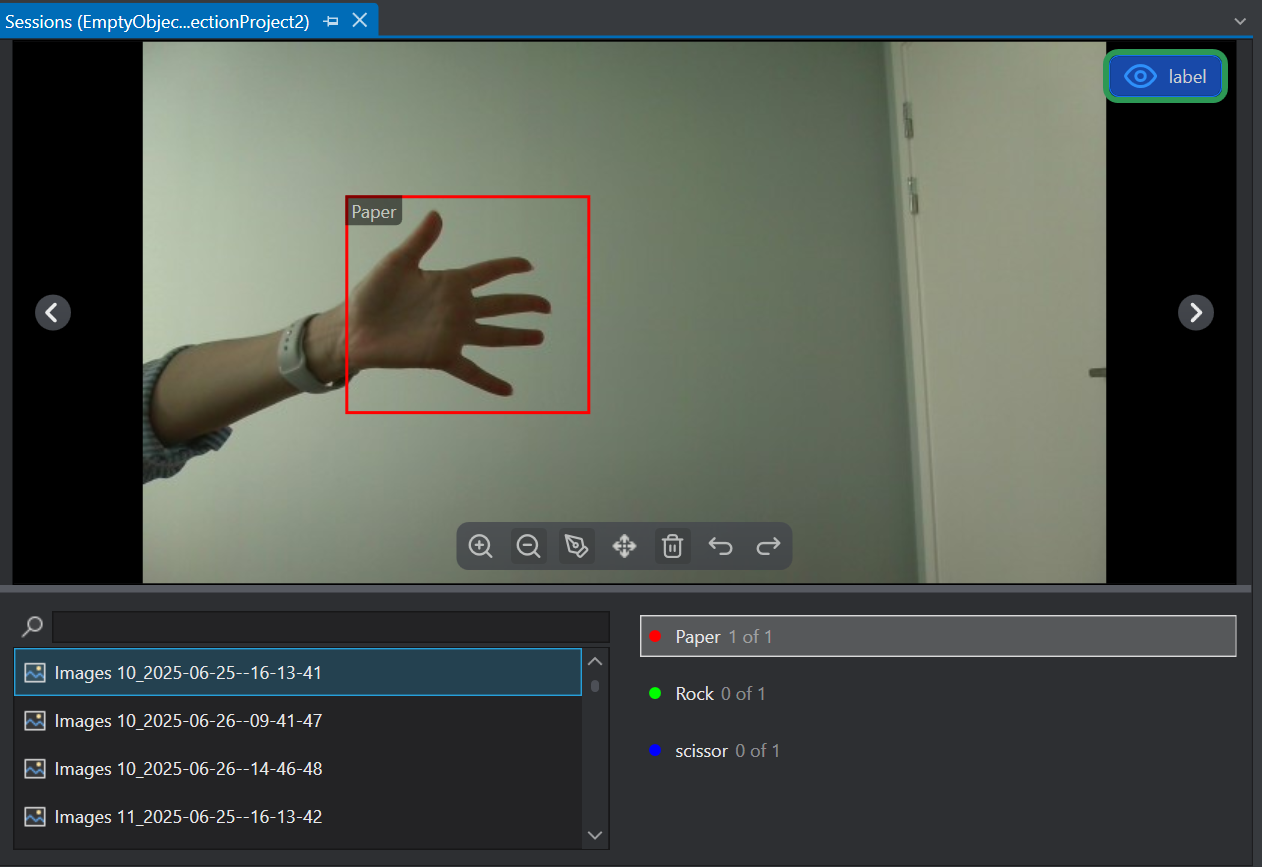
When you open a session file, you can view all the Predefined Labels listed below in the panel.
To use this functionality, ensure you open the session files from the Session Table in the Data Pane. This feature is not available if you open the session files from the Workspace.
How to label image data using the Predefined Labels?
-
Double-click the session file from the session table in which you want to add the labels. The session file window opens in a new tab. The predefined labels are displayed in in the panel.

-
Select the image from the Image list that you want to label. The selected image appears in the Labeling window.
-
Select the desired class from the Predefined Classes list and select the
Pen Tool to draw a bounding box around the relevant object in the image. The name of the selected class will appear in the top-left corner of the bounding box. Similarly, draw the required bounding boxes in the image. To label multiple classes, repeat the process with different class selections. You can use the available tools to draw the bounding boxes correctly. To know more, see Tools for labeling the Images.
-
After you have labeled the image, press Ctrl+ S to save the image. Similarly, you can select the other image from the list and drawing the bounding boxes as explained above.