Deploy Vision Model on PSOC™ Edge boards
This section explains how to deploy code generated for vision models from Studio to PSOC™ Edge using ModusToolbox™. To demonstrate the process, we use the vision code example provided in the ModusToolbox™. You need to create the required machine learning project for your board in the ModusToolbox™, then replace the model.c and model.h files in the ModusToolbox™ project with the model.c and model.h files that you generated for your model in Studio, following by building and flashing the project.
Pre-requisites:
Before you begin, set up the following hardware and software requirements:
Hardware:
- PSOC™ Edge board for deploying the generated code
- Supported camera
- Supported display (optional)
For detailed information on boards, compatible displays and cameras, refer to this section .
Software:
- ModusToolbox™ Tools Package 3.6.0 or later
- ModusToolbox™ Machine Learning Pack 3.0.0 or later
ModusToolbox™ and ModusToolbox™ Machine Learning Pack can be installed through ModusToolbox™ Setup. Download the setup application from here .
Code Example
How to deploy the model onto the board?
We will show how to deploy the model on PSOC™ Edge E84 AI kit, similarly you can deploy the model on PSOC™ Edge E84 Evaluation kit.
Follow the steps to deploy the model onto the board:
-
Open ModusToolbox™ > Eclipse IDE for ModusToolbox™ from the Windows Start menu. The Eclipse IDE for ModusToolbox window appears.
-
Browse and select the workspace directory for your project and click Launch to open the ModusToolbox™ workspace.
-
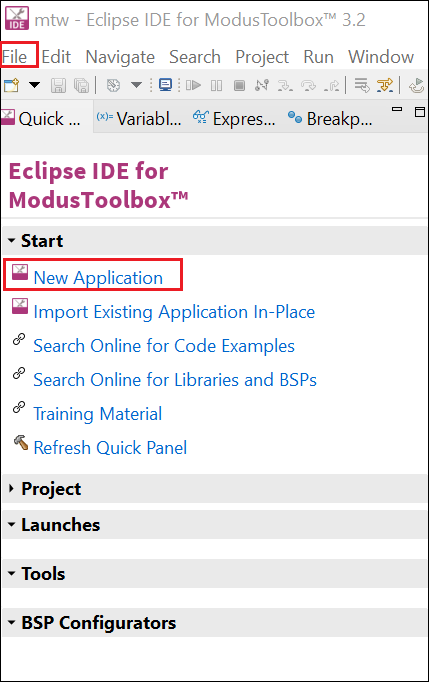
Select New Application from the Quick Panel or navigate to File> New> Modus Toolbox™ Application to open the Project Creator Tool.
-
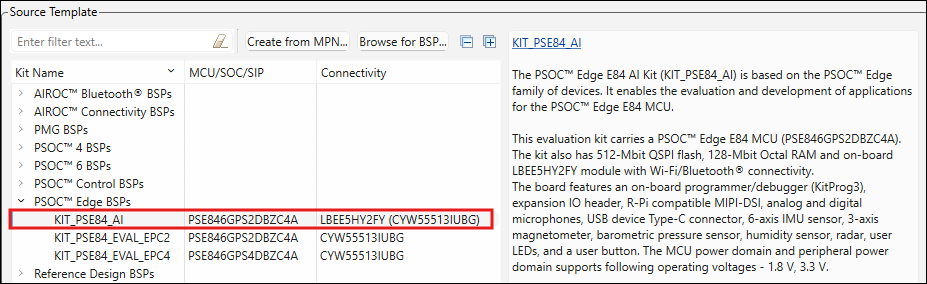
Expand the Kit Name PSOC™ Edge BSPs from the list and select the KIT_PSE84_AI as BSP for your board and click Next. The Select Application window appears.
-
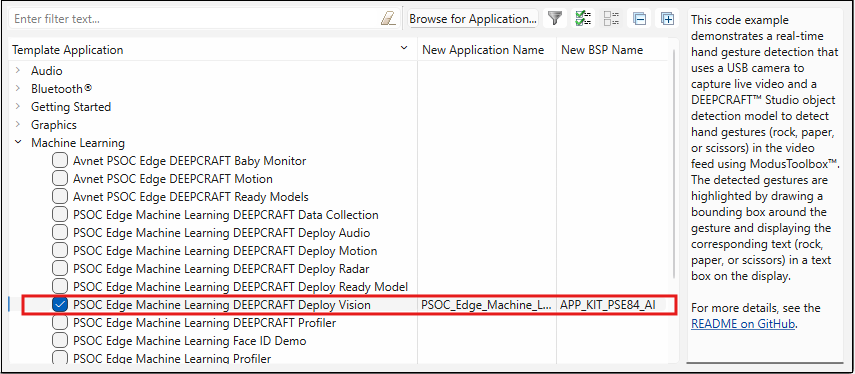
In Template Application, expand Machine Learning and select PSOC Edge Machine Learning DEEPCRAFT Deploy Vision code example and click Create.
-
After the project is created successful, navigate to proj_cm55> model directory and substitute the provided example model.c and model.h files with the actual model.c and model.h files that you generated for your model in Studio.
-
Open the source> inference_task.h file, verify and update the following, if needed:
-
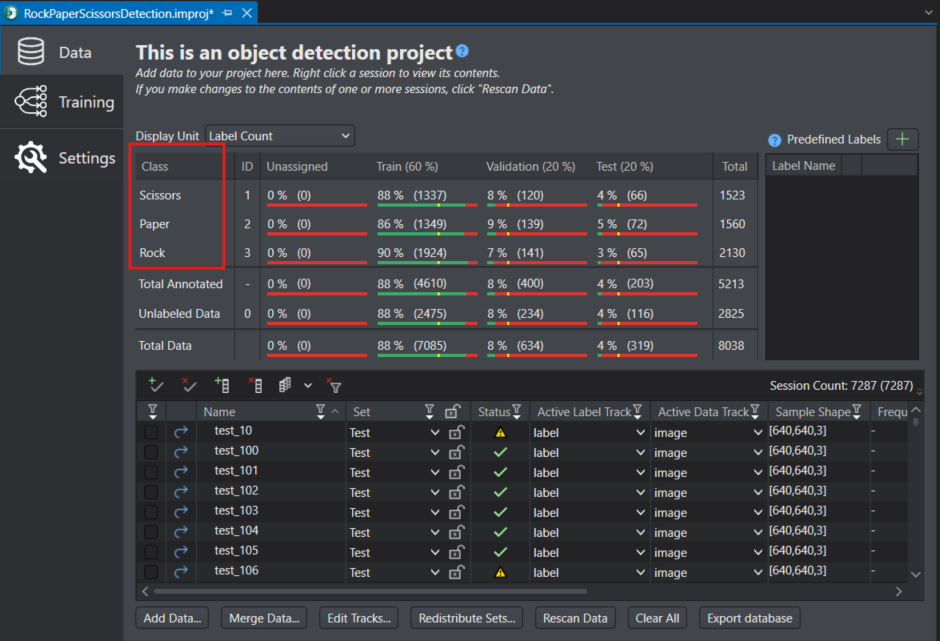
the number of classes defined in the NUM_CLASSES is exactly same as the classes listed in your DEEPCRAFT™ Studio project. If the number or order of the classes differ, update the classes in the NUM_CLASSES. To view the order of the classes for your project, open the project file(.improj) and select the Data tab.
-
the number of detections defined in MAX_PREDICTIONS is same as the Max Detections parameter configured in the Bounding Box Filter node during code generation in Graph UX. If you changed the Max Detections parameter, update the MAX_PREDICTIONS accordingly. By default, the code example supports a maximum of five simultaneous detections.
-
-
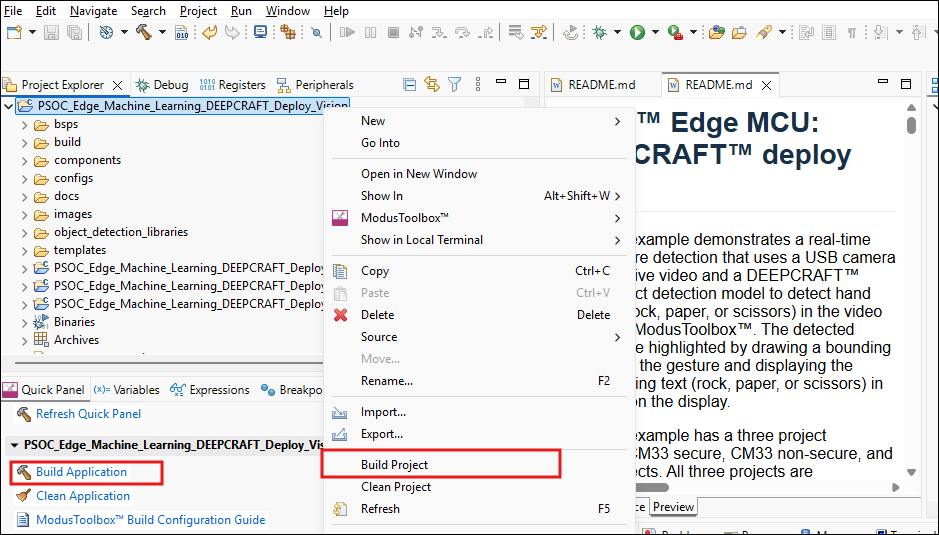
Right-click the project and select Build Project or click Build Application in the Quick panel to build the project.
-
Connect the KitProg3 USB connector (J1) port on the PSOC™ Edge E84 AI Kit to the PC using the USB cable. The green LED (LED1) starts blinking.
When flashing the code to the PSOC™ Edge E84 Evaluation Kit, connect the KitProg3 USB connector (J8) port on the board to the PC using the Type-C to Type-C USB cable. Ensure that the power LED (D1, yellow) on the base board and the power LED (D3, yellow) on the SOM are ON.
- In Quick Panel> Launches, click the program. The code is deployed on the board.
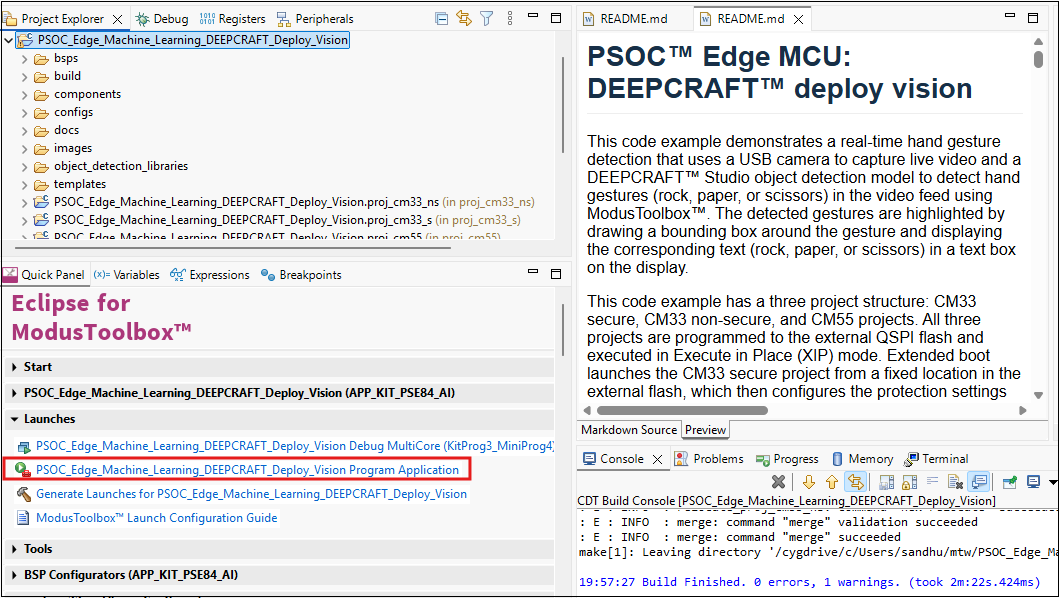
For detailed instructions on how to run and verify the application live on your PSOC™ Edge kit, read the README.md in the ModusToolbox™ application.