Labeling Images
This section provides information on how to label the image data after you import the data into Studio.
Labeling using Predefined labels
- Identify the classes you want the model to predict in the Images
- Define the classes in the Predefined Labels Pane in the Data Tab
- Open the session files and use the predefined classes to draw bounding boxes on the images
Predefine Labels for the project
-
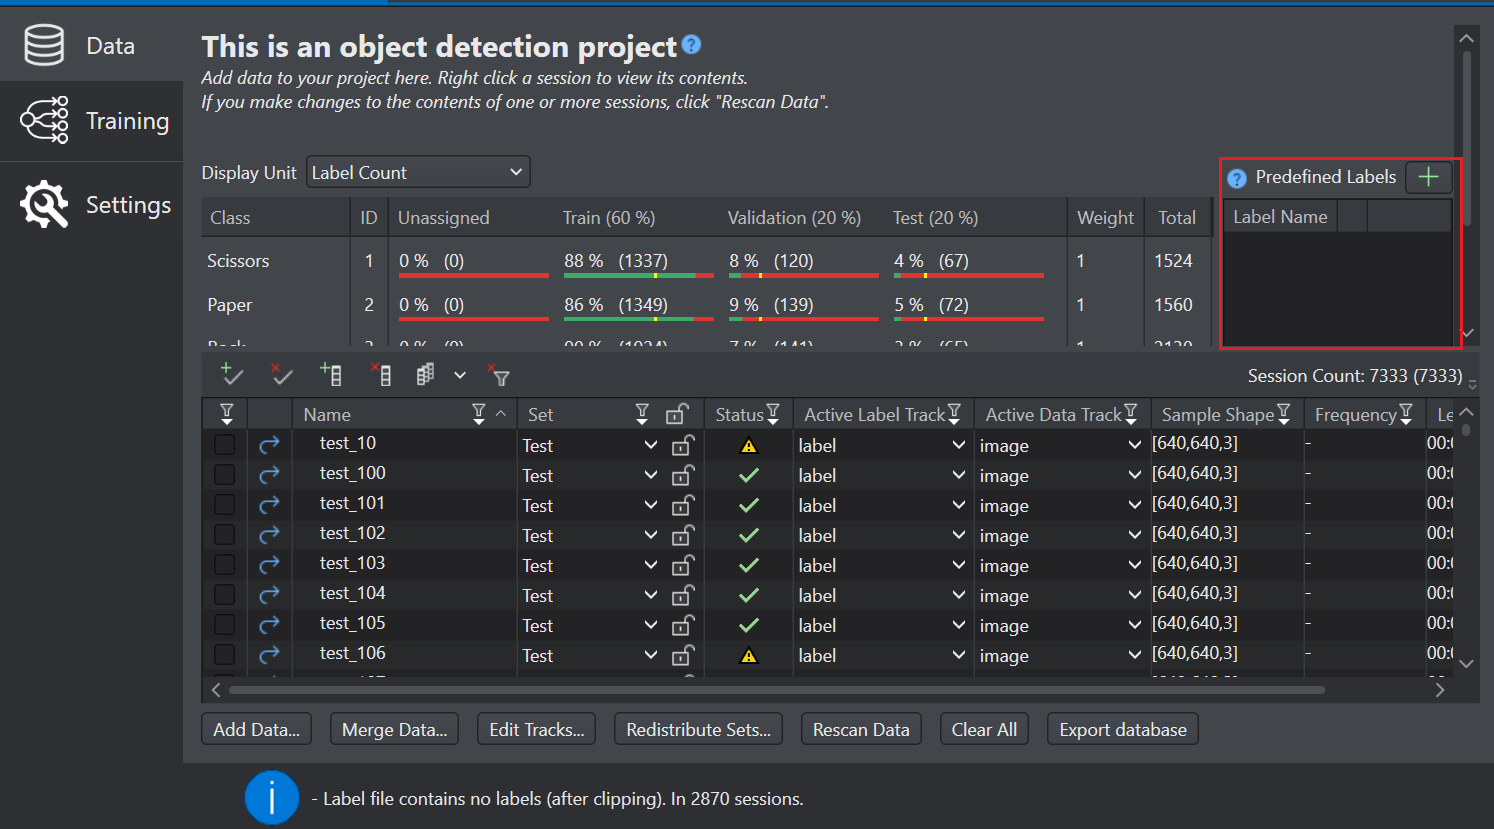
Navigate to the project directory and open the project file. By default, the Data tab is selected.
-
In the Predefined Labels Pane, click the
 Add New label icon to add a label. A label is created under the Label Name column.
-
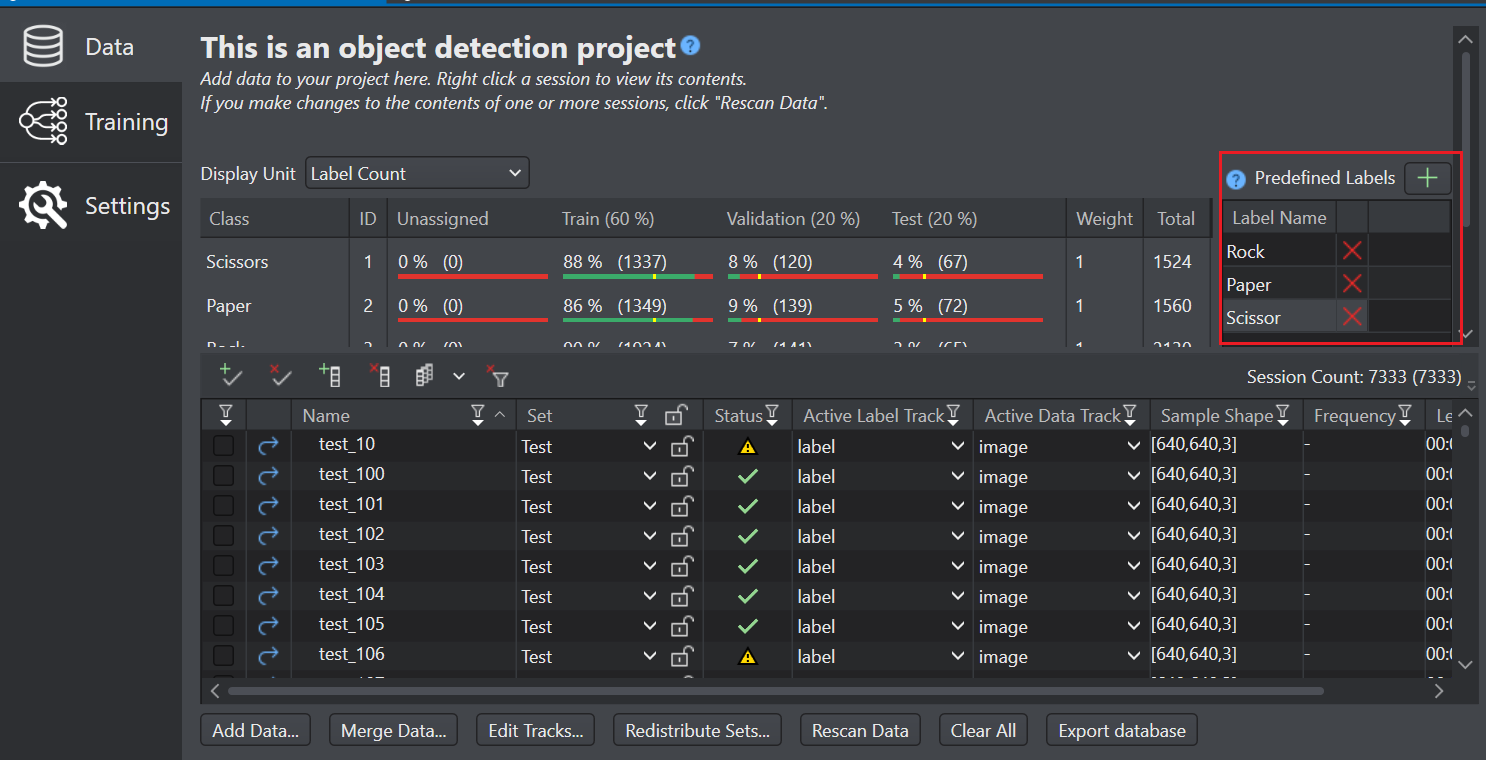
Double-click the label to modify the label name and click outside the label box to save the change.
Similarly, define all the classes for the project in the Predefined Labels Pane. If you want to remove a class from the Predefined Labels Pane, click the Remove icon next to the label you want to remove.
When you open a session file, you can view all the Predefined Labels listed below in the Label list.
How to label image data in Studio?
To use this functionality, ensure you open the session files from the Session Table in the Data Pane. This feature is not available if you open the session files from the Workspace.
-
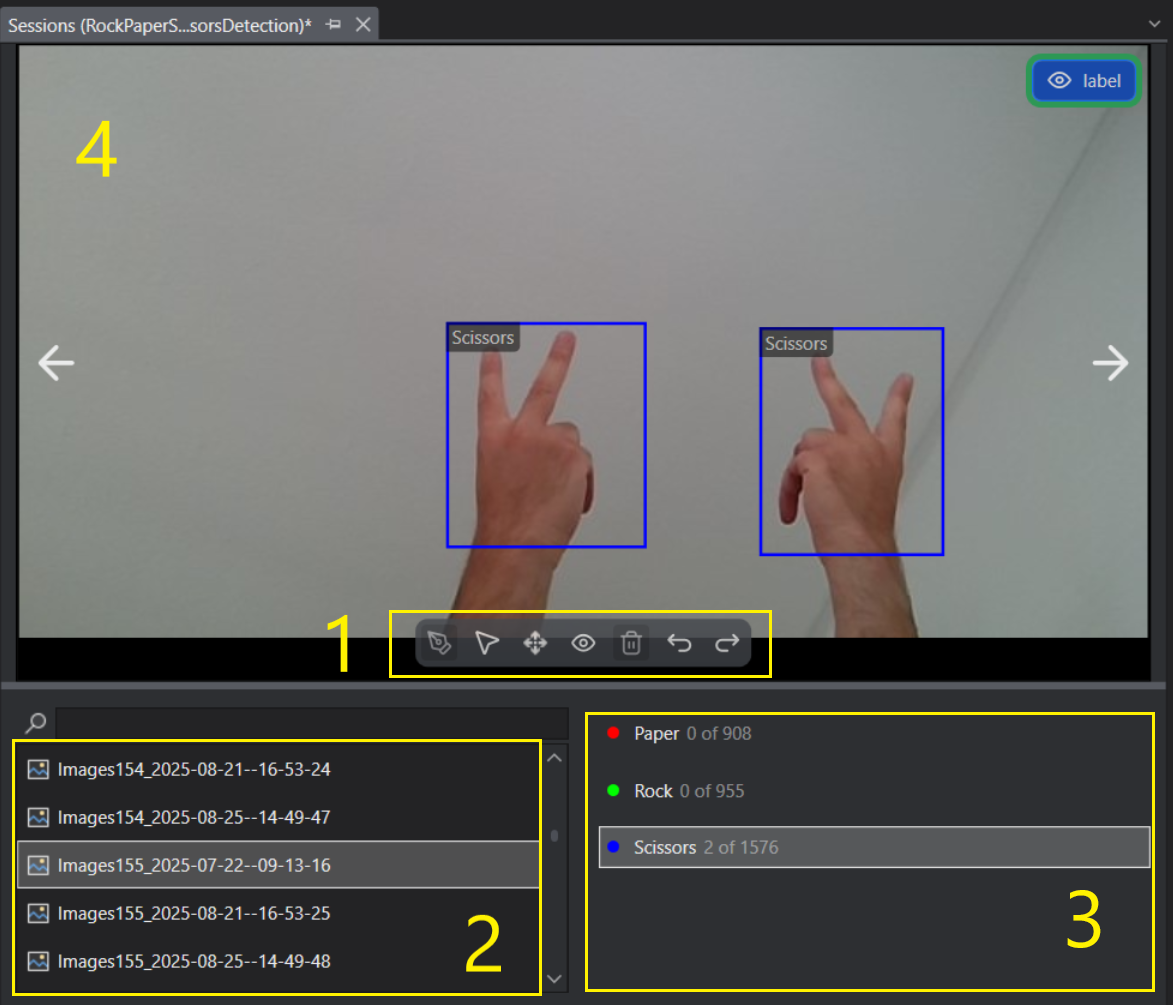
Double-click the session file from the session table in which you want to add the labels. The session file opens in a new tab. The table below show different lists and panels of the session file window:
Number Name Description 1 Labeling Toolbar The toolbar contains the tools for creating and managing the bounding boxes. See Labeling Toolbar for more info. 2 Image list The Image list shows all the sessions in the project file. Click an image in the Image list to view or press the Up and Down arrow keys or use the Left and Right keys on the image to move to the previous or next image. 3 Label list The Label list shows all the predefined or existing labels for the project. 4 Labeling area The labeling area is where you can create and manage bounding boxes using the toolbar.
Labeling Toolbar
Icons Tool Name Description 

Annotation Pen To drawing bounding boxes 

Select tool To select single or multiple bounding boxes for copying and deleting action 

Pan To move around the image after you zoom-in using the mouse or keyboard 

Hide annotations To hide or unhide the bounding boxes 

Delete To remove selected bounding boxes 

Undo To revert the last action 

Redo To reapply the last undone action
How to drawing bounding boxes?
- Select an image from the Image list. The selected image appears in the Labeling area.
- Select the required class from the Label list and select the Pen Tool.
- Click and drag on the image to draw a bounding box around the target object. Adjust the box using the resize handles, if needed. The selected class name appears automatically in the top-left corner of the box. To label additional classes, repeat the steps by selecting the required class from the Label list.
- Press Ctrl+S to save the changes.
How to create and manage labels for multiple images?
The following subtopics describe useful features and shortcuts for creating and managing labels efficiently. Use the copy-and-paste functionality and related shortcuts when labeling the same image across multiple variants (for example, black-and-white, grayscale, color, flipped, or other augmentations) and when applying labels to single images, multiple images, or batches. These tools also help move or delete labels with minimal clicks.
Selecting bounding boxes
Use the following methods to select bounding boxes for copy, move, or delete:
- Select one box: Click the bounding box you want to select. The selected box appears with a dotted outline.
- Select multiple boxes: Click Select on the toolbar, then click and drag to draw a selection rectangle. All boxes that overlap the rectangle are selected and shown with dotted outlines.
- Select all boxes: Press Ctrl+A to select all bounding boxes.
Other selection shortcuts
- Tab: Select the next bounding box
- Shift+Tab: Select the previous bounding box
- Esc: Clear the current selection
Copying-pasting bounding boxes on current image
-
Select one or more bounding boxes to copy as described in Selecting bounding boxes.
-
Press Ctrl+C to copy and Ctrl+V to paste the selections. When pasting multiple selections, the new bounding boxes appear on top of the existing boxes. Click and hold inside the selected area or inside any selected box, then drag to reposition the selection. Select the Pen tool and click the boxes to adjust, as needed.
Copying-pasting bounding boxes on multiple images
-
Select single, multiple or all bounding boxes to copy as described in Selecting bounding boxes. to find the target images
-
Press Ctrl + C to copy the selected bounding boxes. In the Image list, use the search bar to find the target images, then select the images to paste into: hold Ctrl and click to select specific images, click the first image and then hold Shift and click the last image to select a range, or press Ctrl + A to select all images. Press Ctrl+V to paste the boxes. When the confirmation dialog appears, click Yes to apply the boxes to all selected images. Use the Next and Previous controls to review the images and adjust the boxes if needed. Select the Pen tool and refine the pasted boxes as required.
Zooming and Panning
Use the mouse wheel or trackpad to zoom in (scroll up) and zoom out (scroll down), or use the keyboard shortcuts + to zoom in and - to zoom out. Press 0 to reset the zoom to 100%. Zoom centers on the mouse cursor for precise control.
To move around the image, select the Pan tool from the toolbar or press Space, click and drag on the image. Pan works at any zoom level, including 100%.
Show and hide bounding boxes
Click the Eye Icon on the toolbar to hide all bounding boxes in the image. To show the boxes again, click the Eye icon once more or press R. If the image contains bounding boxes from multiple sources (for example, Labels and Predictions), use the Eye Icon next to the corresponding tag in the top-right corner to hide or show that set of boxes.
If an image contains bounding boxes from multiple sources (for example, Labels and Predictions) and bounding boxes from one source are hidden, the hidden bounding boxes can still be selected with the Select tool for copy or other actions. Any hidden bounding box inside the selection area is included in the selection. Hiding a source only disables the visual display of that source’s bounding boxes; the bounding boxes remain in the image and are not deleted or removed.
Deleting bounding boxes from an image
Select the bounding boxes to delete based on how many boxes you want to remove: click a bounding box to select a single box, use the Select tool to drag a selection area for multiple boxes, or press Ctrl + A to select all bounding boxes in the image. Click the Delete icon to remove the selected bounding boxes.
You can delete bounding boxes from only one image at a time; you cannot delete bounding boxes across multiple images in a single action.
You can remove images from the Image list when needed. To delete a single image, click the delete icon next to the image. To delete multiple images, hold Ctrl and click to select the images, then press Delkey. In the confirmation dialog, click Yes to delete the selected images.
Undo-Redo
Click the Undo Icon or Redo Icon from the toolbar to undo and redo actions for adding, deleting, moving, and resizing bounding boxes. You can also press Ctrl+Z for Undo or Ctrl+Y for Redo. The undo history stores up to 50 actions to optimize memory usage.
Keyboard Shortcuts
The table below lists the keyboard shortcuts for different actions:
| Shortcut | Action | Category |
|---|---|---|
Ctrl+Z | Undo | Edit |
Ctrl+Y | Redo | Edit |
Ctrl+Shift+Z | Redo (alternative) | Edit |
Ctrl+S | Save session | Edit |
Ctrl+C | Copy selected annotations | Edit |
Ctrl+V | Paste annotations (to selected images) | Edit |
Ctrl+D | Duplicate annotation | Edit |
Ctrl+A | Select all annotations on current image | Edit |
Delete | Delete selected annotations | Edit |
Esc | Cancel selection / Deselect all | Edit |
Tab | Select next annotation | Navigation |
Shift+Tab | Select previous annotation | Navigation |
Left/Up Arrow | Previous image | Navigation |
Right/Down Arrow | Next image | Navigation |
+ / = | Zoom in | View |
- | Zoom out | View |
0 | Reset zoom to 100% | View |
Mouse Wheel | Zoom in/out | View |
Space (hold) | Pan mode | View |
Ctrl (hold) | Pan mode (Draw tool only; Select tool keeps Ctrl for other use) | View |
| Pan toolbar button | Pan mode (click then drag) | View |
| Select tool: click inside selection + drag | Move all selected annotations | Edit |
R | Toggle all annotations visibility | View |