Data Preparation: Collecting, Labeling, Importing, and Distributing Data
Data Preparation for machine learning is the first step in building a machine learning model and can be broken down into the following stages:
- Collecting and labeling real-time data
- Adding data into the project
- Distributing Data
Real-Time Data Collection and labeling
We will learn how to collect data from various sensors present in the PSOC™ 4100S Max Pioneer Kit into DEEPCRAFT™ Studio. You can add additional data to your existing projects or build your own dataset from scratch. You can collect both labeled and unlabeled data, depending on your project requirements.
What type of data can be collected using PSOC™ 4100S Max Pioneer Kit?
Using the Infineon’s CAPSENSE™ technology, you can collect data from CAPSENSE™ Buttons and Slider to build button detection models, slider position detection models or slider gesture detection models that can be used in smartphones, industrial automation, and safety systems.
Before you start collecting data using PSOC™ 4100S Max Pioneer Kit, make sure to flash the kit with the Streaming Firmware. For step-by-step instructions, refer to Streaming Firmware for PSOC™ 4100S Max Pioneer Kit.
Collecting and labeling data using CapSense Button sensor
Use the Graph UX to collect and label real-time data from the PSOC™ 4100S Max Pioneer kit’s on-board CapSense Button sensor to build Touch Button Detection models. CapSense Buttons are integrated into the kit and provide capacitive touch sensing rather than acting as external sensors. Use these buttons for user input and to integrate touch-based interfaces into applications.
How to collect and label real-time data from the CapSense Button sensor?
Collecting and labeling data in real-time is straightforward using Graph UX in DEEPCRAFT™ Studio. Follow these steps to efficiently collect and label your data:
-
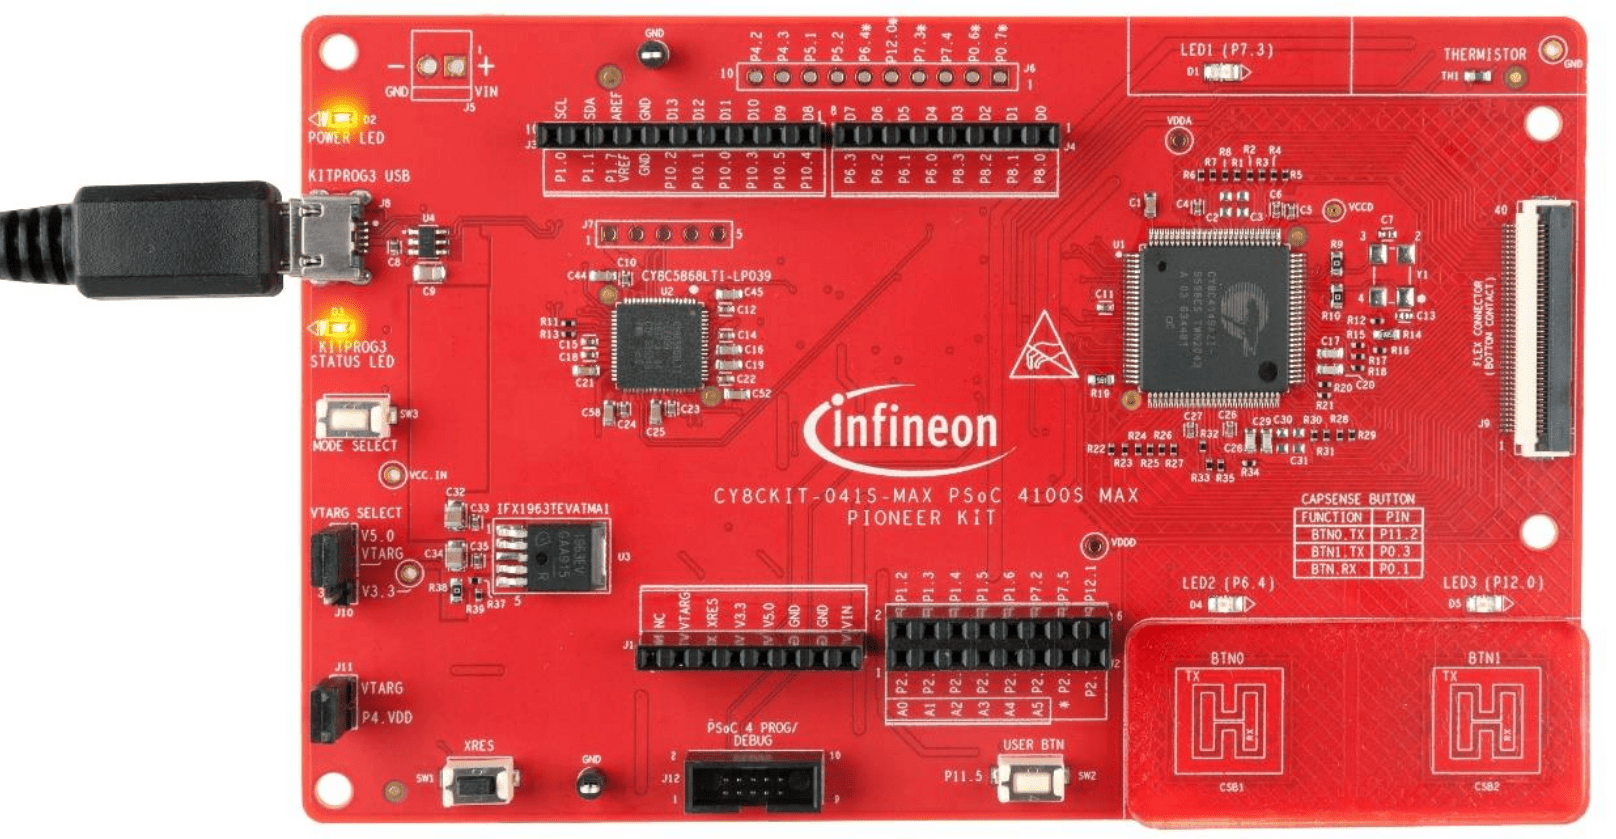
Connect the KitProg3 USB connector (J8) on the pioneer board to the PC or laptop using USB cable.
-
After connecting the kit, open Studio and navigate to Node Explorer Window> Boards to check if the board is connected properly. The PSOC™ 4100S Max Pioneer Kit (CY8CKIT-041S-MAX) with the CapSense sensor is displayed under Boards.
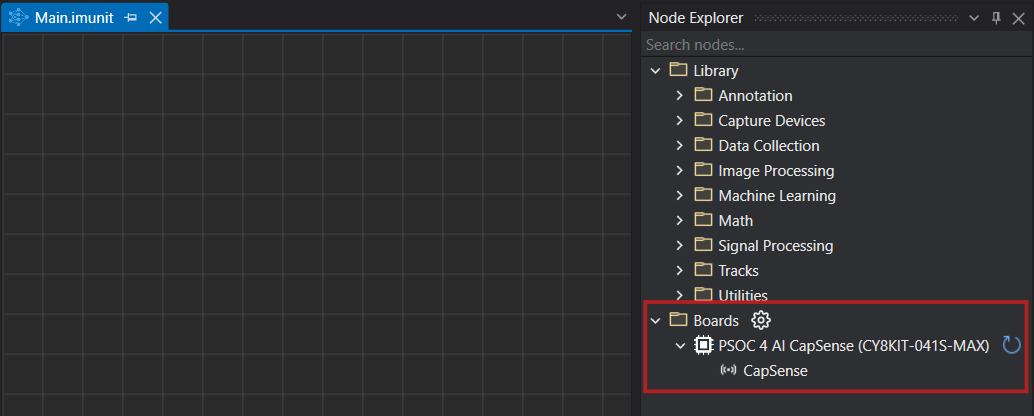
- If the Node Explorer Window is not open, navigate to View> Node Explorer to access the window.
- If the PSOC™ 4100S Max Pioneer Kit is not displayed under Boards in Node Explorer, navigate to Tools> Options> Graph UX> Capture Nodes and select Use Node Explorer with Protocol Version 2.
- Navigate to imagimob_nn_projects> button_nn> data-collection-button and open the main.imunit. The imunit contains the data collection and labeling graph, CapSense sensor node to stream data, CapSense data node to track, visualize and label the data stream, and a predefine labels node to define the labels.
If Failed to fetch board config appears in your data collection and labeling graph, remove the existing sensor node. Drag a new sensor node from Node Explorer onto the graph and connect it to restore your workflow.
Real-time data collection and data labeling for Button detection
-
Navigate to the toolbar and click the Start button to open the session file (live.imsession). An empty session file opens displaying the pre-defined classes in the Labels bar.
-
Click the Record button to start capturing the real-time data.
-
Interact with the CSB1 button to capture the touch data.
-
In the Labels bar, select the touch class to start adding labels to the streaming data.
-
Deselect the touch class to stop adding the labels.
-
Click the Record button to stop collecting the data.
-
Select File > Save to save the session file, data track and label track. The Save New Session window appears.
-
In Location, click the three dot and select capsense-project> data_processing> imagimob_nn_projects> button_nn> Data to save the files.
-
In Session Name, enter the name of the session file.
-
Under Track Options, set the following:
- In Track Name, double-click the column to edit the track name, if required
- In File Name, double-click the columns to edit the track name, if required
-
Select the save checkbox corresponding to the tracks you want to save.
-
Click OK to save the files.
-
Repeat the instructions from step 2 to collect and save data in multiple session files.
After collecting the data, add data to the button_nn.improj project file to start with the machine learning workflow in Studio. The Button Detection model is created using a classification project. Refer to Add data to project for detailed instructions on adding data to a classification project.
If you prefer not to collect and label data simultaneously, you can first collect the data. Once the data collection is complete, simply press the play button in the session and begin labeling by selecting the appropriate labels in the Labels bar.
Collecting and labeling data using CapSense Slider Gesture sensor
Use the Graph UX to collect and label real-time data from the CapSense Slider Gesture sensor present on the Capacitive sensing expansion board of the PSOC™ 4100S Max Pioneer kit to build Gesture Detection models. Here, we will collect data for simple left and right swipe gestures on the slider.
How to collect and label real-time data from the CapSense Gesture sensor?
Collecting and labeling data in real-time is straightforward using Graph UX in DEEPCRAFT™ Studio. Follow these steps to efficiently collect and label your data:
-
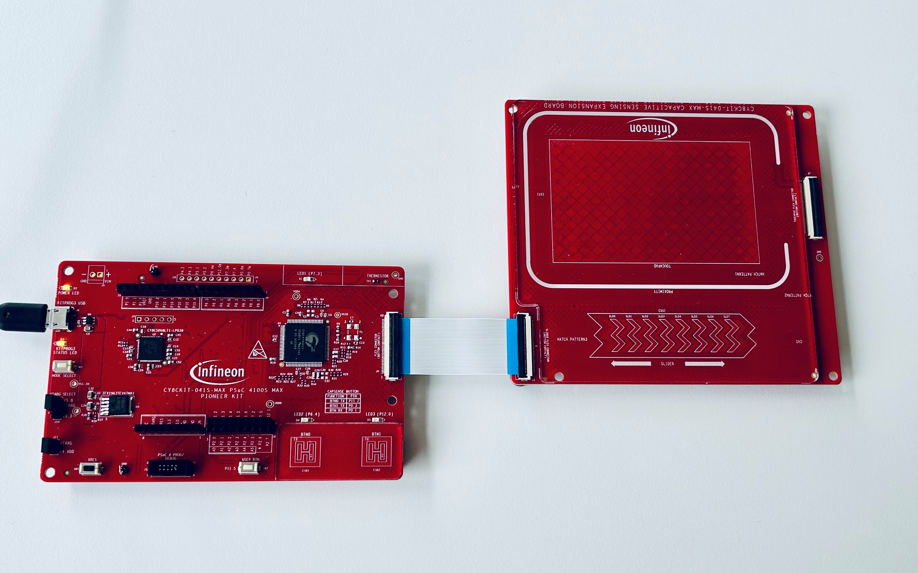
Connect the Flat Flex Cable (FFC) connector (J9) on the pioneer board to the Slider (CSS1) in the expansion board using the the Flat flex cable.
-
Connect the KitProg3 USB connector (J8) on the pioneer board to the PC or laptop using USB cable.
-
After connecting the kit, navigate to Node Explorer Window> Boards to check if the board is connected properly. The PSOC™ 4100S Max Pioneer Kit (CY8CKIT-041S-MAX) with the CapSense sensor is displayed under Boards.
- If the Node Explorer Window is not open, navigate to View> Node Explorer to access the window.
- If the PSOC™ 4100S Max Pioneer Kit is not displayed under Boards in Node Explorer, navigate to Tools> Options> Graph UX> Capture Nodes and select Use Node Explorer with Protocol Version 2.
- Navigate to imagimob_nn_projects> gestures_nn > data-collection-gestures_nn and open the main.imunit. The imunit contains the data collection and labeling graph, CapSense sensor node to stream data, CapSense data node to track, visualize and label the data stream, and a predefine labels node to define the labels.
If Failed to fetch board config appears in your data collection and labeling graph, remove the existing sensor node. Drag a new sensor node from Node Explorer onto the graph and connect it to restore your workflow.
Real-time data collection and data labeling for gesture detection
-
Navigate to the toolbar and click the Start button to open the session file (live.imsession). An empty session file opens displaying the pre-defined classes in the Labels bar.
-
Click the Record button to start capturing the real-time data.
-
Interact with the gesture slider to capture the right and left gesture data.
-
In the Labels bar, select the class to start adding labels to the streaming data. Similarly, you can enable or disable the other classes and label the data.
-
Deselect the class Left or Right to stop adding the labels.
-
Click the Record button to stop collecting the data.
-
Select File > Save to save the session file, data track and label track. The Save New Session window appears.
-
In Location, click the three dot and select capsense-project> data_processing> imagimob_nn_projects> gestures_nn> Data the desired location to save the files.
-
In Session Name, enter the name of the session file.
-
Under Track Options, set the following:
- In Track Name, double-click the column to edit the track name, if required
- In File Name, double-click the columns to edit the track name, if required
-
Select the save checkbox corresponding to the tracks you want to save.
-
Click OK to save the files.
-
Repeat the instructions from step 2 to collect and save data in multiple session files.
After collecting the data, add data to the gestures_nn.improj project and start with the machine learning workflow in Studio. The Gesture Detection model is created using a classification project. Refer to Add data to project for detailed instructions on adding data to a classification project.
If you prefer not to collect and label data simultaneously, you can first collect the data. Once the data collection is complete, simply press the play button in the session and begin labeling by selecting the appropriate labels in the Labels bar.
Collecting and labeling data using CapSense Slider Position sensor
Using the Graph UX functionality, you can collect and label real-time data from the Slider Position CapSense sensor present on PSOC™ 4100S Max Pioneer Kit.
How to collect and label real-time data from the CapSense Slider Position sensor?
Collecting and labeling data in real-time is straightforward using Graph UX in DEEPCRAFT™ Studio. Follow these steps to efficiently collect and label your data:
-
Connect the Flat Flex Cable (FFC) connector (J9) on the pioneer board to the Slider (CSS1) in the expansion board using the the Flat flex cable.
-
Connect the KitProg3 USB connector (J8) on the pioneer board to the PC or laptop using USB cable.
-
After connecting the kit, navigate to Node Explorer Window> Boards to check if the board is connected properly. The PSOC™ 4100S Max Pioneer Kit (CY8CKIT-041S-MAX) with the CapSense sensor is displayed under Boards.
- If the Node Explorer Window is not open, navigate to View> Node Explorer to access the window.
- If the PSOC™ 4100S Max Pioneer Kit is not displayed under Boards in Node Explorer, navigate to Tools> Options> Graph UX> Capture Nodes and select Use Node Explorer with Protocol Version 2.
- Navigate to imagimob_nn_projects> position_nn> data-collection-position_nn and open the main.imunit. The
.imunitfile contains the data-collection graph, including a CapSense sensor node that streams slider data. The slider is divided into eight segments, and the signals from these segments form the eight input features. The graph uses two Select nodes: one Select node captures the eight segment signals, and the other Select node captures the ground truth computed by a classical algorithm. Use the segment signals as training data and use the ground truth as the label.
If Failed to fetch board config appears in your data collection and labeling graph, remove the existing sensor node. Drag a new sensor node from Node Explorer onto the graph and connect it to restore your workflow.
Real-time data collection and data labeling for Slider Position detection
-
Navigate to the toolbar and click the Start button to open the session file (live.imsession). An empty session file opens displaying the pre-defined classes in the Labels bar.
-
Click the Record button to start capturing the real-time data.
-
Interact with the slider position to capture data from different slider positions. The ground truth corresponding to the different features is captured in train_labels track simultaneously.
-
Click the Record button to stop collecting the data.
-
Select File > Save to save the session file, data track and label track. The Save New Session window appears.
-
In Location, click the three dot and select capsense-project> data_processing> imagimob_nn_projects> position_nn> Data to save the files.
-
In Session Name, enter the name of the session file.
-
Under Track Options, set the following:
- In Track Name, double-click the column to edit the track name, if required
- In File Name, double-click the columns to edit the track name, if required
-
Select the save checkbox corresponding to the tracks you want to save.
-
Click OK to save the files.
-
Repeat the instructions from step 2 to collect and save data in multiple session files.
After collecting the data, add data to the required project and start with the machine learning workflow in Studio. Refer to Create project and Add data to project to know more.
Adding data into the project
Navigate to the button, gesture or position project file in the respective project folder to add the real-time data. For the Button Detection and Gesture Recognition build using classification projects, place the .data files in the Data Track box and the .label files in the Label Track box. For the Slider Position model build using regression project, place the .data files to use as data in the Data Track box and the .data file to use as label in the Label Track box.
Refer to Adding data to classification and regression projects for detailed instructions.
Distributing Data
After you add data to the projects, you need to distribute the data into different datasets for each project. You can split the data into the following three sets:
Train Set: The data in the train set is used to train the model.
Validation Set: The data in the validation set is used to test the model during training and to evaluate the performance of the model.
Test Set: The data in the test set is used at the end of training to evaluate the performance of the model on unseen data.
Refer to Distributing Data for detailed instructions.
It is recommended to keep the training set significantly bigger than the validation and test sets. Some standard splits are (train/validation/test) 60/20/20 or 80/10/10. The more data you have collected, the smaller you can make your validation and test set target size.