Data Preparation: Collecting, Labeling, Importing, and Distributing Data
Data Preparation for machine learning is the first step in building a machine learning model and can be broken down into the following stages:
- Collecting and labeling Data
- Importing data into the project
- Distributing Data
Let’s start preparing data for the siren detection project.
Collecting and labeling Data
You can collect and label the real-time data at the same time using Graph UX in Studio. Graph UX allows you to capture the real-time data using Serial Capture or Local Microphone.
Let’s add additional data to the existing siren detection starter project using the Serial Capture.
Creating project to collect and label data using Graph UX
-
Open Studio and click New Project in the welcome screen.
OR
Go to File> New Project. The New Project window appears. -
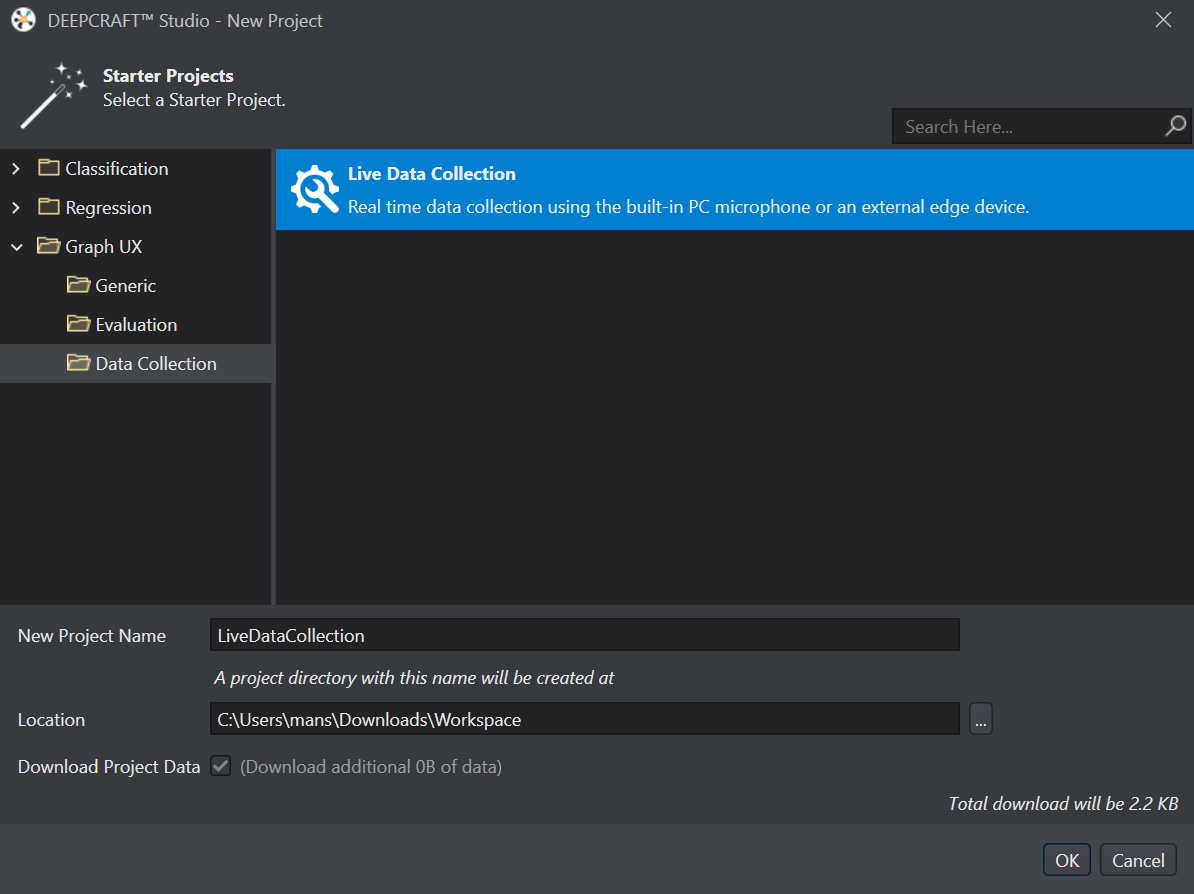
Under Graph UX > Data Collection, select Live Data Collection.
-
In New Project Name, enter the name of the project.
-
In Location, specify the location where you want to create the workspace and the project directory.
-
Click OK to create the project. The project Library is downloaded to the workspace in Studio.
Connecting and setting up Serial Capture and Predefined Labels units
Now, let’s set up the Serial Capture unit for collecting data and Predefined unit for labeling data on the canvas.
Setting up the Serial Capture
-
Connect the board to your laptop or PC a USB cable.
-
Expand LiveDataCollection directory and double-click the Main.imunit to open the canvas. By default, an example graph for collecting data is already illustrated in the canvas.
-
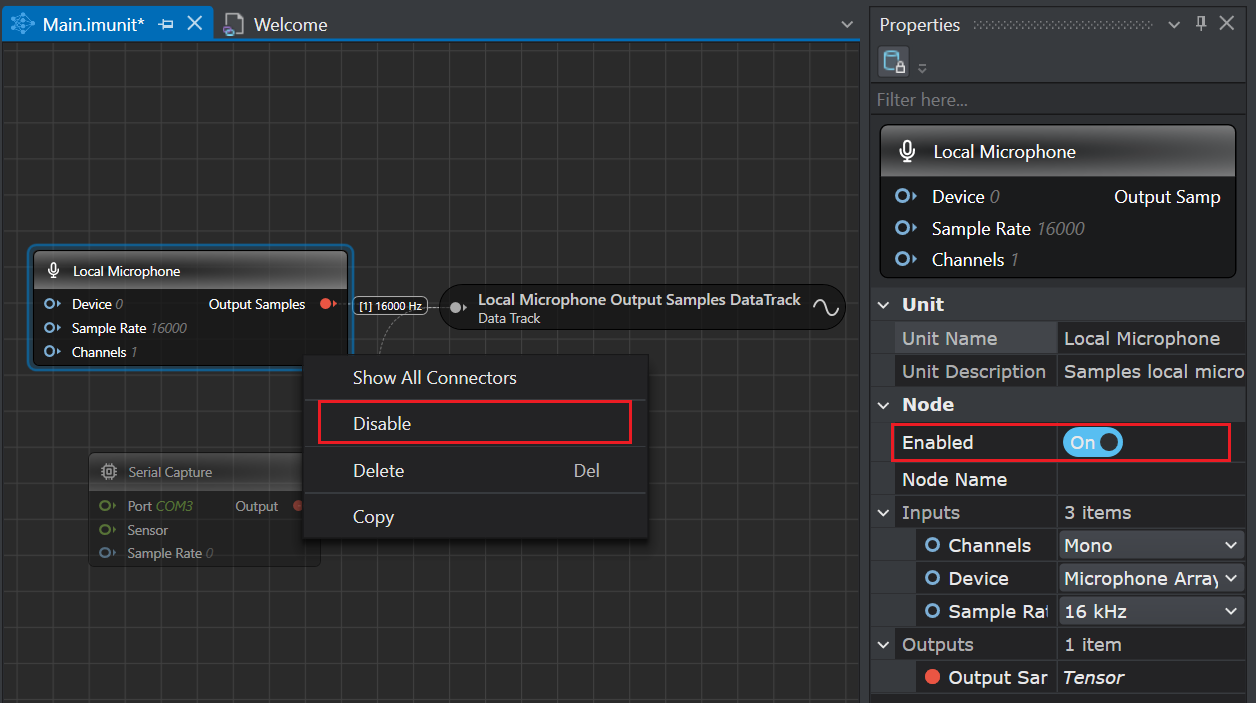
Select the Local Microphone node and click the Enabled radio button in the Properties window to disable the node.
OR
Right-click the Local Microphone node and select Disable from the list of options.
-
Select the Serial Capture node and click the Enabled radio button in the Properties window to enable the node.
OR
Right-click the Serial Capture node and select Enable from the list of options. -
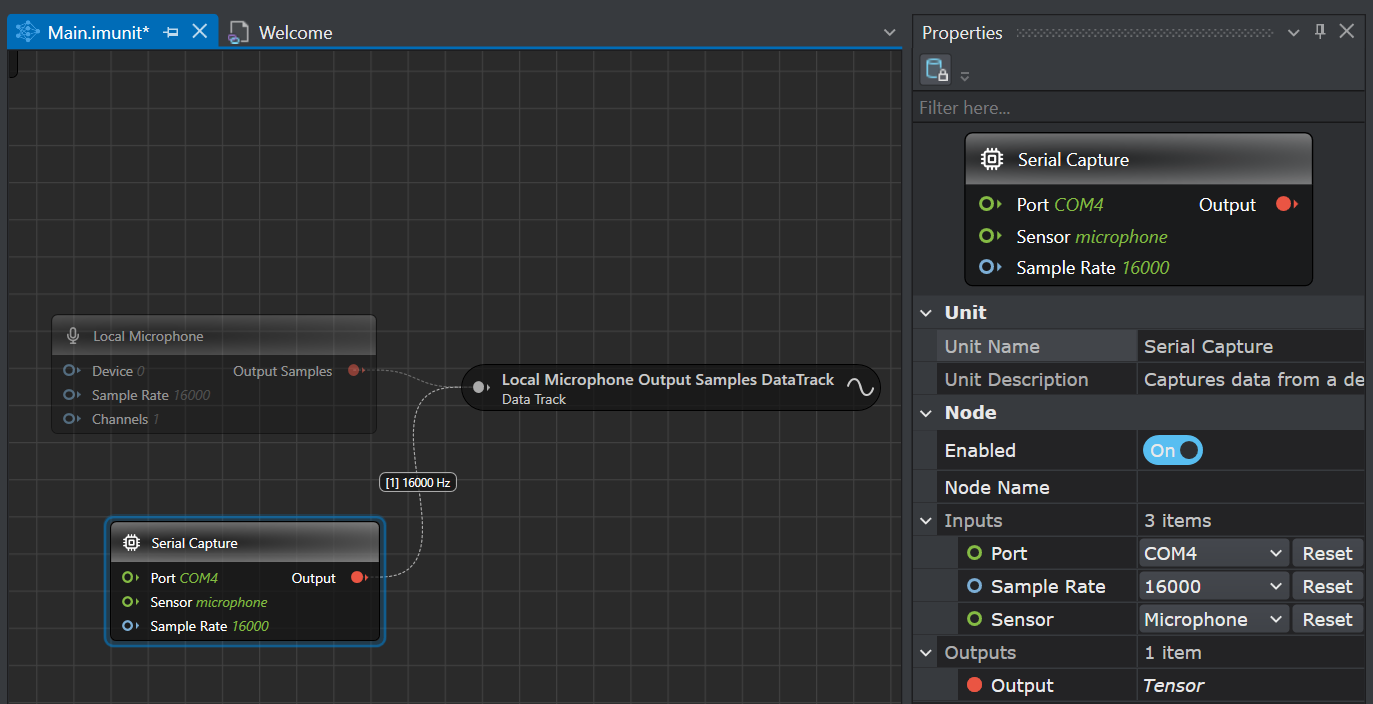
Click the Serial Capture node to edit the properties in the Properties window:
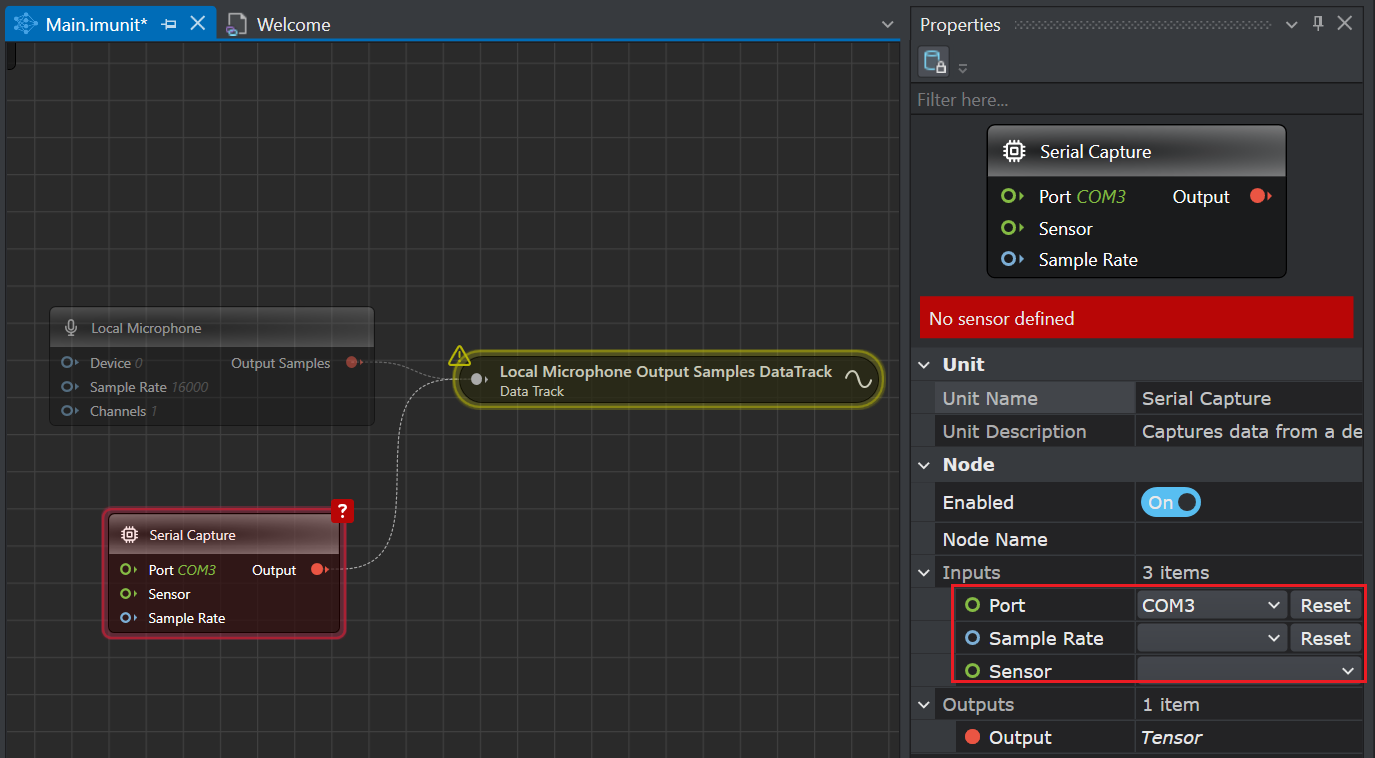
- In Port, select the COM port to be used for recording.
- In Sample Rate, select the 16000 as the sample rate from the list.
- In Sensor, select the Microphone as sensor type to be used for recording.
To check the COM port at which the board is connected, open Device Manager> Ports and look for USB Serial Device.
After setting up the Serial Capture, you can utilize the same graph to label the real-time data. The example graph contains a Predefined Labels unit onto the canvas. Define the classes in the Predefined Labels node for one time and utilize the defined classes to label the data on a click of button.
Setting up the Predefined Labels
-
Navigate to the Predefined Labels node onto the canvas to define the class for labeling. The Predefined Labels node displays the default classes.
-
Delete the default classes and enter siren as the class in Predefined Labels node.

After defining the class, start collecting and labeling data simultaneously.
Real-time data collection and labeling
-
Navigate to the toolbar and click the Start button to open the main.imsession file. An empty session file opens displaying the predefined classes in the Labels bar.

-
Open the Freesound website and play the ambulance siren sound to collect the real-time data. You can also collect the siren sounds from various other sources.
-
Go to Studio and click the Record button to start capturing the real-time data.
-
In the Labels bar, select the siren class to start adding labels to the streaming data.
-
Deselect the siren class to stop adding the labels.

-
Click the Record button to stop collecting the data.
• You can also enable or disable the siren class using the keyboard shortcuts displayed when hovering over the classes in the Labels bar.
• After collecting the data, you can fine-tune the labels accordingly.
-
Select File>Save to save the session file, data track and label track. The Save New Session window appears.
-
In Location, click the three dot and select the Data folder in the siren detection starter project to save the files.
-
In Session Name, enter the name of the session file.
-
Under Track Options, you can set the followings:
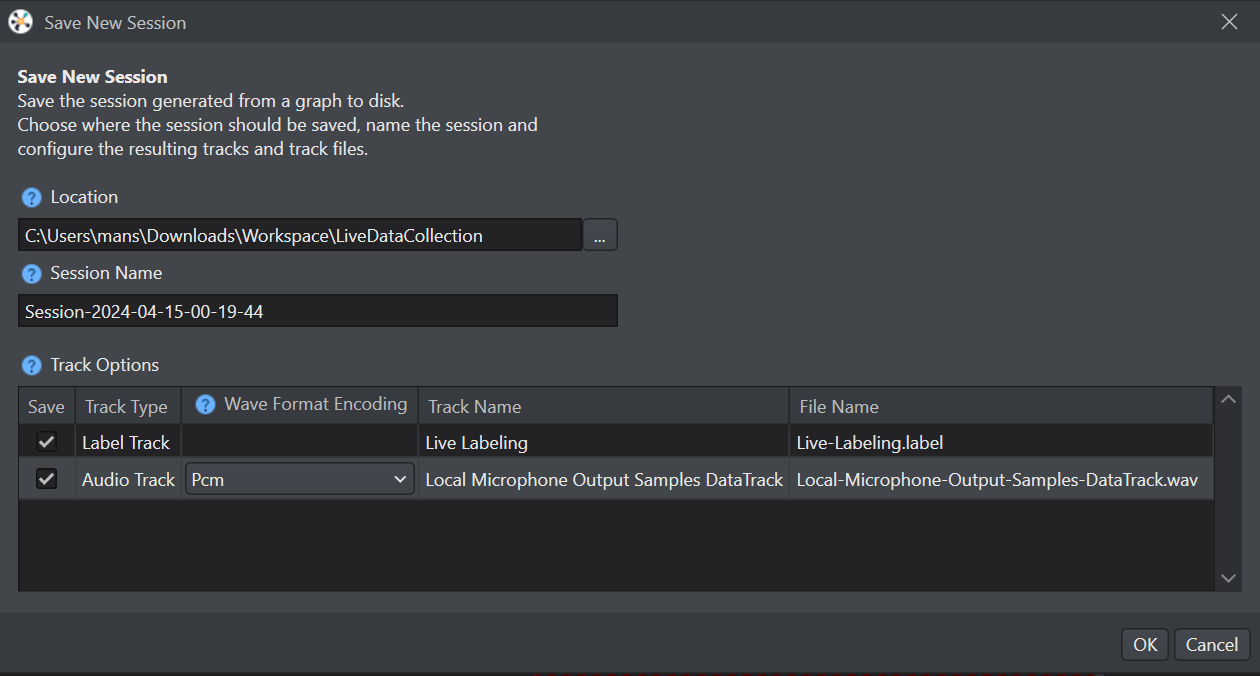
• In Wave Format Encoding, select the encoding format for the audio tracks.
• In Track Name, double-click the column to edit the track name, if required.
• In File Name, double-click the columns to edit the track name, if required. -
Select the save checkbox corresponding to the tracks you want to save.
-
Click OK to save the files.
-
Repeat the instructions from step 2 to collect and save data in multiple session files.
After you have collected and labeled the required data, let’s import data into the Studio.
Importing data into the siren project
-
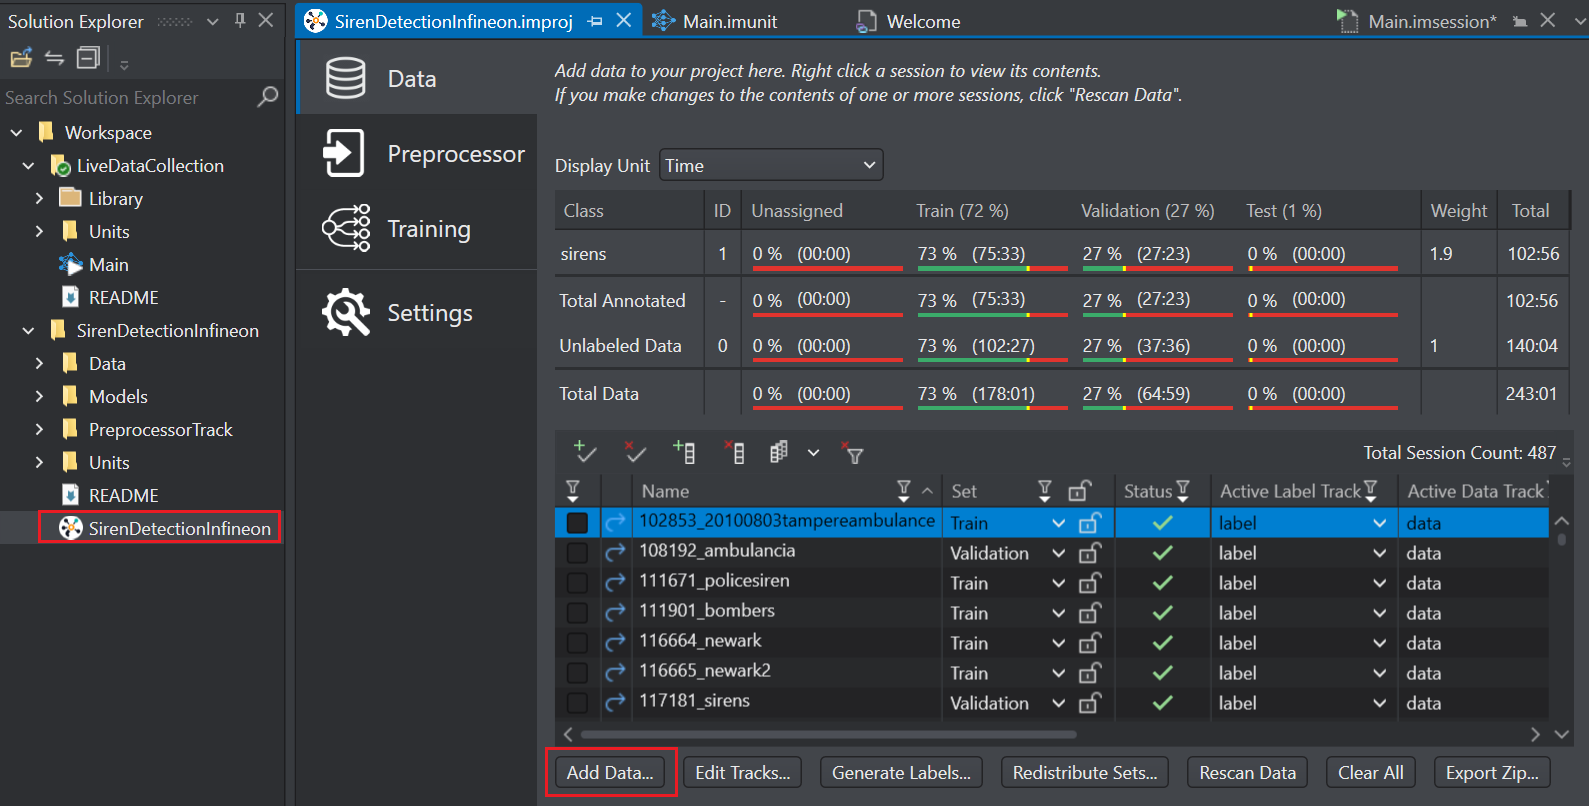
Open the SirenDetectionInfineon project file present in the project folder.
-
Select the Data tab, and click the Add Data button at the bottom of the project file. The Select import mode window appears.
-
Click Add icon and browse to the folder you want to upload and click Select Folder. The Select folder structure window appears.
-
Select the Nested structure or Flat structure radio button and click Next. The data import tool searches through the folders and recognize folders containing .data, .label files.
-
Select or deselet what you want to import and click OK. The data is imported into the Siren project. The added data will appear in the list of data sets in the Data pane window.
-
Click the Rescan Data button at the bottom of the project file to verify the sufficiency of data for each class. Select Quick scan or Full scan as required. The Data Summary pane in the table displays the concise data summary that provides insights about data distribution, balanced and unbalanced datasets and other data statistics.
After you have imported the data into the Studio, let’s distribute the data into different datasets.
Data Distribution
You can split the data into the following three sets:
-
Train Set: The data in the train set is used to train the model.
-
Validation Set: The data in the validation set is used to test the model during training and to evaluate the performance of the model.
-
Test Set: The data in the test set is used at the end of training to evaluate the performance of the model on unseen data.
It is recommended to keep the training set significantly bigger than the validation and test sets. Some standard splits are (train/validation/test) 60/20/20 or 80/10/10. The more data you have collected, the smaller you can make your validation and test set target size.
To distribute the data into the three sets, follow the steps:
-
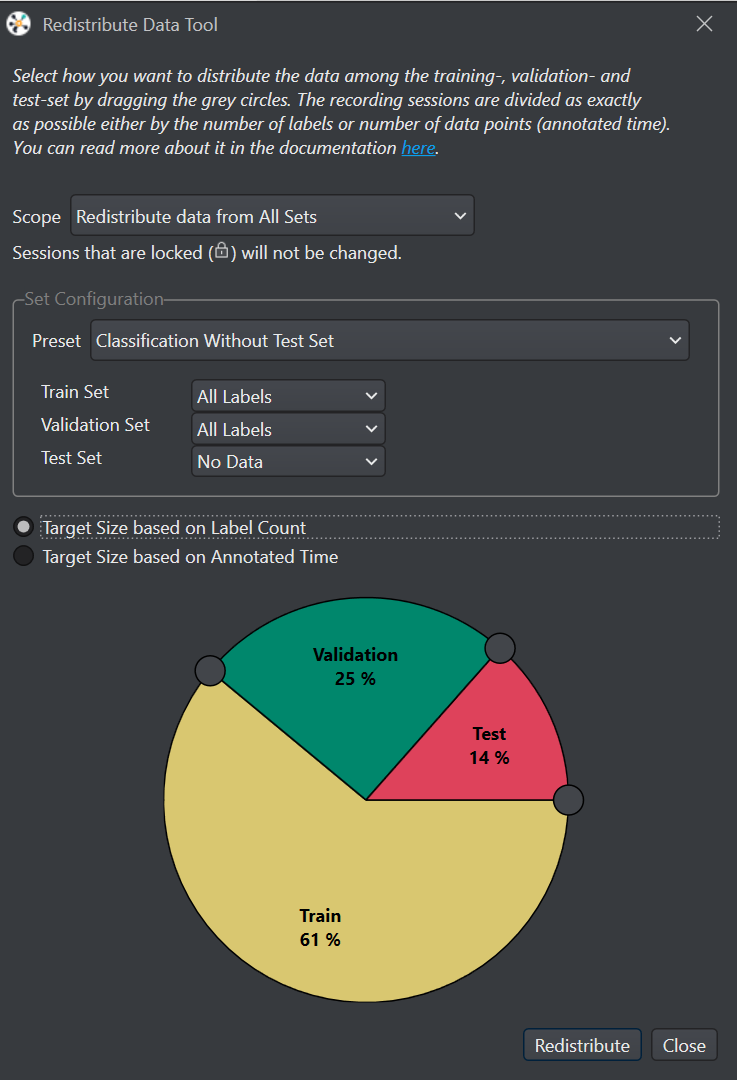
Open the SirenDetectionInfineon project file and select Redistribute Sets. The redistribute data tool window appears.
-
Set Scope as either Redistribute data from All Sets or from Redistribute data from Unassigned sets.
-
Use the graphical tool to distribute the data into different data sets. The target size can either be based on Label Count or Annotated Time.
-
Select Redistribute and the data in the selected scope will be distributed among the three data sets.
After you have completed all the steps for preparing the data, the next step is to configure the preprocessor. Refer Preprocessing to know more.