Model Training
This section covers information about generating, training, and evaluating the machine learning model. After you collect the data and design the preprocessor, the data is passed to the model for training. Before the model can be trained, you need to generate the model and define the layers of the model. Studio allows generation of multiple different models to be trained and compared to find the best fitting model.
Generating the model
You can generate the model using any of the following ways in Studio:
Model Wizard
You can generate multiple model architecture using the Model Wizard. The Auto ML tab in wizard can be configured for different model families, classifiers, sizes, and learning rate. The wizard generates models based on the configuration, speeding up the model development phase by prioritizing the main features of a model. The generated models have different layers and layer configurations and produce slightly different results. The models generated by the Auto ML wizard can be changed layer by layer, allowing the more advanced users to fine tune the models. Refer to Generating model to know about Model wizard.
Empty model
You can create a custom model from scratch or clone one of the Auto ML models as a starting point for a new model. For each model in the list, you can change the training settings such as the number of epochs to be run and the learning rate used by entering the desired values. You can click the Model properties icon to set additional properties. If you select a model, you can view the different layers of that model. You can change the order of the layers, properties of each layer, and add or remove layers before training.
Import architecture
You can import an existing Keras H5 model in different modes into the Studio to generate a model.
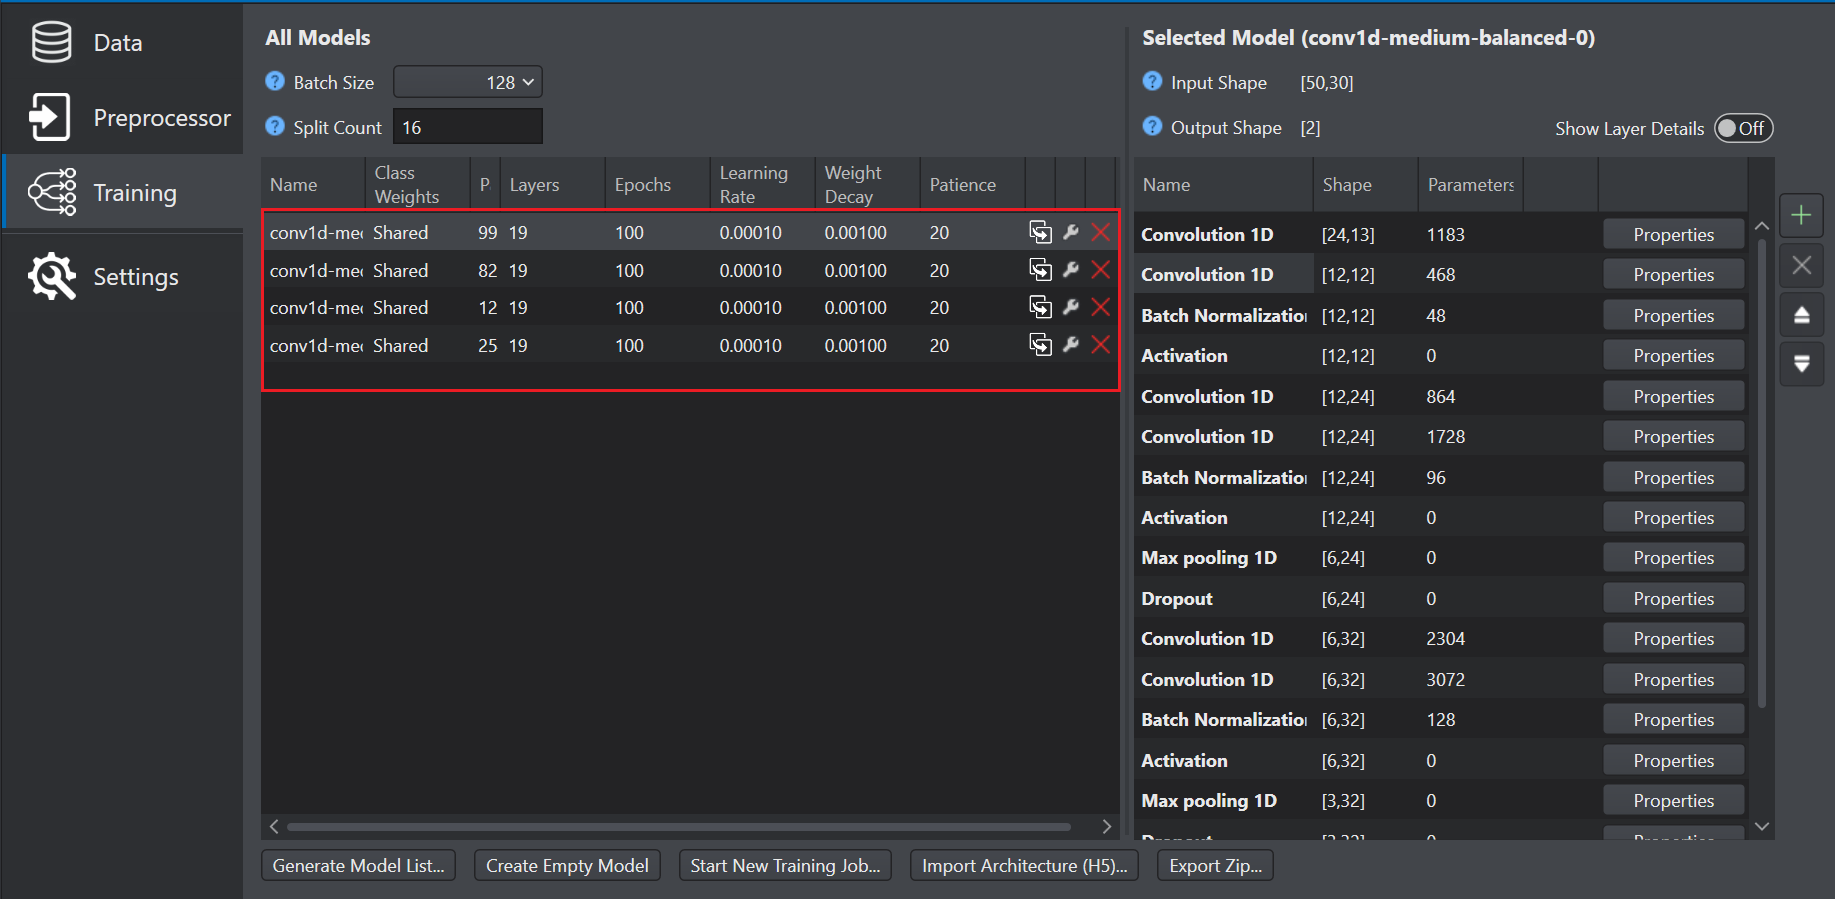
Generating model for the Siren Detection project
For the Siren Detection starter projects, multiple models with different architectures are included in the project. The complete model architecture is shown in the image below:
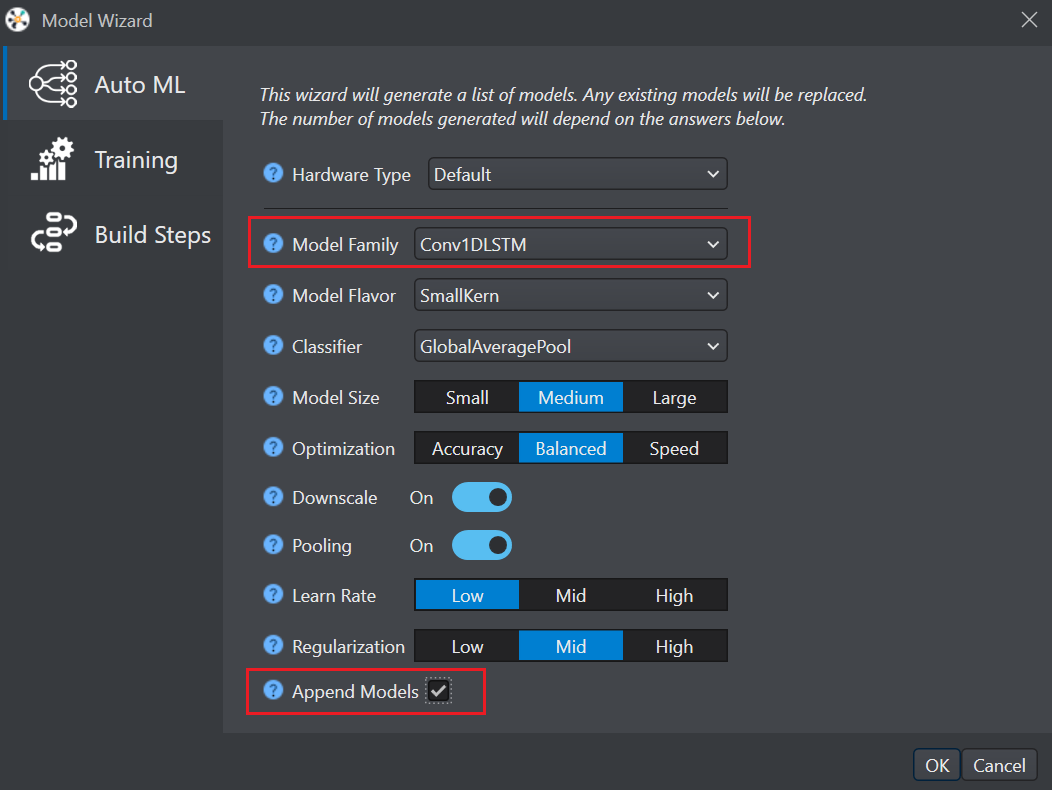
We will try to generate the model using the Model wizard for preprocessor we designed earlier. To generate model using the Model wizard:
-
Navigate to the Training tab in the project file.
-
Click Generate Model List button to open the Model wizard. The Auto-ML tab appears with the pre-configured parameters. Keeping most of the parameters as it is, we will change the following parameters to generate different set of models.
- In Model family, select Conv1DLSTM.
- In Append Models, enable the checkbox to keep the old models and append new models to the list.
-
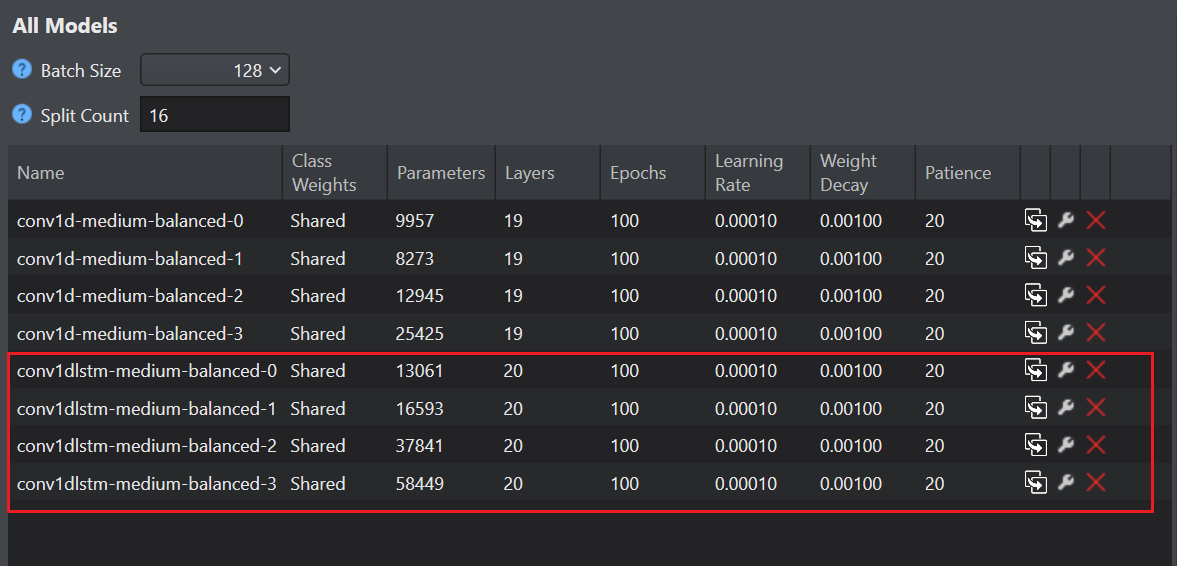
Click Ok. The new set of models appear in the list.
Training and Evaluating the model
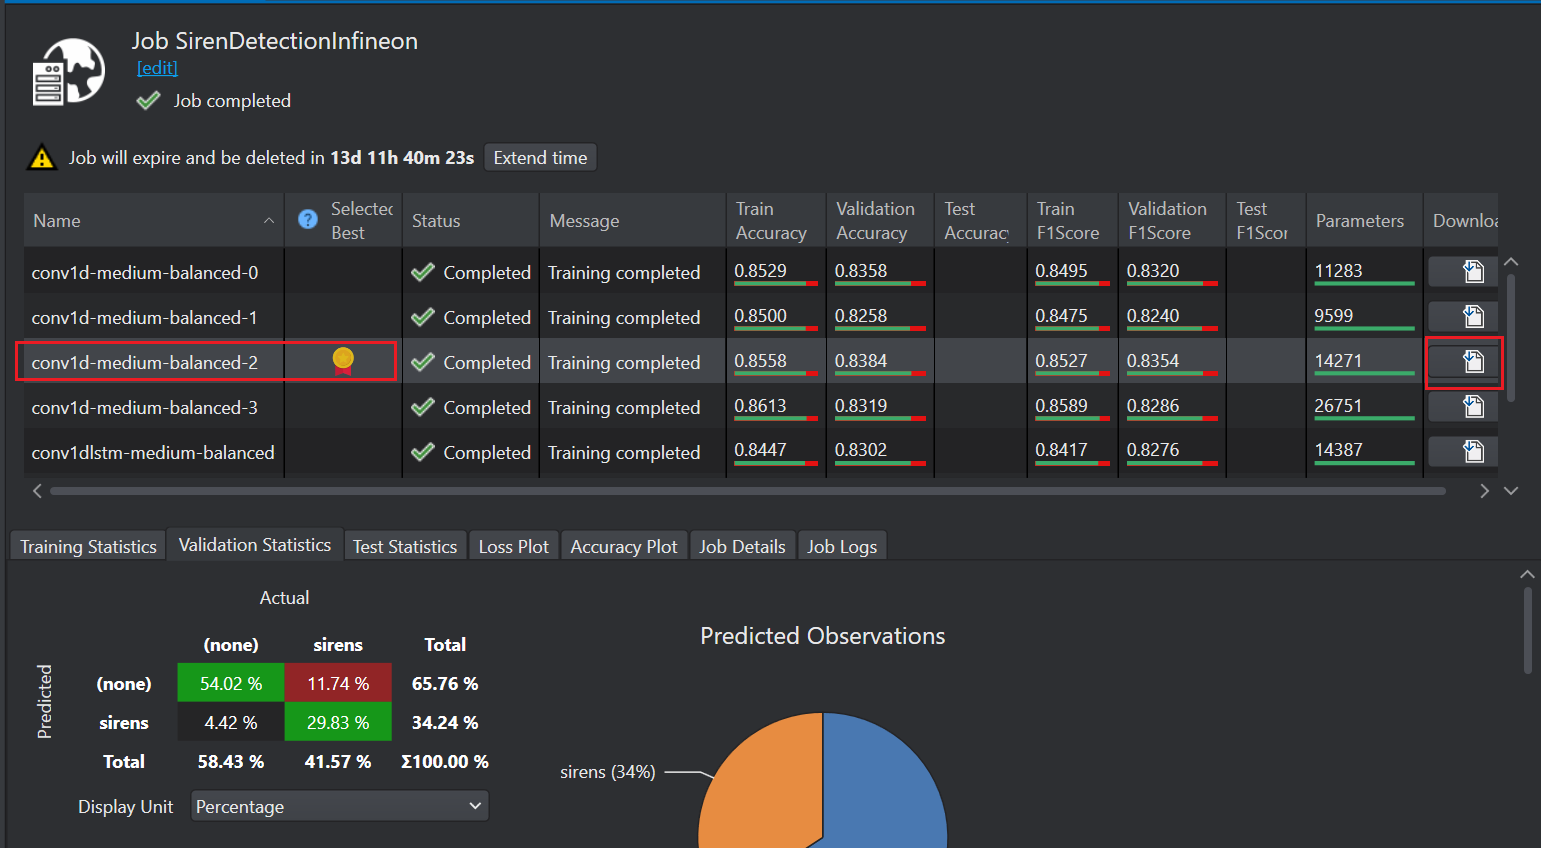
After you have a list of models, you can train and evaluate the models to see which one produces the best results. Studio offers many different training statistics and metrics to analyze the strengths and weakness of a model. The statistics include accuracy of validation and test data as well as confusion matrix to see which model performed well.
Refer to Starting Model Training and Tracking the training job to see the detailed instructions on how to start and track the training job respectively.
After the model is trained in Imagimob Cloud, the detailed performance data of each the model is available. You can download the model recommended by Studio. Refer to download the model files for detailed steps.
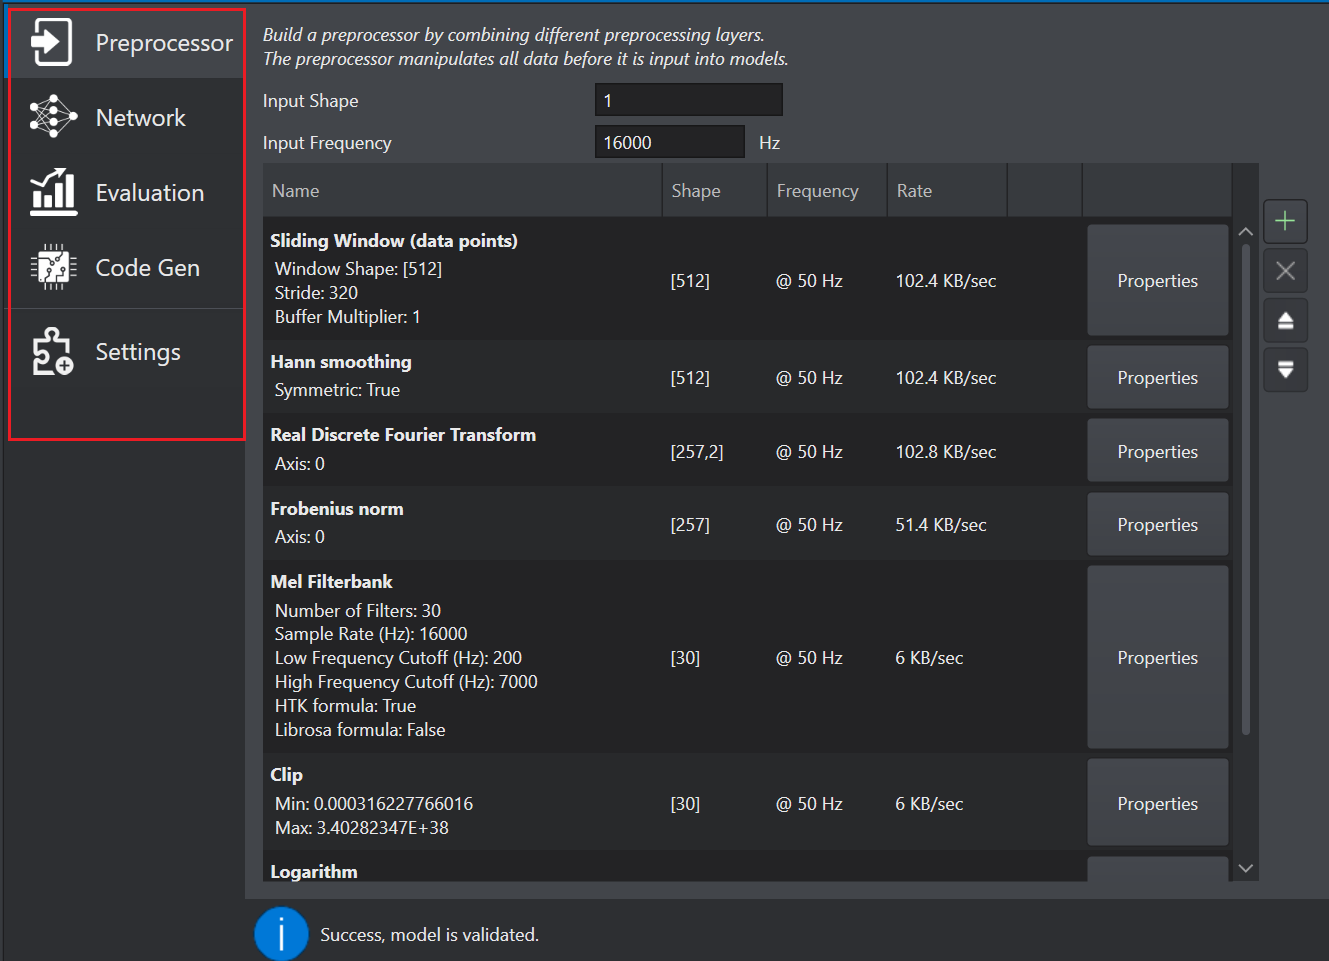
After downloading the model files, open the model file to evaluate the model. The *.h5 model file contains the following tabs:
• Preprocessor: This tab contains the preprocessor information defined for the project.
• Network: This tab provides details about the layers of the model, activations and parameters.
• Evaluation: This tab contains the performance data with additional filtering and visualization capabilities.
• Code Gen: This tab allows you to generate the code for the selected model.
You can evaluate the models by comparing the predictions from the original model with the predictions from the new model. Studio allows a much more detailed view of the performance of a model by merging the model predictions as tracks into the sessions containing the original data. Refer to import predictions into the project to see the detailed instructions on how to import the predictions.
You can use the advanced features, such as confusion matrix and Window Visualization and Grad-CAM to evaluate the performance of the models. Refer to Model evaluation using Confusion Matrix and Model explainability using Window Visualization and Grad-CAM to know more.
After you have trained and evaluated the model, the last step is to deploy the model on the Infineon board. To know how to deploy the model, refer to Model Deployment.