Generating model
After completing the preprocessing steps, you can now configure a list of models that is sent to Imagimob cloud for training. DEEPCRAFT™ Studio uses an auto machine learning approach that generates a number of different neural network architectures.
To generate model, follow the steps:
-
Navigate to your project directory and double-click the project file (.improj).
The project file opens in a new tab. -
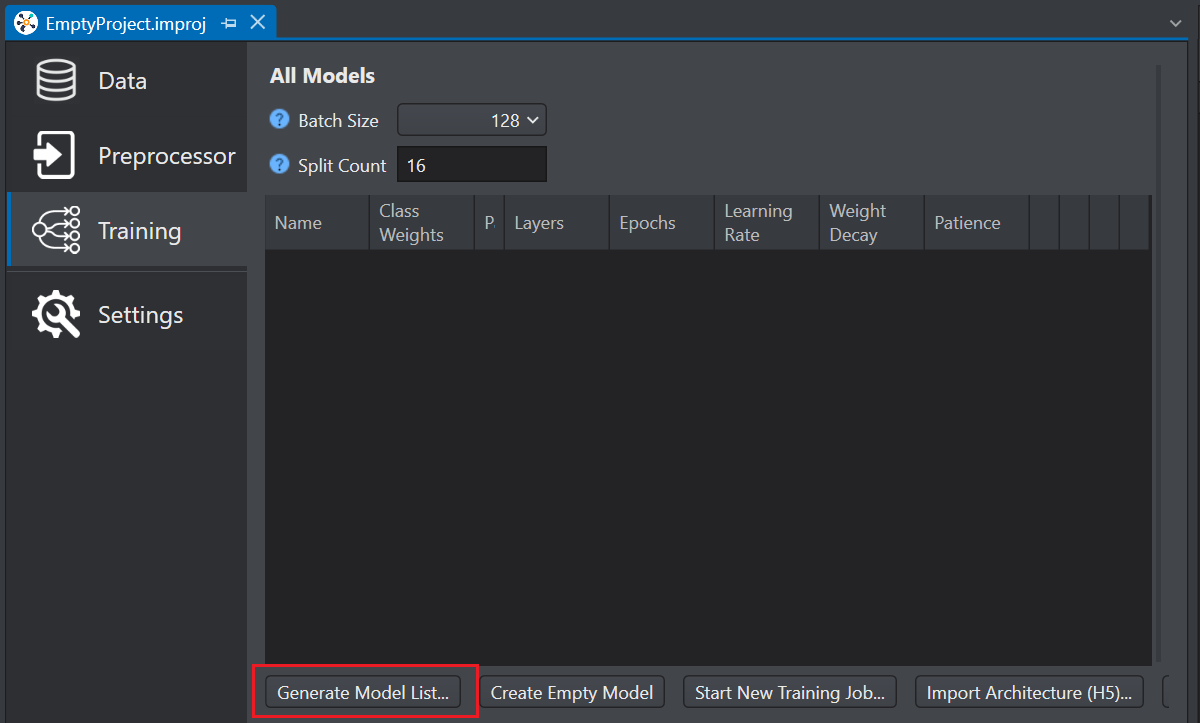
Click Training tab on the left pane.
-
Click Generate Model List. The Model Wizard window appears.
-
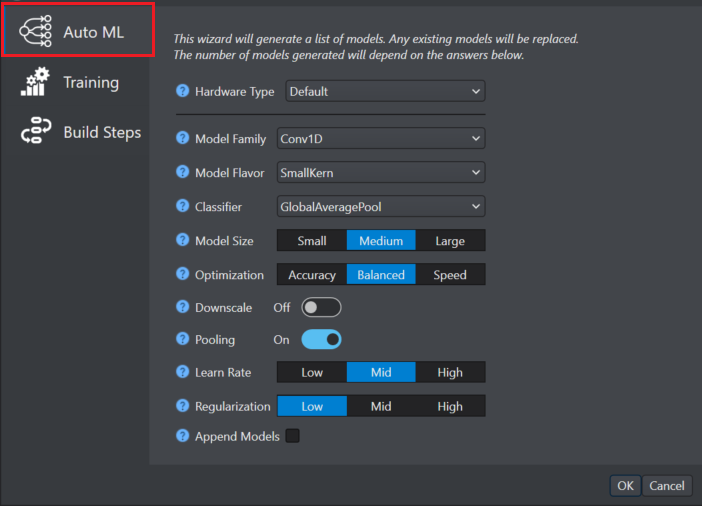
In Auto ML on the left pane, configure the following parameters:
-
In Hardware, select the architecture that is applicable to target device or solution.
-
In Model family, select the model family as per your requirement -
-
Conv1D - Convolution-1D are lightweight models effective for time series data.
-
Conv1DLSTM - Convolution-1D and LSTM 1D-convolution are high accuracy models effective for one dimensional and two dimensional data.
-
Conv2D - Convolution-2D models are effective for two dimensional data like audio spectrograms.
-
-
In Model flavor, select the model flavor as per your requirement -
-
SmallKern - Small kernels capture small patterns, increasing the model speed.
-
LargeKern - Large kernels captures large patterns, increase the performance but slowing model speed.
-
-
In Classifier, select the classifier type at the end of the model - GlobalAverage Pool, Hybrid and Dense.
-
In Model size, select the model size as per your requirement.
-
In Optimization, select the Optimization level of the model for accuracy and speed.
-
In Downscale, enable or disable the radio button as per your requirement. When enabled, this parameter increases the speed of the model effecting the model accuracy. However, when the model identifies large features in the input data, downscaling increases the model speed as well ad the model accuracy at the same time.
-
In Pooling, enable or disable the radio button as per your requirement. When enabled, this parameter reduces the dimensionality after convolutional layers. In most cases, pooling will increase the speed and reduce the memory consumption without effecting the model accuracy.
-
In Learn rate, select the training speed of the model as low, mild and high. Setting the learn rate as high will speed up the training, however, this may cause suboptimal training results.
-
In Regularization, select the desired option as per your requirement. This parameter reduces over-fitting to the training data.
-
In Append models, enable the check box to keep old models and append new models to the list. This parameter is applicable when all models have the same class count.
- Click Ok.
-
All the existing models will be replaced, unless you have enabled the Append models check box.
-
Verify your data labelling and database for missed labels or uneven data split for training, validation and test sets before starting the training. If you have a large database or a large training job, it might take a while for the results where the data issues are evident.
-
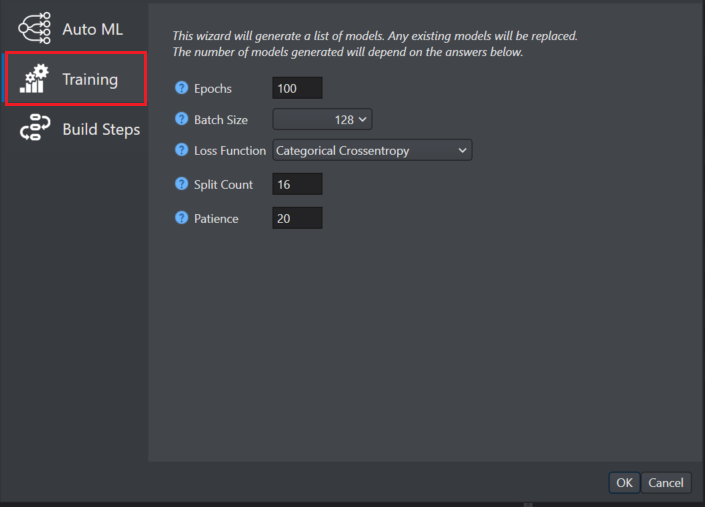
Click Training on the left pane and configure the following parameters:
-
In Epochs enter the number of iterations for training per model. The training of a neural network is typically divided into epochs. Larger the value of epochs, longer will be the training time of each model structure or hyper parameter. Early stopping is used to prevent overfitting.
-
In Batch Size enter the number of windows to be send to update the model in each epoch. A higher value of batch size means that the job will run faster, but it requires larger memory and might cause the training job to end due to hardware limitation. The optimal value for this parameter depends on the total number of training samples or windows. For example, a batch size of 32 is usually good for 1000 training samples and 128 is usually good for 5000 training samples.
-
In Loss Function select the appropriate loss function type. This parameter defines the error a neural network makes for a given input and is used to update the weights in each epoch. It is recommended not to modify this setting. For classification problems, select categorical_crossentropy and for regression problems, choose from the following options: Mean Squared Error (MSE), Mean Absolute Error (MAE), Root Mean Squared Error (RMSE).
-
In Split count enter the value for splitting, shuffling and merging data. The split count should be dividable by the batch size and the maximum value should be the batch size otherwise this may cause data loss. It is recommended not to modify this setting.
-
In Patience enter the number of epochs with no improvement after which the training should stop.
-
-
Click Build Steps where the steps after model generation are listed.
-
For classification projects, the build steps are: Model training and Confusion matrix
-
For regression project, the build steps are: Model training and Regression evaluation metrics

-
-
Click OK to generate a list of models.