Adding data to object detection projects
Whether you have collected real-time image data or plan to use an existing dataset for model building, you need to create an Empty Object Detection Project in DEEPCRAFT™ Studio. Using the Project Templates, create an Object Detection project by selecting Templates> Vision> Empty Object Detection Project as the project type. To know how to create the project using the project template, refer to Project Templates. After you have created the project, the Object Detection project directory appears in your Workspace.
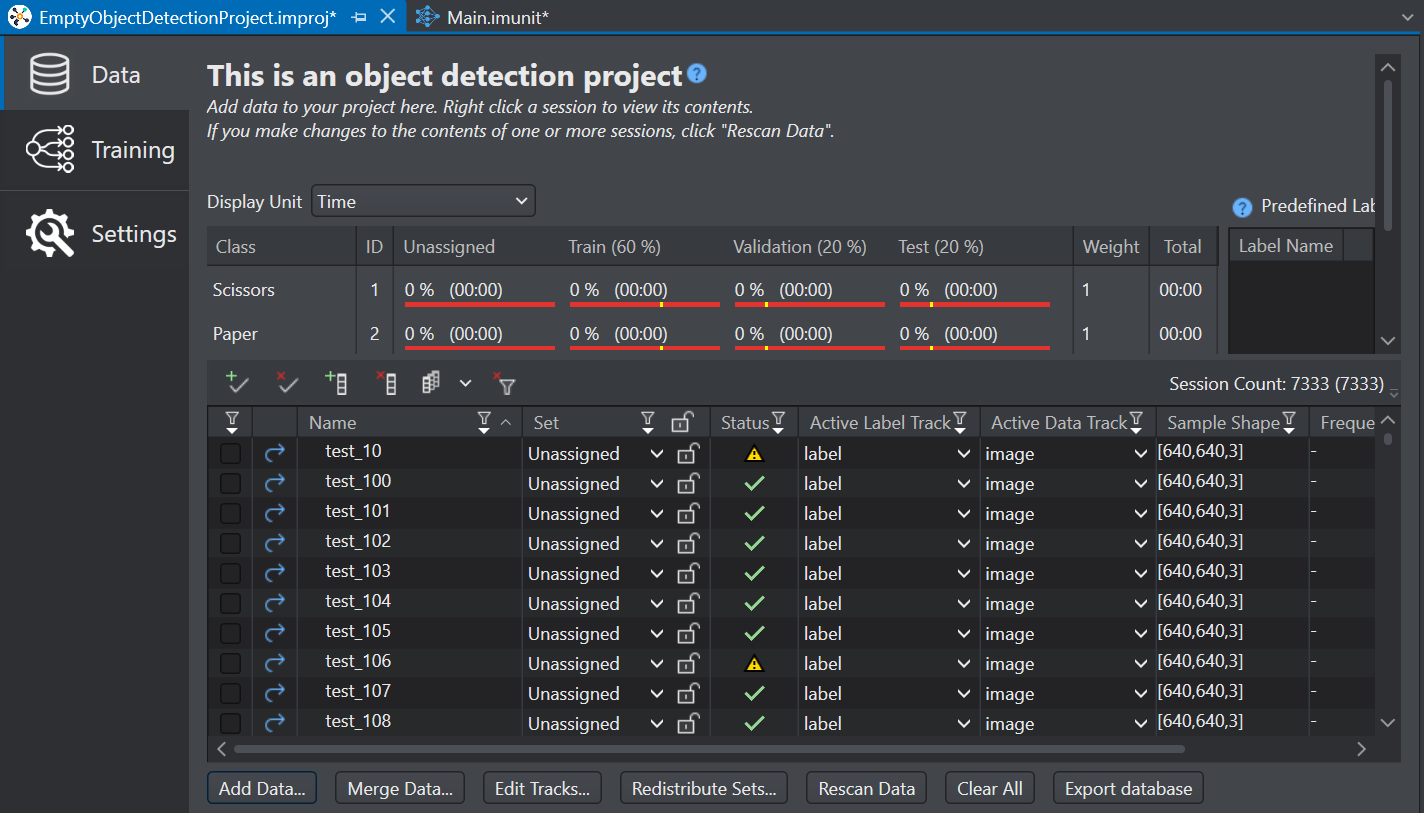
Adding data to an Empty Object Detection Project
To add data to your project, follow these steps:
-
Navigate to Workspace and expand the object detection project directory and open the the project file (*.improj) present in the directory.
-
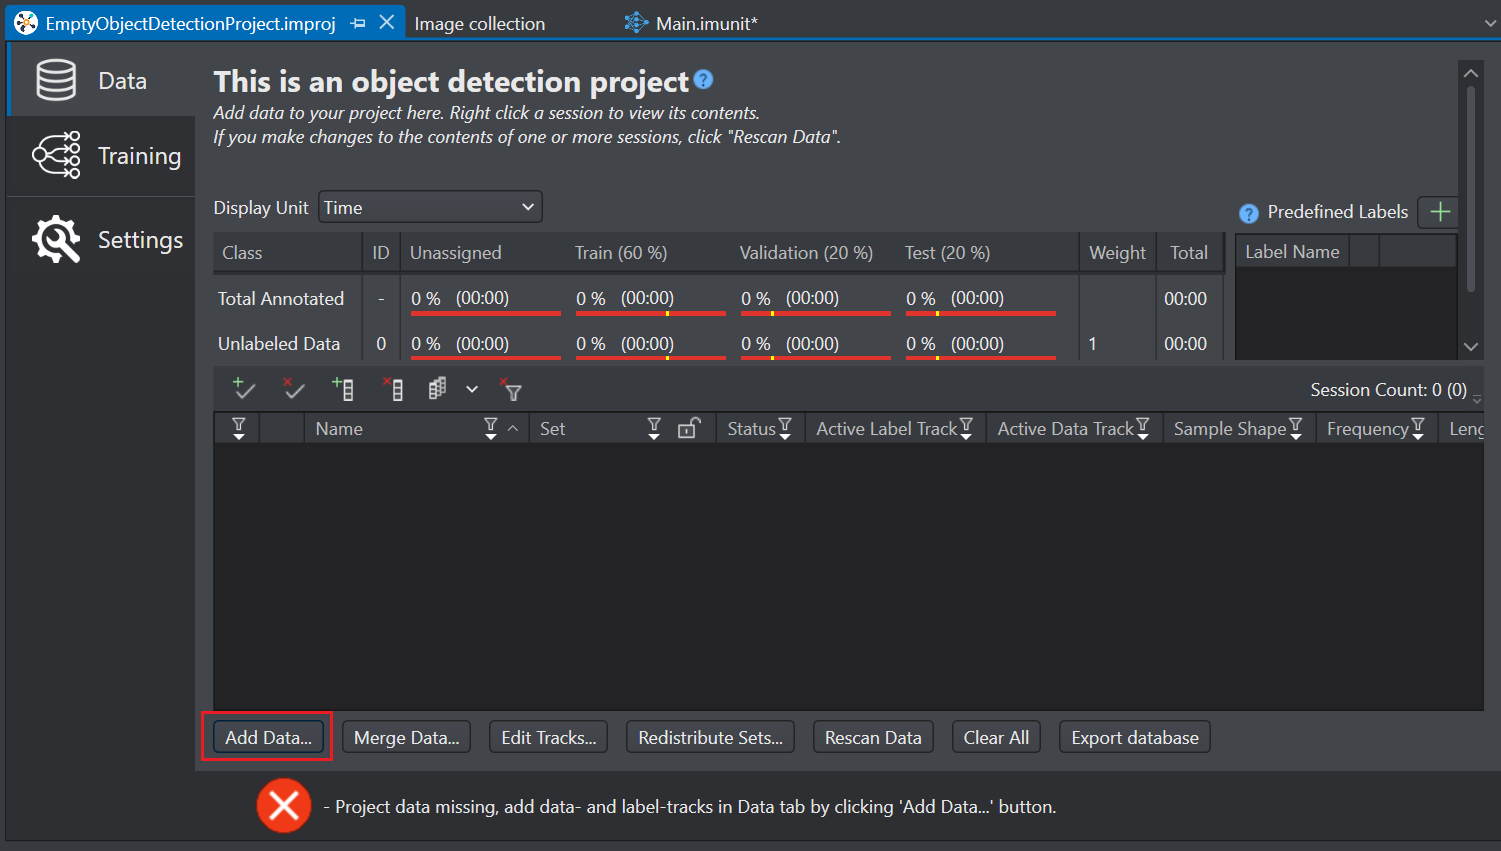
In Data tab, click the Add Data button at the bottom of the project file. The Select Folder window appears.
-
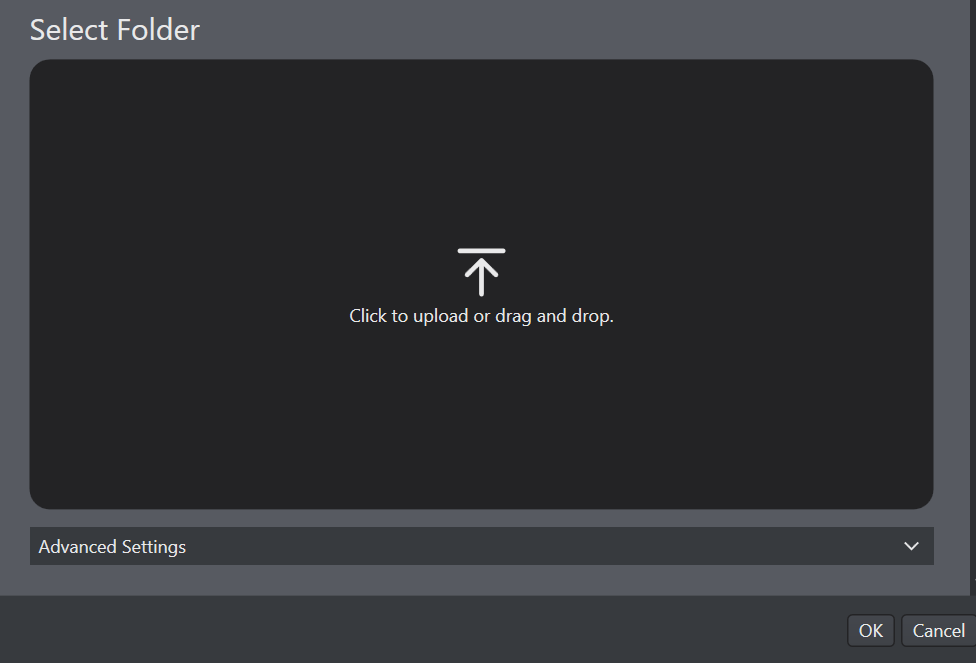
Click the Upload icon to browse and select the folder containing the image data, or simply drag and drop the folder into the designated drop zone.
-
Expand Advanced Settings to select the target directory where the added data will be stored. By default, the data will be saved in Data folder within the Object Detection Project. Click ok to proceed to the next step.
Depending on whether you are importing your existing data into DEEPCRAFT™ Studio or adding data collected using Graph UX, either the Select Label Format window or the Data Import wizard will appear, respectively.
If you are adding data collected using the Studio, skip step 6 and follow the next step.
-
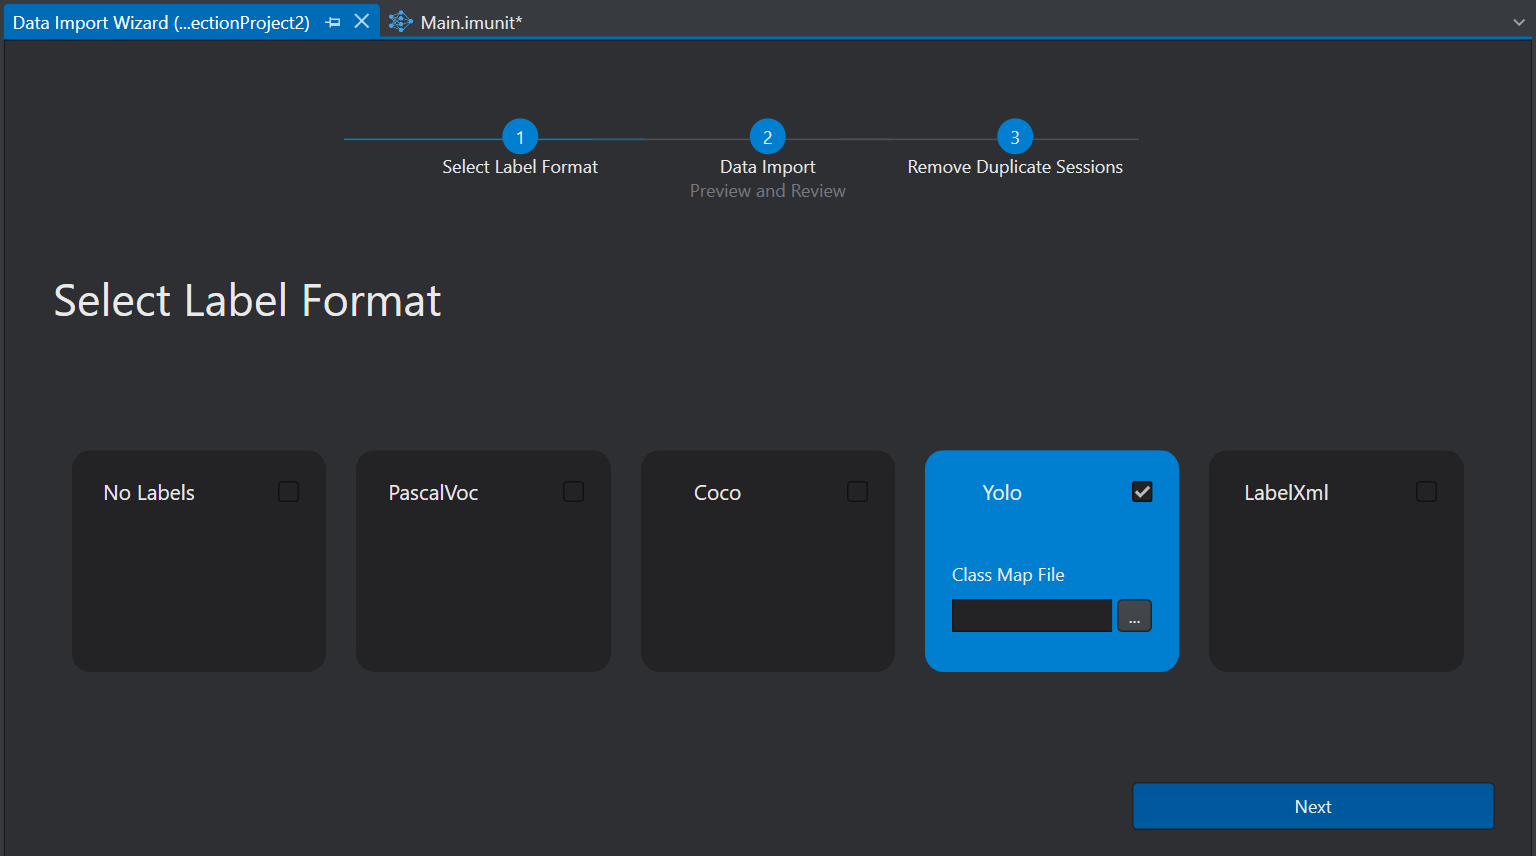
In the Select Label format window, select the checkbox corresponding to the label format - PASCAL VOC, COCO or YOLO, you want to import for training the model. Studio will convert the selected label format into its specific format, which is LabelXml. If you select the YOLO label format, under Class Map File, click the three horizontal buttons to browse and select a yaml file that has the class mapping defined either as an array or a dictionary. If you are importing an image dataset without labels, then select the No Labels checkbox.
For information on the types of label and image formats you can import into the Studio, refer to Bring your own data for object detection projects.
-
The data import wizard shows the summary of the imported data in the following tiles:
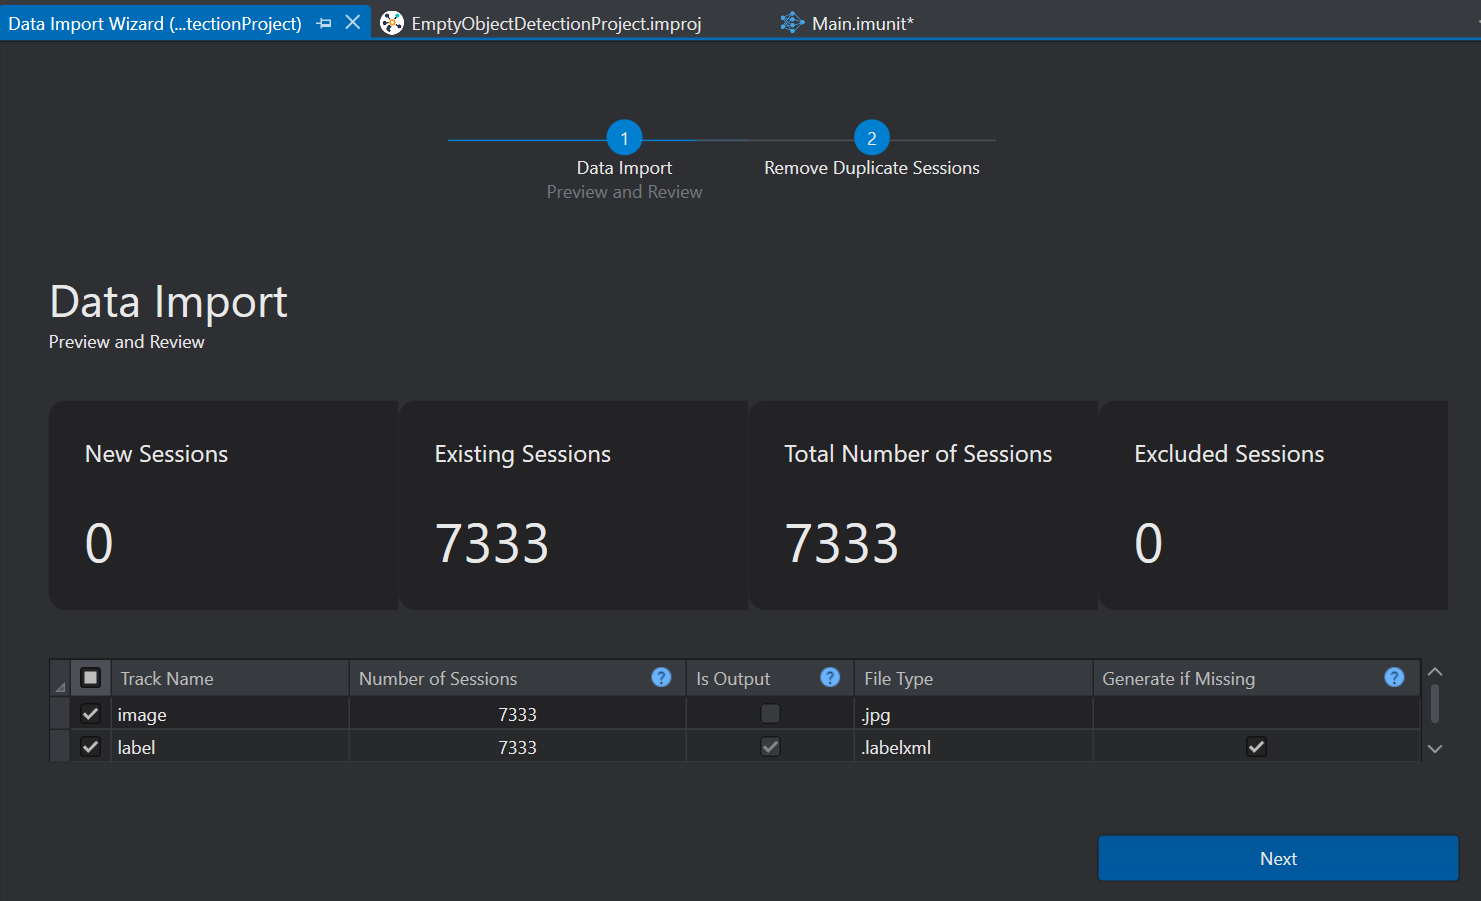
- New Sessions: shows the number of new sessions that will be created after importing the data
- Existing Sessions: shows the number of existing sessions that will be imported
- Total Number of Sessions: shows the total number sessions adding the new and existing sessions
- Excluded Sessions: shows the number of sessions that will not be imported
-
Select the checkbox corresponding to the Track Name to add both the images and labels into the project. If case, you want to import only the images or labels, select the respective checkbox. You can also select the Generate, if missing checkbox if you want to generate an empty label file for the images that does not contain any labels. After selecting the required checkboxes, click Next. The Remove Duplicate Session window appears.
-
Sort the duplicate sessions list by Duplicate Session Names or Duplicate Session IDs and select the checkboxes of the duplicate sessions you want to remove, if any. Click Next to add data to the project.
After you have imported the data into the Studio, you should distribute the data into different datasets. To know how to distribute the data, refer to Data Distribution.