Getting started with Infineon PSoC™6 Wi-Fi BT Pioneer Kit and IoT sense expansion kit
This section provides instructions for flashing Imagimob Streaming Firmware onto Infineon PSoC™6 Wi-Fi BT Pioneer Kit and IoT sense expansion kit to facilitate real-time data collection and model evaluation.
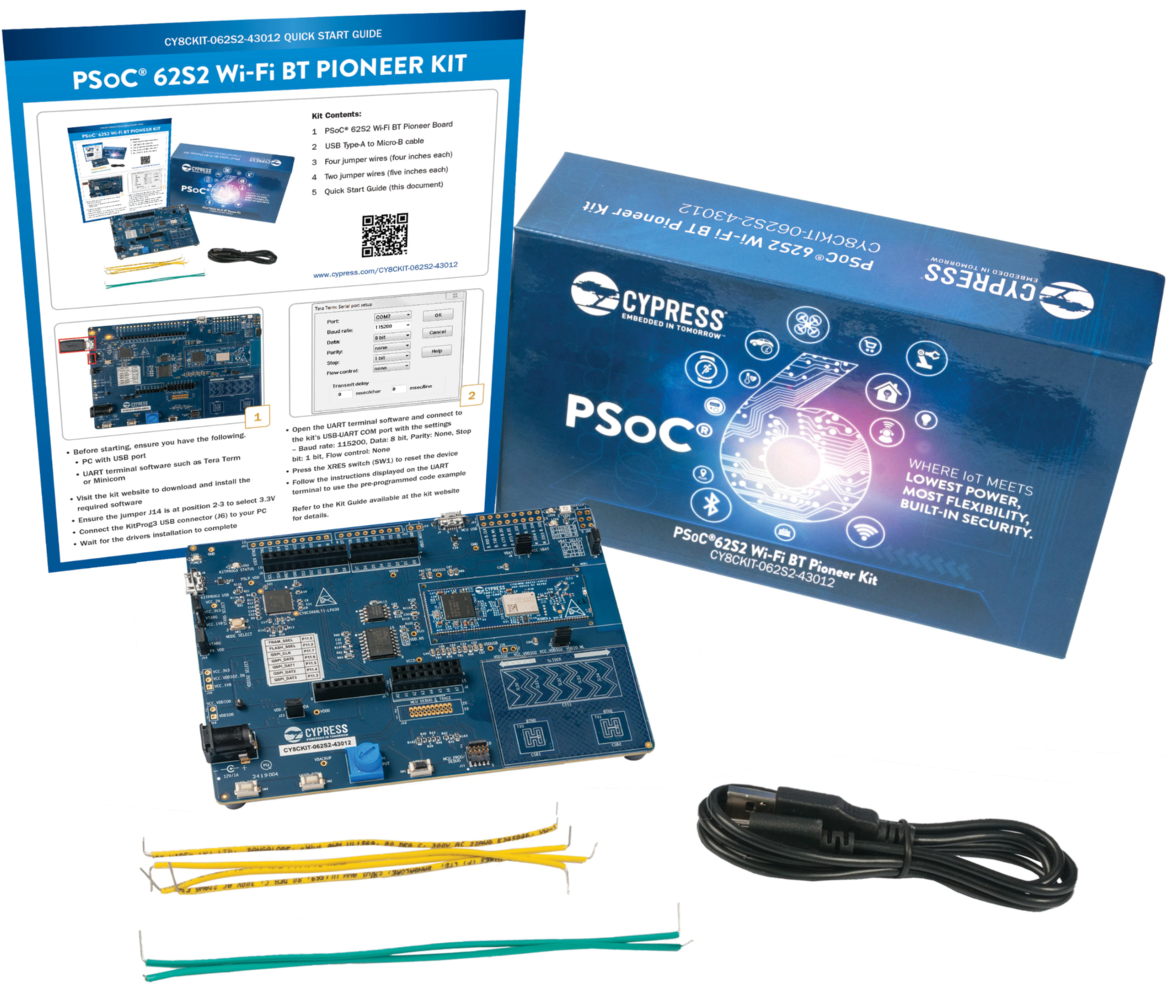
PSoC™ 62S2 Wi-Fi BT Pioneer Kit (opens in a new tab) (CY8CKIT-062S2-43012) is a feature rich hardware evaluation platform that enables development of applications based on the PSoC™ 62 series MCU. The kit also includes a wireless module based on the AIROC™ CYW43012 combo device to develop cloud connected IoT applications including Matter over Wi-Fi applications.
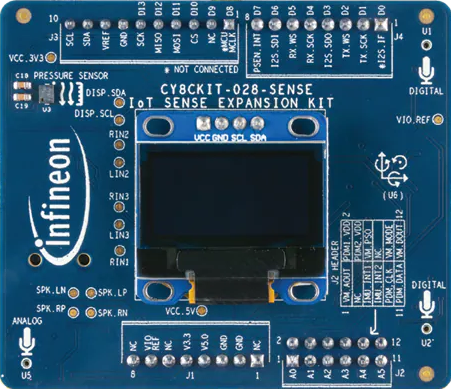
IoT sense expansion kit (opens in a new tab) (CY8CKIT-028-SENSE) is a low-cost Arduino™ UNO compatible shield board that can be used to easily interface a variety of sensors with the PSoC™ 6 MCU platform, specifically targeted for audio and machine learning applications.
There are two ways to flash the Imagimob Streaming Firmware onto the Infineon PSoC™6 board:
-
Cypress Programmer : Flash utility tool that allows you to directly flash the Imagimob Streaming Firmware
-
ModusToolbox : Multi-platform development tools that allows you to build and flash the Imagimob Streaming Firmware
Imagimob Streaming Firmware supports data collection using a mono microphone at 16 kHz and an accelerometer at 50 Hz. However, Imagimob Streaming Protocol supports data collection using all types of sensors at varying rates. If you want to use the Imagimob Streaming Firmware without any modifications, flash the development kit with Cypress Programmer or ModusToolbox. But, if you want to add the support for additional sensors, customize the Imagimob Streaming Protocol using ModusToolbox.
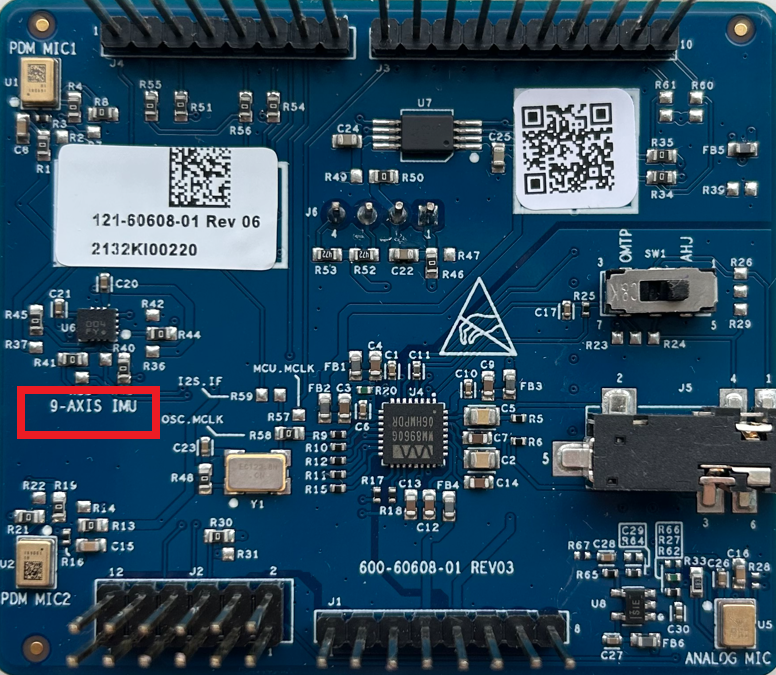
Before you attach the expansion kit on the Pioneer Kit, check the revision (nine or six axis inertial measurement unit) mentioned at the back of the expansion kit.
Flashing Imagimob Streaming Firmware using Cypress Programmer
Using Cypress Programmer, you can flash the firmware on the board within no time.
Pre-requisites:
- Imagimob Streaming Firmware (HEX Files)
- Cypress Programmer (opens in a new tab) (Flash Utility)
- PSoC 6 Wi-Fi BT Pioneer Kit (opens in a new tab) (CY8CKIT-062S2-43012)
- IoT sense expansion kit (opens in a new tab) (CY8CKIT-028-SENSE)
After the pre-requisites are met, follow the steps to flash the firmware:
-
Connect the KitProg3 USB port on the board with the PC using the USB cable.
-
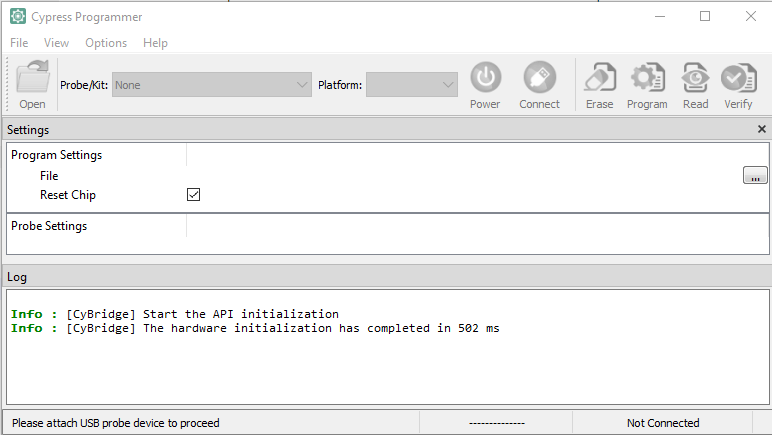
Open Cypress Programmer from the Windows Start menu. The Cypress Programmer window appears.
-
In the Probe/Kit drop-down box, select the device type as CY8CKIT-062S2-43012-100E02E800132400.
-
Click Open and navigate to select the Imagimob Streaming Firmware (hex file) downloaded earlier.
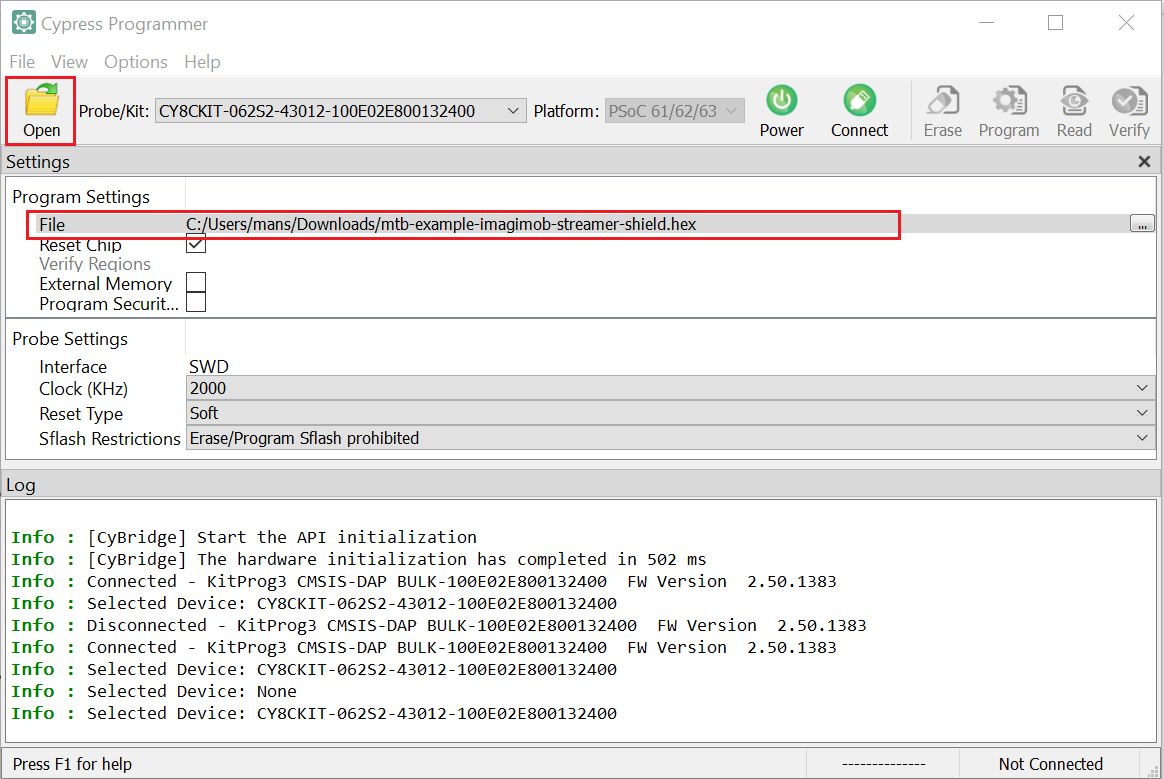
Make sure you select the hex file compatible with the revision of the expansion kit:
- For Rev** (nine-axis inertial measurement unit), select mtb-example-imagimob-streamer-shield.hex file.
- For Rev* A, Rev*B or later (six-axis inertial measurement unit), select mtb-example-imagimob-streamer-shield-v2.hex file.
-
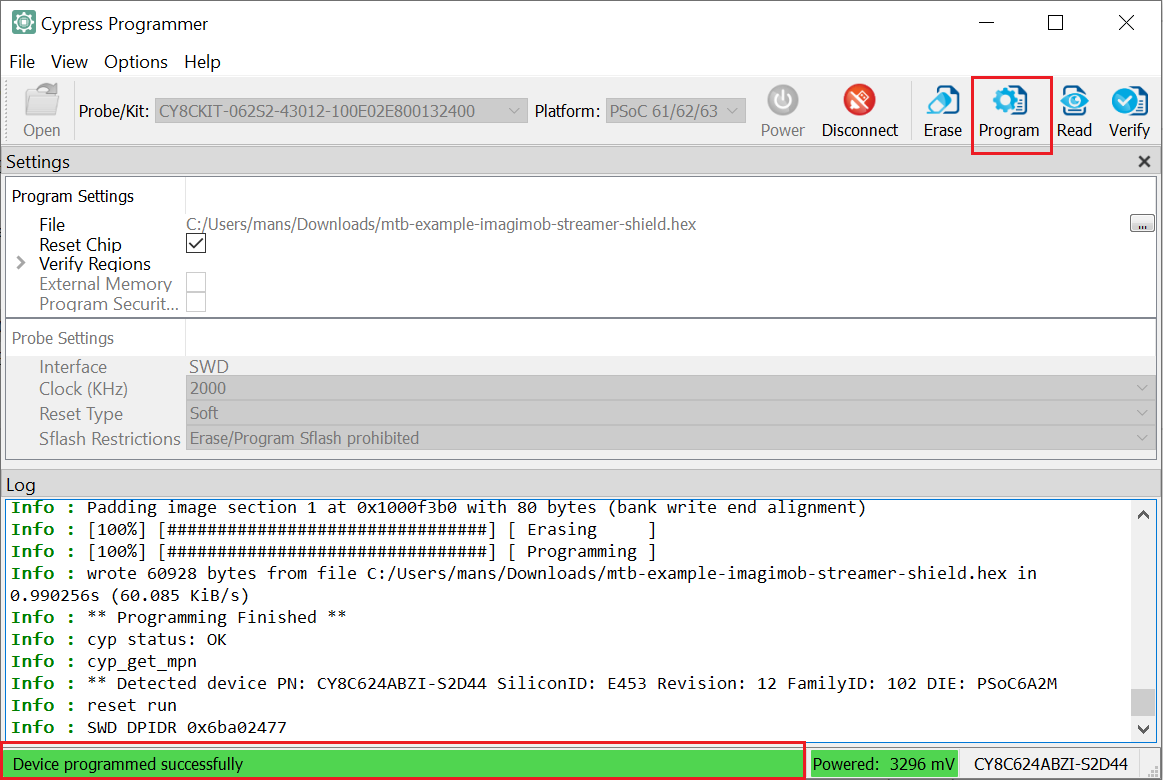
Click Connect to establish a connection between the board and the Cypress Programmer.
-
Click Program to flash the Imagimob Streaming Firmware on the board. The firmware is flashed on the development kit.
Flashing Imagimob Streaming Firmware using ModusToolbox
Flashing the firmware using ModusToolbox consists of two parts:
- Create and build the project
- Flash and run the project
Pre-requisites:
- Download or clone Imagimob Streaming Firmware (opens in a new tab) (source code)
- ModusToolbox (opens in a new tab)
- PSoC 6 Wi-Fi BT Pioneer Kit (opens in a new tab) (CY8CKIT-062S2-43012)
- IoT sense expansion kit (opens in a new tab) (CY8CKIT-028-SENSE)
Make sure you update the Makefile depending on the revision mentioned at the back of the expansion kit:
- For Rev** (nine-axis inertial measurement unit), set SHIELD_DATA_COLLECTION=SENSE_SHIELD
- For Rev* A, Rev*B or later (six-axis inertial measurement unit), set SHIELD_DATA_COLLECTION=SENSE_SHIELD_v2
Create and Build the project
-
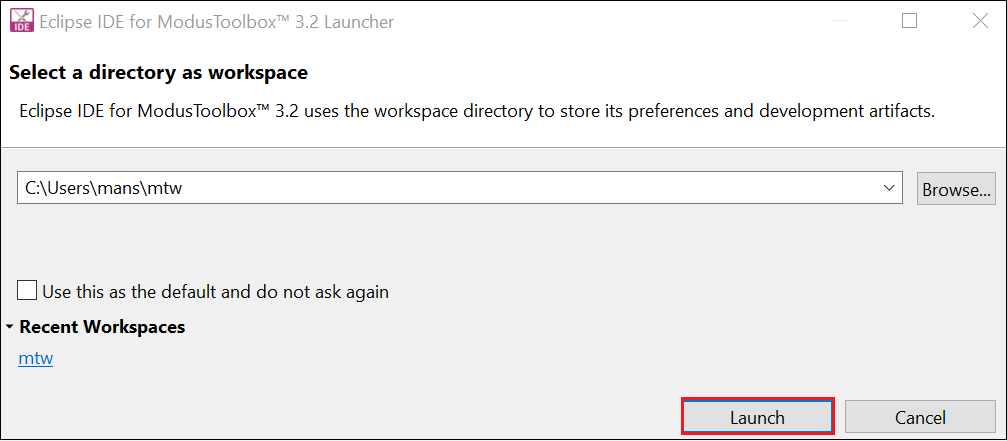
Open ModusToolbox™ > Eclipse IDE for ModusToolbox™ from the Windows Start menu. The Eclipse IDE for ModusToolbox window appears.
-
Browse and select the workspace directory for your project.
-
Click Launch to open the ModusToolbox™ workspace.
-
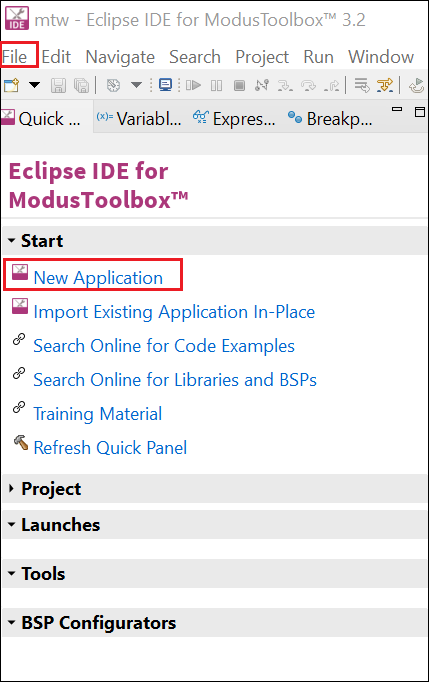
Select New Application from the Quick Panel or navigate to File> New> Modus Toolbox™ Application to open the Project Creator Tool.
-
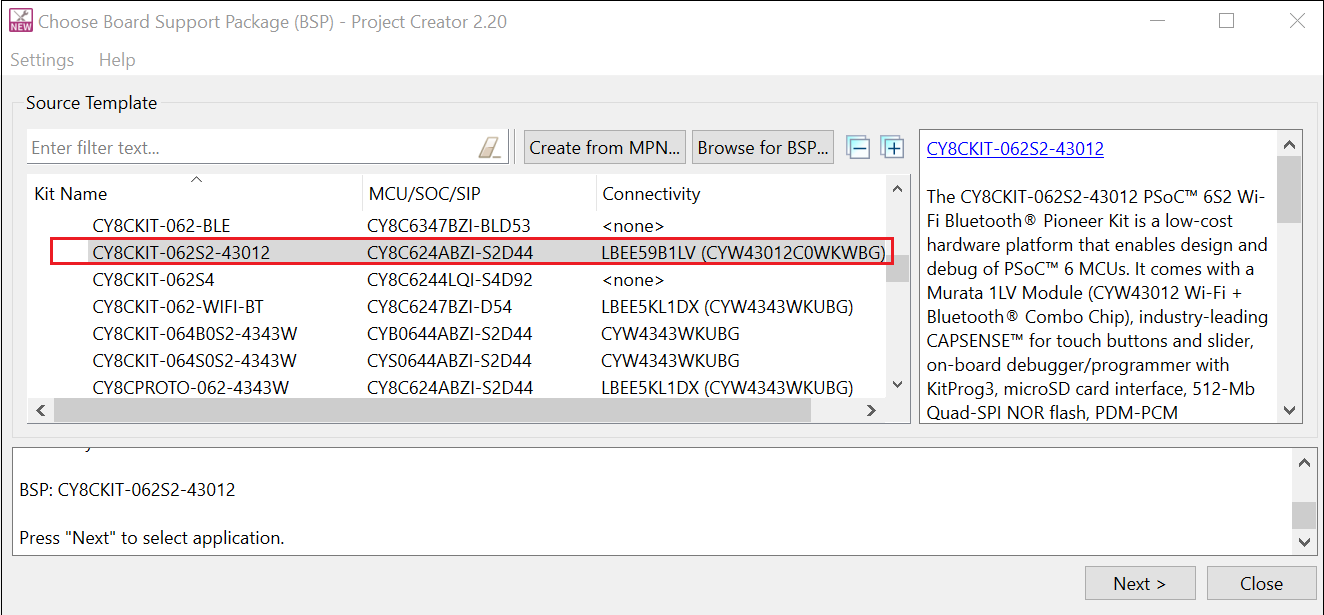
Expand PSoC™6 BSPs, select CY8CKIT-062S2-43012 as the BSP for your board and click Next. The Select Application window appears.
-
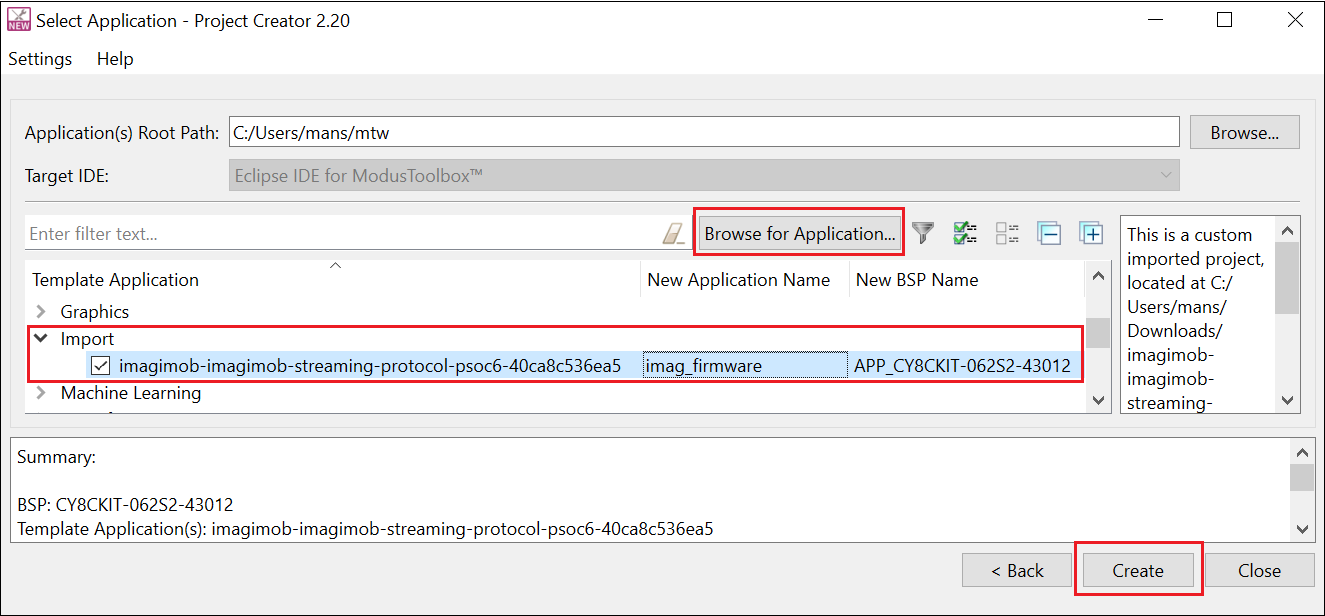
Click Browse for Application and select the folder containing the Imagimob Streaming Firmware downloaded earlier.
-
Select the checkbox against the firmware and click to change the firmware name to something concise, for instance imag_firmware.
-
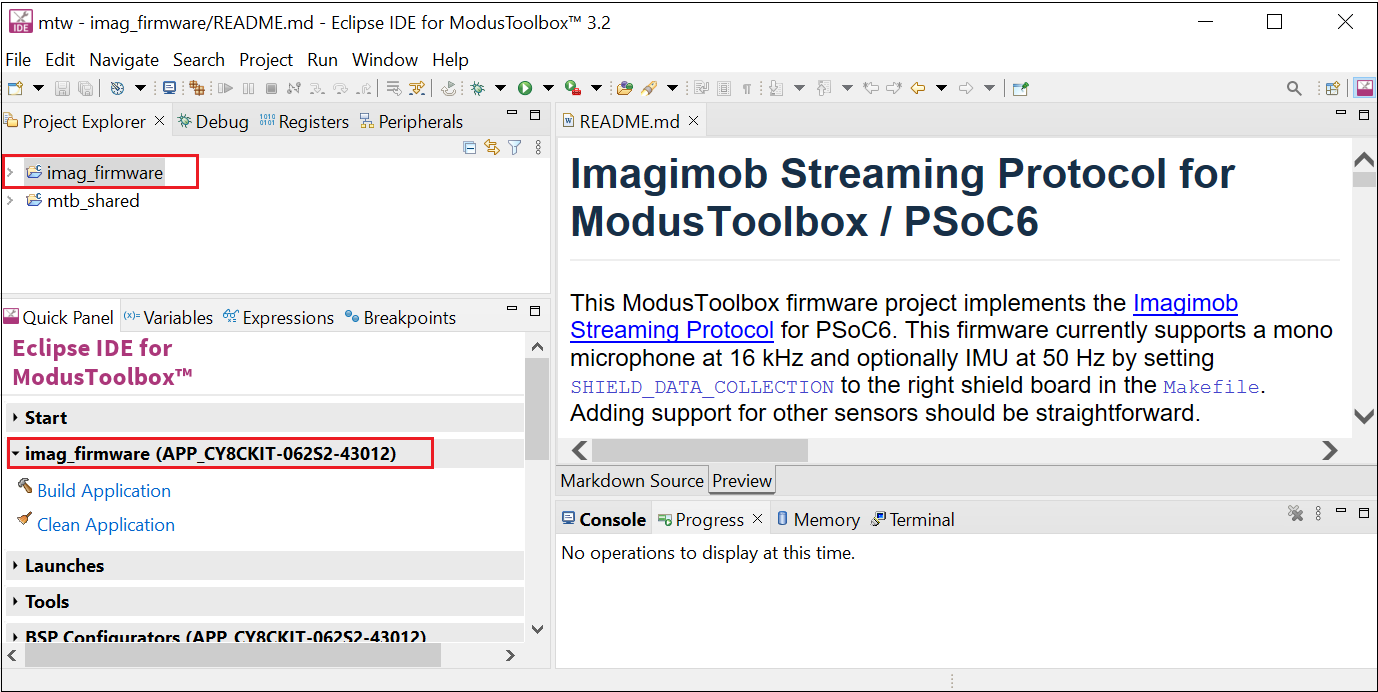
Click Create to create the project. After the project is created successful, the following window appears.
-
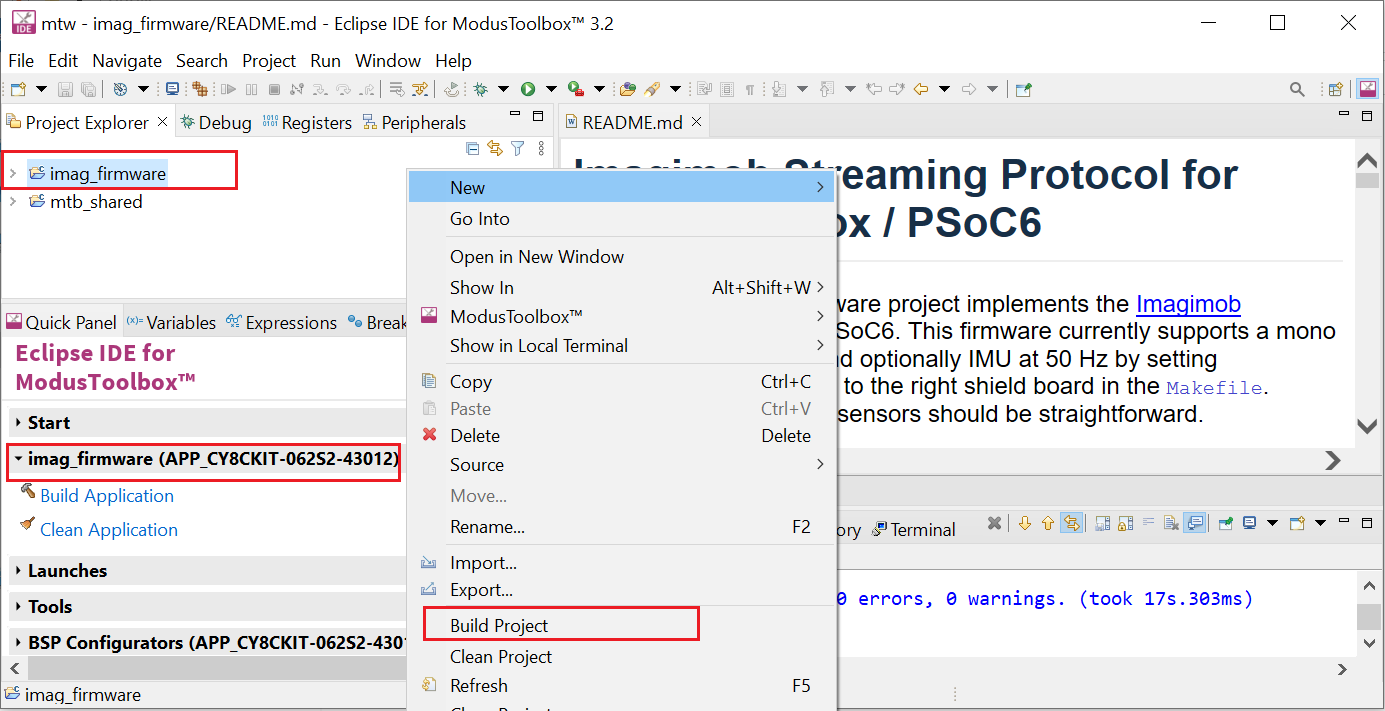
Right-click the imag_firmware project and select Build Project or click Build Application in the Quick panel to build the project.
Flash and Run the project
-
Connect the KitProg3 USB port on the board with the PC using the USB cable.
-
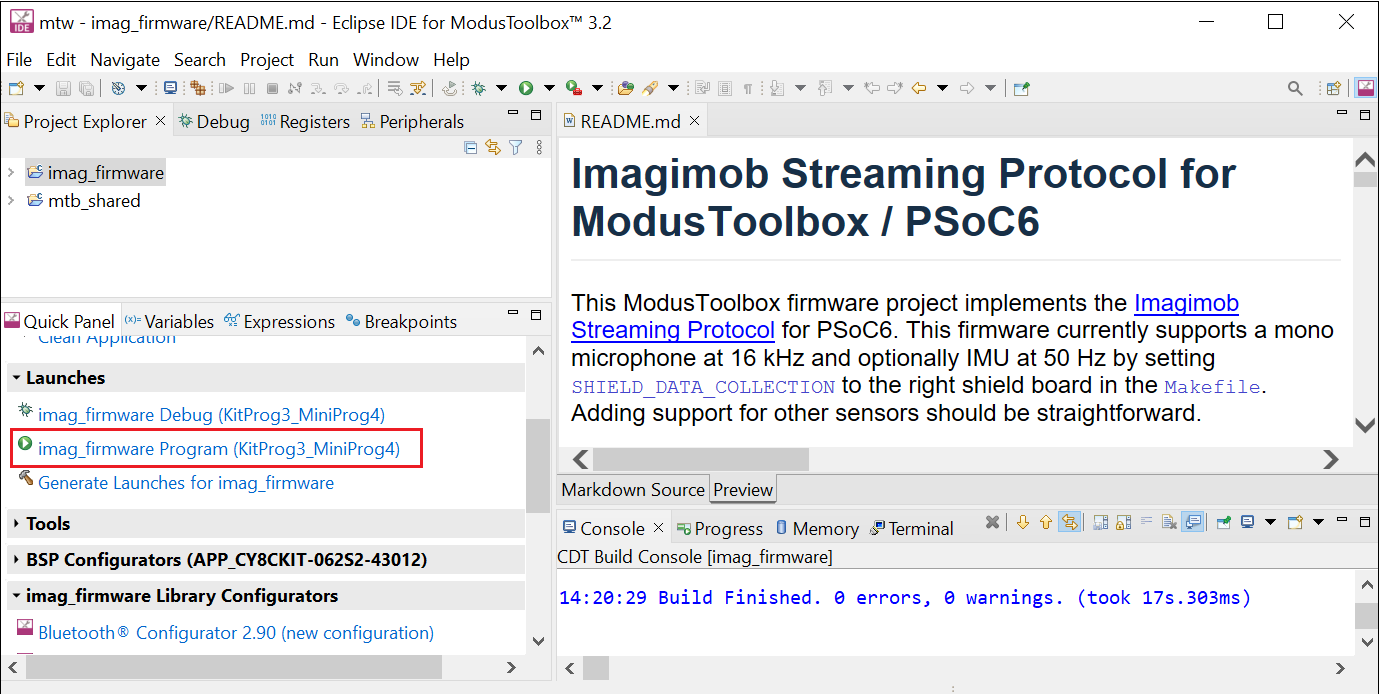
In Quick Panel> Launches, click imag_firmware_Program. The firmware is flashed on the development kit.
Disconnect the USB cable from KitProg3 and connect to MCU USB port on the board. You can start collecting the real-live data using the Infineon PSoC™6 board and Graph UX, refer to Collect data using Graph UX to know more.