Deploy siren detection model on TRAVEO™ T2G (KIT_T2G-B-E_LITE)
This section explains how to deploy the siren detection model on TRAVEO™ T2G Body Entry Lite evaluation kit (KIT_T2G-B-E_LITE) using ModusToolbox™. We provide a code example with a pre-generated model, ready for deployment. The code example uses the PCM data preloaded into the flash memory, which is then read and fed into the model.
Objective
This tutorial aims to demonstrate the following features:
- storing PCM data in code-flash memory
- processing the PCM stream through the siren detection model to recognize siren sounds
- print the detection results via serial interface (UART) to a terminal
Prerequisites
- Download the Code Example
- Download and Install ModusToolbox (opens in a new tab)
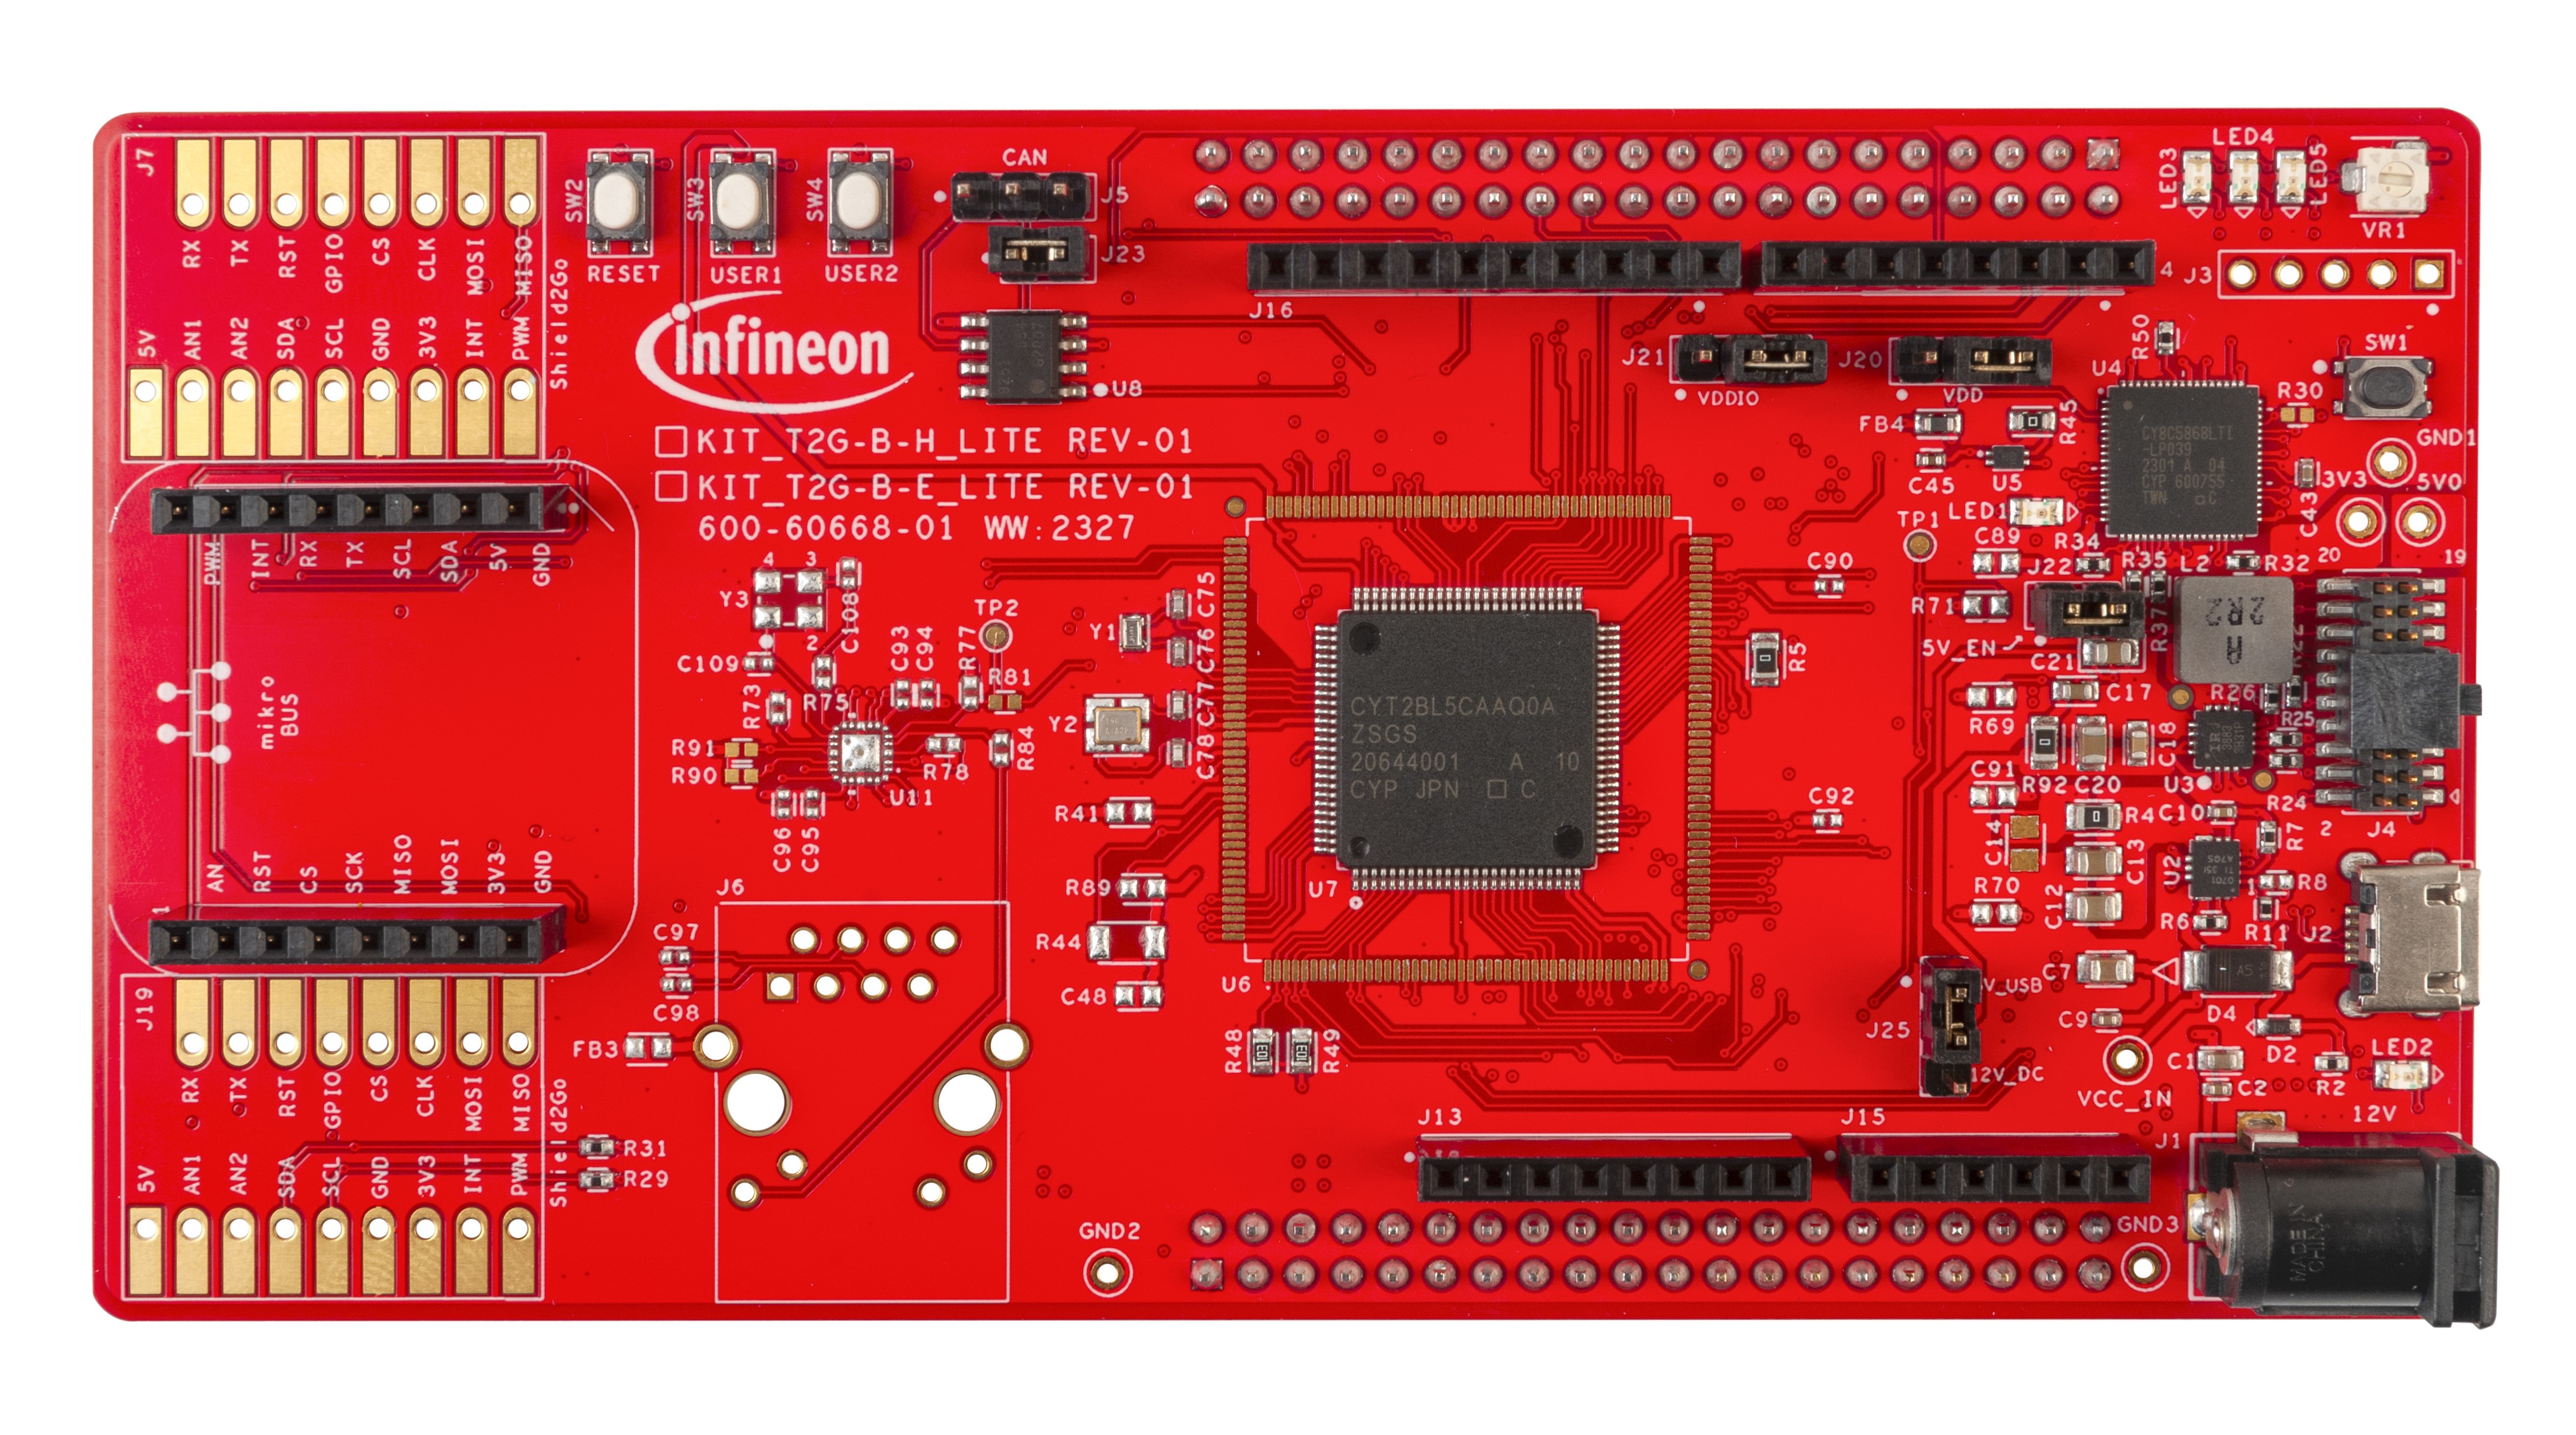
- TRAVEO™ T2G (KIT_T2G-B-E_LITE) (opens in a new tab)
 |
|---|
Let’s begin deploying the model onto the board!
First, we will generate the PCM data followed by compiling and running the model on the board.
Generating PCM Data
Before flashing the code example onto the device, the PCM data must be generated. This can be accomplished using the free software Audacity (opens in a new tab) and a simple python script, which is included in the code example.
-
Collect PCM Data: You can either import any audio data containing the siren sounds by navigating to File> Import> Audio or can drag and drop the file directly into Audacity. For our testing, we used the audio from a video (opens in a new tab). To record audio from a video, set Audio Setup >host to Windows WASAPI to capture the siren sounds.
-
Select and Export PCM Data: Select the portion of the audio file you wish to export as PCM values. Ensure the selection is not too long, as only 4 MB of code flash is available on the device, and the AI model, code, etc, also occupy space. The size of the audio data is determined by the following formula: size = length * sample_rate * bps, where length is in seconds and bps stands for bits per sample.
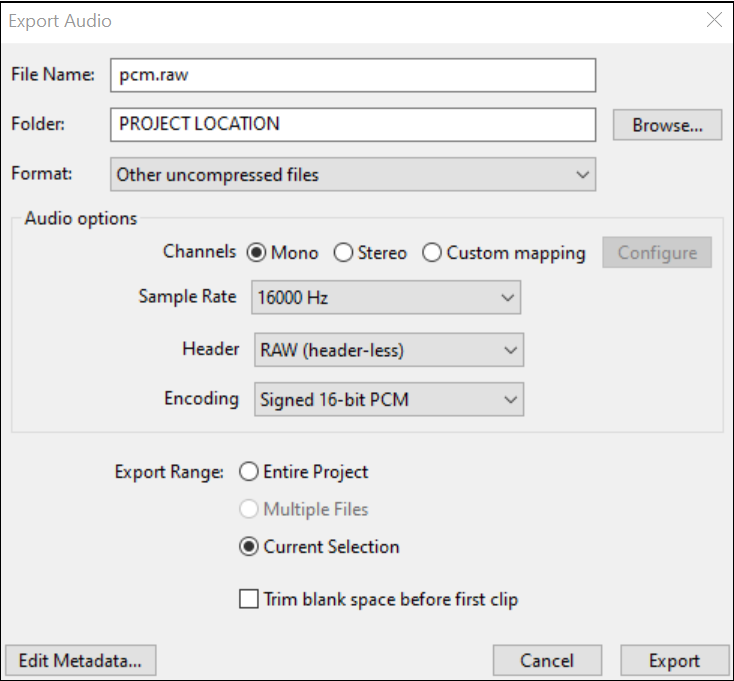
The AI model is trained with a sample rate of 16 kHz and 16 bits per sample, which is sufficient for siren detection. For this example, we will select a length of 60 seconds, resulting in PCM data slightly larger than 1.83 MB. After selection, navigate to File->Export Audio and set the following:
-
File Name: pcm.raw (alternatively change file name in python script)
-
Folder: Top-folder of ModusToolbox™ project (same level as main.c and python script)
-
Format: Other uncompressed files
-
Channels: Mono
-
Sample Rate: 16000 Hz
-
Header: RAW (header-less)
-
Encoding: Signed 16-bit PCM
-
Export Range: Current Selection
-
-
Execute the Python Script: Open a terminal in the code example folder and run the following command: python raw_to_array.py. Upon completion, a file named pcm_samples.h will be created in the same folder, containing all PCM data in an array used later in the application.
To execute the Python script, ensure that Python is installed on your system. You can install python using the native package manager of your operating system or download directly from the official Python webpage (opens in a new tab).
Implementation:
The application does the following:
- Initializing the board, Imagimob model, and UART via retarget-io
- In a loop:
- retrieves the current PCM sample
- converts the sample to a float and scale it to model input range
- inputs sample into the model
- if sufficient samples are available, obtain the classification result
- print the timestamp and classification result via UART to the serial monitor
Hardware setup
Connect the board to your PC using a USB cable. The USB connector is located on the right side of the board
Compiling and Running
-
Open ModusToolbox™ > Eclipse IDE for ModusToolbox™ from the Windows Start menu. The Eclipse IDE for ModusToolbox window appears.
-
Browse and select the workspace directory for your project.
-
Click Launch to open the ModusToolbox™ workspace.
-
Select Import Existing Application In-Place from the Quick Panel. The Import ModusToolBox™ Project window appears.
-
Browse and select the code example folder downloaded earlier and click Finish. The code example is imported into the ModusToolBox™.
-
Navigate to the Terminal and run the command make getlibs to ensure all necessary libraries are downloaded.
-
In Launches, click on Generate Launches for SirenDetection_T2GBodyEntry after the libraries are imported.
-
Click on Siren Detection_T2gBodyEntry Program(KitProg3_MiniProg4) to build and flash the application onto the board. You can view the current status in the console.
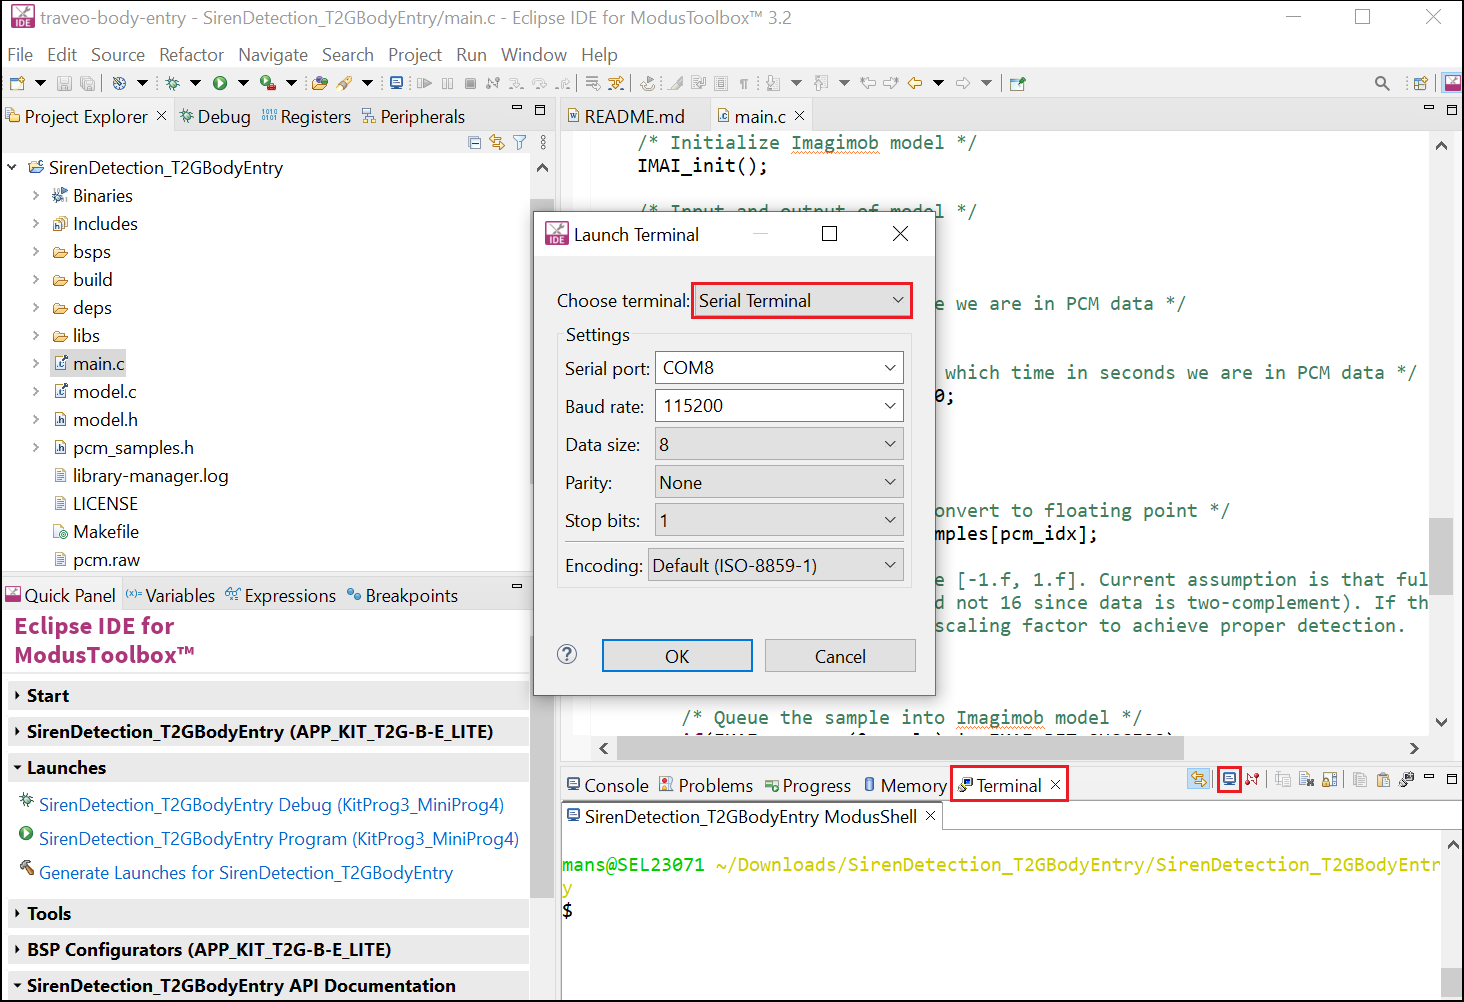
Once the flashing process is complete, you need to open a serial monitor. You have two options: you can either use an external tool like PuTTY (opens in a new tab), or the integrated serial monitor in ModusToolbox™. For latter, click on the terminal window, then on the terminal icon, and select Serial Terminal and configure the following settings:
- Serial port: Choose port of device, depends on local machine
- Baud rate: 115200
- Data size: 8
- Parity: None
- Stop bits: 1
- Encoding: Default (ISO-8859-1)
After completing these steps, you should observe the following output:
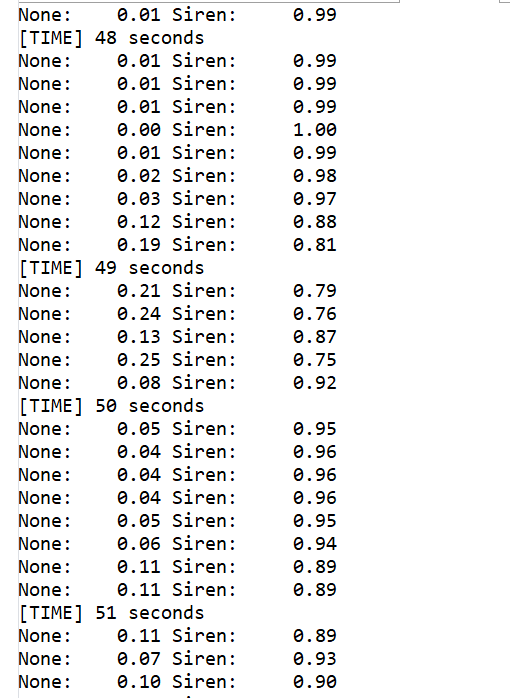
The application continuously analyzes the flashed PCM stream and prints the current timestamp in seconds. If a siren sound is detected with a probability exceeding 70%, the classification results will be printed. If no siren sound is detected, only the timestamps will be printed. For example, an output of None: 0.21 Sound: 0.79 indicates that the model is 79% confident that a siren sound is detected, while the 0.21 represents the confidence level for no siren sound.